Choisir le bon Système de Gestion de Batterie (BMS) pour votre pack de batteries, c’est comme choisir le cerveau pour l’ensemble de votre système d’alimentation. Faites une erreur, et vous risquez d’endommager les cellules, de créer des risques pour la sécurité ou de voir votre pack de batteries tomber en panne bien avant l’heure.
J’ai vu trop de bricoleurs de batteries sauter l’étape de la recherche et prendre n’importe quel BMS qui « semble convenir » – pour finir avec des cellules grillées ou un système qui s’éteint au pire moment.
Voici le truc :
Un BMS correctement adapté peut prolonger la durée de vie de votre batterie de quelques années à plus d’une décennie. C’est d’une importance capitale.
Dans ce guide, en tant que professionnel fabricant de packs de batteries au lithium, je vais vous guider précisément comment choisir un BMS pour un bloc-batterie projets, que vous construisiez un mur solaire, une batterie pour vélo électrique, ou autre chose.
Pourquoi votre choix de BMS est plus important que vous ne le pensez
Considérez votre BMS comme un garde du corps pour vos cellules de batterie. Il surveille en permanence la tension, le courant et la température – prêt à intervenir lorsque les choses tournent mal.
Sans le bon BMS, voici ce qui peut arriver :
- Dommages dus à la surcharge: Les cellules gonflent, fuient ou, pire, prennent feu
- Décharge profonde: Perte de capacité permanente qui ne peut pas être récupérée
- emballement thermique: Le scénario cauchemardesque où votre batterie devient un risque d'incendie
- Déséquilibre des cellules: Certaines cellules travaillent en surcharge tandis que d'autres se relâchent, ce qui tue votre pack prématurément
La partie folle ? La plupart de ces défaillances sont évitables à 100% avec le bon BMS.
Comment choisir un BMS pour un pack de batteries
Étape 1 : Correspondre à la chimie de votre batterie
C’est là que la plupart des gens se trompent dès le départ.
Votre BMS doit être conçu pour la chimie spécifique de votre batterie. Pourquoi ? Parce que différentes chimies ont des plages de tension et des seuils de sécurité différents.
Voici ce que vous devez savoir :
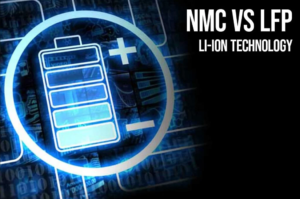
Batteries LiFePO4 (LFP)
- Tension nominale : 3,2V par cellule
- Tension maximale de charge : 3,65V
- Tension de coupure : 2,5V
- Plus stable mais nécessite des réglages de tension différents
Li-ion standard (NMC/NCA)
- Tension nominale : 3,7V par cellule
- Tension maximale de charge : 4,2V
- Tension de coupure : 2,5-3,0V
- Densité d’énergie plus élevée mais plus sensible
Astuce professionnelle: Utiliser un BMS NMC sur des cellules LFP (ou vice versa) revient à mettre du diesel dans un moteur à essence. Il peut fonctionner brièvement, mais vous allez rencontrer des problèmes.
Étape 2 : Comptez vos cellules en série (le numéro « S »)
Votre BMS doit correspondre exactement au nombre de cellules en série que vous avez. Cela détermine la tension totale de votre pack.
Voici les calculs :
- Tension totale du pack = Nombre de cellules en série × Tension nominale de la cellule
Par exemple :
- 4S LiFePO4 = 4 × 3,2V = 12,8V nominal
- 13S Li-ion = 13 × 3,7V = 48,1V nominal
Le modèle de BMS inclut généralement ce nombre (comme « 13S BMS » ou « 4S BMS »). Si vous vous trompez, votre BMS ne se connectera tout simplement pas correctement.
Étape 3 : Calculez vos besoins en courant
C’est là que les choses deviennent intéressantes – et où des erreurs coûteuses peuvent se produire.
La capacité de courant de votre BMS doit supporter votre consommation maximale, avec une marge de sécurité. Mais voici le hic : vous devez calculer en fonction de la tension la plus basse de votre pack, et non la tension nominale.
Laissez-moi vous montrer pourquoi :
Supposons que vous utilisez un onduleur de 1000W sur un pack de batteries de 24V.
En pleine charge (29,2V pour 7S Li-ion) :
- Courant = 1000W ÷ 29,2V = 34,2 ampères
Mais lorsque la batterie est presque déchargée (18,5V) :
- Courant = 1000W ÷ 18,5V = 54 ampères
Vous voyez le problème ? Si vous avez dimensionné pour la tension nominale, il vous manquerait 20 ampères.
Ma règle: Ajoutez une marge de sécurité de 20-30% au-dessus de votre courant maximal. Pour cet exemple, je choisirais un BMS d’au moins 70A.
Étape 4 : Vérifier les fonctionnalités essentielles de protection
Tous les BMS ne se valent pas. Les modèles bon marché font l'impasse sur des fonctionnalités de protection qui pourraient sauver votre batterie (et éventuellement votre maison).
Voici votre liste de contrôle incontournable :
Fonctionnalités critiques
- Protection contre la surtension: Arrête la charge avant que les cellules ne soient endommagées
- Protection contre la sous-tension: Prévenir les dommages dus à une décharge profonde
- Protection contre le surintensité: Votre dernière ligne de défense contre les courts-circuits
- Surveillance de la température: Coupe si la température devient trop élevée (ou trop basse pour la charge)
- Équilibrage des cellules: Maintient toutes les cellules au même niveau
Fonctionnalités appréciables
- Connectivité Bluetooth: Surveillez votre pack depuis votre téléphone
- Paramètres programmables: Personnalisez les seuils de tension
- Circuit de pré-charge: Protège contre condensateur surtension
- Bus CAN/UART: Pour l'intégration avec des onduleurs ou des écrans
Étape 5 : Décidez de l'architecture du BMS
Vous avez trois options principales ici :
BMS Centralisé
Toute la surveillance se fait dans une unité principale. C’est simple, abordable et parfait pour les petits packs (moins de 14S).
Idéal pour: Vélos électriques, outils électriques, petites batteries solaires
BMS Distribué
Circuits de surveillance répartis dans le pack, communiquant avec un contrôleur central. Plus complexe mais mieux adapté aux grands systèmes.
Idéal pour: Batteries pour véhicules électriques, grandes murs électriques, applications commerciales
BMS Modulaire
Mon préféré personnel pour les bricoleurs. Vous pouvez échanger des modules, mettre à niveau facilement, et dépanner sans remplacer tout le système.
Idéal pour: Versions expérimentales, systèmes qui pourraient s'étendre plus tard
Exemples du monde réel (avec chiffres)
Regroupons tout cela avec quelques configurations concrètes :
Exemple 1 : Batterie pour camping-car 12V
- Chimie : LiFePO4
- Configuration : 4S10P (4 en série, 10 en parallèle)
- Capacité : 200Ah
- Charge maximale : onduleur 2000W
Choix du BMS: BMS LiFePO4 4S 200A avec Bluetooth
- Pourquoi 200A ? Courant maximal à basse tension = 2000W ÷ 12V = 167A (plus une marge de sécurité)
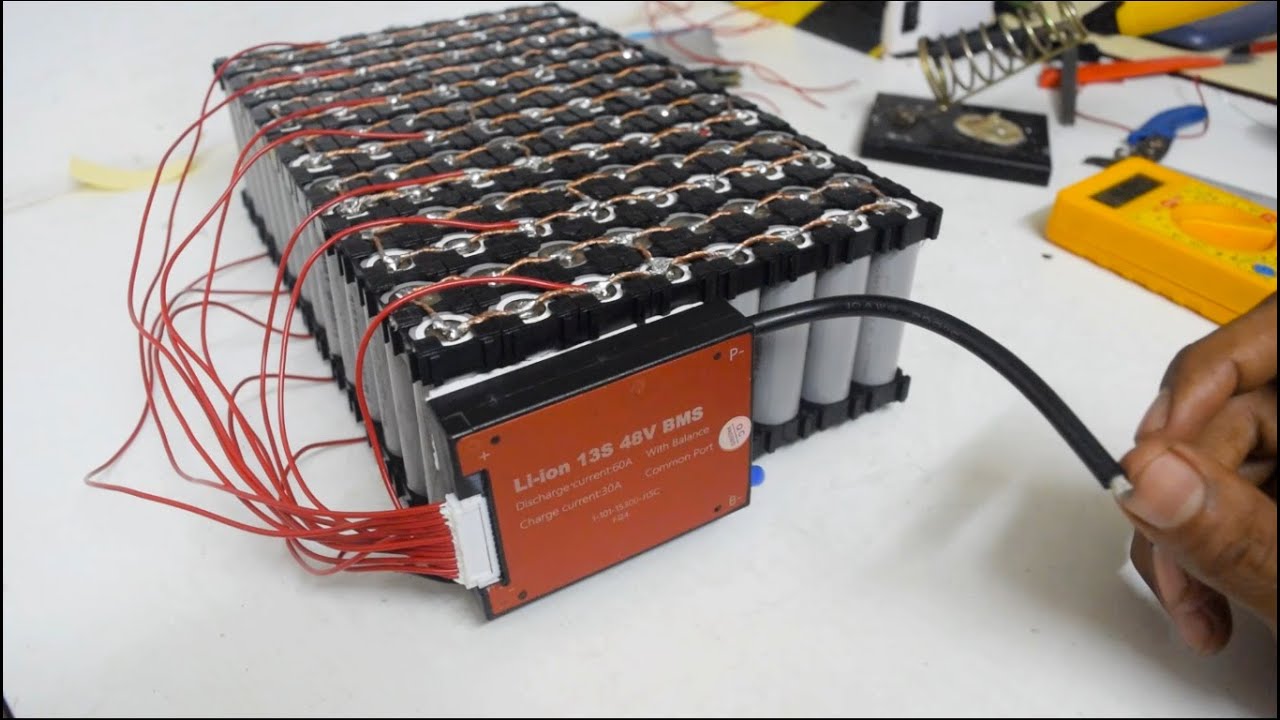
Exemple 2 : Batterie pour vélo électrique 48V
- Chimie : Li-ion (NMC)
- Configuration : 13S4P
- Consommation maximale du moteur : 1500W
Choix du BMS: BMS Li-ion 13S 40A avec courant d'équilibrage ≥50mA
- Calcul du courant : 1500W ÷ 46V (basse tension) = 33A (40A offre une marge de sécurité)
Exemple 3 : Batterie solaire domestique
- Chimie : LiFePO4
- Configuration : 16S (51,2V)
- Onduleur : 5000W
Choix du BMS: 16S 120A LiFePO4 BMS avec communication CAN
- Dimensionné pour : 5000W ÷ 44V = 114A (120A offre une marge)
Erreurs courantes à éviter
Je vois ces erreurs constamment dans les groupes de batteries DIY :
Erreur #1 : Acheter un BMS avant de finaliser la conception de votre pack
Votre BMS doit correspondre à votre configuration exacte. Concevez d'abord, achetez ensuite.
Erreur #2 : Ignorer le courant d'équilibrage
Les unités BMS bon marché ont des courants d'équilibrage pathétiques (comme 20mA). Recherchez au moins 50mA pour la fiabilité.
Erreur #3 : Oublier le courant de charge
Votre BMS doit gérer la puissance maximale de votre chargeur, pas seulement la décharge.
Erreur #4 : Sauter les capteurs de température
Particulièrement critique dans les climats froids où les batteries au lithium ne peuvent pas se charger en dessous de zéro.
La qualité compte (Voici pourquoi)
J'ai appris cela à mes dépens :
Un ami a économisé $30 sur un BMS générique pour sa batterie de vélo électrique. Six mois plus tard, il n'a pas coupé lors d'une surcharge. Le résultat ? Un incendie dans le garage qui lui a coûté des milliers.
Restez fidèle à des marques éprouvées comme :
- JBD/Xiaoxiang: Idéal pour la plupart des projets DIY
- Daly: Économique mais fiable
- ANT: Fonctionnalités haut de gamme pour des constructions sérieuses
- Batrium: Niveau supérieur pour les grandes installations
Conseils d’installation qui vous éviteront des maux de tête
Une fois que vous avez choisi votre BMS, l’installation est cruciale :
- Vérifiez votre schéma de câblage – La plupart des défaillances du BMS sont en réalité des erreurs de câblage
- Utilisez des fils d'équilibrage de calibre approprié – Des fils fins = erreurs de mesure de tension
- Installer à l'écart des sources de chaleur – La chaleur détruit l'électronique
- Testez avant de connecter les charges – Vérifiez que toutes les fonctions de protection fonctionnent
- Documentez tout – Votre futur vous remerciera votre présent
Fonctionnalités avancées à considérer
Pour des constructions plus sophistiquées, ces fonctionnalités peuvent faire une énorme différence :
Communication intelligente
Le bus CAN ou RS485 permet à votre BMS de communiquer avec les onduleurs et chargeurs. Cela permet :
- Limitation dynamique du courant en fonction de la température
- Rapport sur l'état de charge (SOC)
- Profils de charge automatiques
Circuits de précharge
Protège contre le courant d’appel massif lors de la connexion aux onduleurs. Si vous utilisez plus de 2000W, cette fonctionnalité se rentabilise rapidement.
Équilibrage actif
Au lieu de dissiper l'excès d'énergie sous forme de chaleur, l'équilibrage actif la transfère vers des cellules moins chargées. Plus efficace mais plus coûteux.
Le bilan
Choisir le bon BMS n’est pas de la science-fusée, mais cela demande de l’attention aux détails. Faites correspondre votre chimie, dimensionnez pour votre courant (avec une marge), et ne faites pas l’impasse sur les fonctionnalités de sécurité.
Souvenez-vous : votre BMS protège des cellules valant des centaines ou des milliers d'euros. La différence entre un BMS douteux et un BMS de qualité est la meilleure assurance que vous pouvez acheter.
Suivez ces lignes directrices sur comment choisir un BMS pour un bloc-batterie projets, et vous construirez un système sûr, fiable et durable pendant des années.
L'essentiel est de prendre le temps de calculer correctement vos besoins et d'investir dans la qualité là où cela compte. Votre futur vous (et vos cellules de batterie) vous remercieront.