Quindi hai un sacco di batterie 18650 che ti avanzano.
Forse le hai recuperate da un vecchio laptop. O ne hai prese alcune da quel venditore online poco affidabile.
Ecco la cosa:
Come verificare se la batteria 18650 è buona non riguarda solo il risparmio di denaro. È anche una questione di sicurezza.
Ho testato centinaia di queste batterie nel corso degli anni. E ho visto in prima persona cosa succede quando le persone usano celle difettose.
(Spoiler: non è bello.)
In questa guida, come professionista produttore di pacchi batteria 18650, ti mostrerò esattamente come testare le tue batterie 18650 come un professionista. Niente fronzoli. Solo passaggi pratici che funzionano davvero.
Iniziamo.
Cosa rende una batteria 18650 “buona” comunque?
Prima di entrare nelle cose del test, vediamo rapidamente cosa stiamo effettivamente cercando.
Una buona batteria 18650 deve soddisfare tre requisiti:
Tensione: Deve mantenere tra 3,0V e 4,2V
Capacità: Almeno 80% della sua capacità nominale
Resistenza Interna: Bassa abbastanza da consegnare energia in modo efficiente
Pensalo così:
La tua batteria è come un serbatoio d'acqua. La tensione è la pressione dell'acqua. La capacità è quanta acqua può contenere. E la resistenza interna? È come la dimensione del tubo che lascia uscire l'acqua.
Hai bisogno che tutti e tre funzionino correttamente. Altrimenti, hai un fallimento.
Come verificare se una batteria 18650 è buona?
L'ispezione visiva rapida (Fallo prima)
Ecco qualcosa che la maggior parte delle persone salta:
Vedere effettivamente la batteria.
Lo so, lo so. Sembra ovvio. Ma ti sorprenderà quante persone cercano di testare batterie che sono chiaramente da buttare.
Prima di prendere il multimetro, controlla:
Danni fisici: Ammaccature, perforazioni o rigonfiamenti
Condizione dell'involucro: Strappi o metallo esposto
Corrosione: Polvere bianca o incrostazioni verdi sui terminali
Odore: Qualsiasi odore dolce o chimico
Vedi qualcuno di questi?
Butta via quella batteria. Seriamente.
Una volta avevo una batteria con una piccola ammaccatura che sembrava a posto. Anche testata ottimamente. Ma quando l'ho messa sotto carico? Si scaldava come una pazza.
Non vale il rischio.
Test della tensione della batteria (Controllo di 2 minuti)
Va bene, la tua batteria ha superato il test visivo.
È ora di prendere il multimetro.
Ecco esattamente come controllare la tensione:
Fase 1: Imposta il multimetro sulla tensione DC (range 20V)
Fase 2: Tocca la sonda rossa alla estremità positiva (pulsante superiore)
Fase 3: Tocca la sonda nera alla estremità negativa (fondo piatto)
Fase 4: Leggi il display
Ora ecco cosa significano quei numeri:
4.1-4.2V: Completamente carica e in buona salute
3.6-4.0V: Parzialmente carica, probabilmente buona
3.0-3.5V: Scarica ma probabilmente recuperabile
Sotto 2.5V: Morta. Non provare nemmeno a rianimarla
Consiglio professionale: lascia riposare la batteria per un'ora prima di testarla. Le letture appena uscite dalla carica non sono accurate.
Ho imparato questa lezione a mie spese quando pensavo di avere un lotto di batterie perfette. Risultato: si scaricavano di tensione come pazzi dopo averle lasciate inattive per un po'.
Il Test di Carico (Dove la Gomma Incontra la Strada)
Ecco il punto:
Una batteria potrebbe mostrare una tensione perfetta mentre è ferma. Ma mettila sotto carico? È lì che si evidenziano i problemi.
Hai due opzioni qui:
Opzione 1: Il Metodo del Resistor
Prendi un resistore da 10 ohm, 10 watt (circa $2 in qualsiasi negozio di elettronica).
Fase 1: Registra la tensione iniziale della batteria
Fase 2: Collega il resistore ai terminali della batteria
Fase 3: Misura immediatamente di nuovo la tensione
Fase 4: Monitora per 30 secondi
Una buona batteria scende forse di 0,2-0,3V.
Se scende di più di 0,5V? È un campanello d'allarme.
Opzione 2: Il Test della Torcia
Hai una torcia ad alta richiesta di corrente? Ancora meglio.
Inserisci quella batteria e accendila al massimo. Se la luce si affievolisce notevolmente nel primo minuto, la tua batteria ha problemi.
Semplice ma efficace.
Misurare la Capacità (Il Test Standard d'Oro)
Ora diventiamo seri.
Il test di capacità ti dice esattamente quanta energia la tua batteria può effettivamente fornire. Non quello che è scritto sulla confezione. Quello che REALMENTE contiene.
Per questo avrai bisogno di un tester di batteria dedicato. Io uso un Opus BT-C3100 (costa circa $40).
Ecco il processo:
Fase 1: Carica completamente la batteria
Fase 2: Imposta il tuo tester in modalità scarica
Fase 3: Scegli una velocità di scarica (io uso 0,5A per precisione)
Fase 4: Lascia che funzioni fino a raggiungere 2,8V
Fase 5: Controlla la lettura in mAh
Ora ecco come interpretare quei risultati:
90-100% della capacità nominale: Eccellente
80-90% della capacità nominale: Buono
70-80% della capacità nominale: Adeguato per dispositivi a basso consumo
Sotto 70%: È ora di metterla da parte
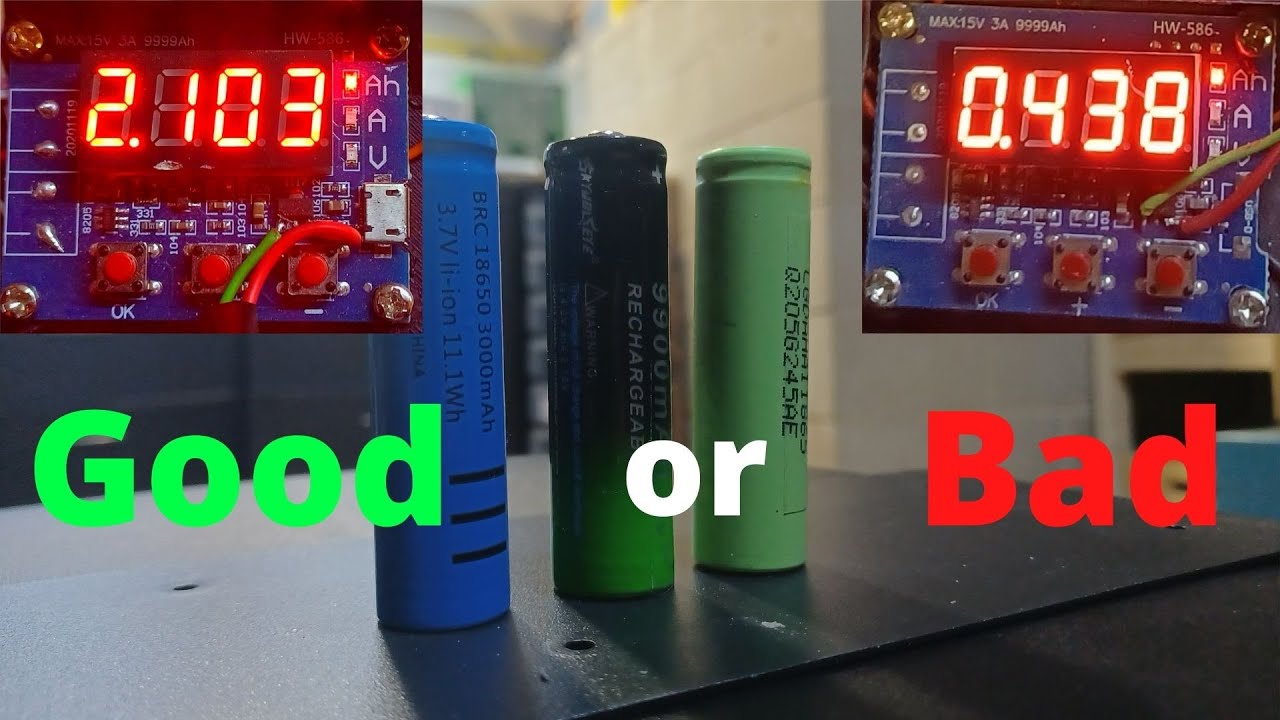
Parliamoci chiaro: la maggior parte delle batterie “9900mAh” che vedi online? Assolutamente falso. Una vera 18650 raggiunge circa 3500mAh.
Resistenza Interna (Il killer nascosto della batteria)
Qui la maggior parte delle persone interrompe i test.
Grave errore.
La resistenza interna (IR) è come il colesterolo per le batterie. Non puoi vederla, ma ucciderà le prestazioni.
Un'IR alta significa:
- Più calore durante l'uso
- Maggiori cadute di tensione sotto carico
- Durata complessiva più breve
Per misurare la resistenza IR, hai bisogno di un tester che la misuri specificamente (come il YR1035+).
Buoni valori di IR:
- Batteria nuova: 20-50 milliohm
- Usata ma in buona salute: 50-100 milliohm
- Tempo di sostituzione: oltre 150 milliohm
Ho batterie che risultano perfette in tutti gli altri test ma hanno un IR alle stelle. Funzionano bene in un telecomando TV. Ma in un dispositivo ad alto assorbimento? Dimenticalo.
Il Test di Autodiscarica (Per il Paziente)
Ecco un test di cui nessuno parla:
Tasso di autodiscarica.
Carica la batteria a 4,2V. Annota la tensione esatta. Poi lasciala riposare per una settimana.
Una batteria in buona salute perde forse 0,05V a settimana.
Perdere 0,2V o più? Quella batteria sta perdendo energia. Non è buona per applicazioni di conservazione a lungo termine.
Scheda di riferimento per test rapidi
Perché so che sei impegnato, ecco la versione TL;DR:
Controllo visivo: Nessun danno, terminali puliti
Tensione: Tra 3,0V e 4,2V
Caduta di Tensione: Inferiore a 0,5V sotto carico
Capacità: Sopra l'80% di capacità
Resistenza Interna: Inferiore a 100 milliohm
Autodiscarica: Inferiore a 0,1V a settimana
Se raggiungi tutti questi indicatori? Hai una buona batteria.
Errori comuni da evitare durante i test
Vedo che le persone sbagliano spesso:
Testare batterie calde: Lascia sempre che si raffreddino prima. Il calore distorce le letture.
Ignorare i danni alla confezione: Quella plastica non è solo decorativa. Previene cortocircuiti.
Mescolare marche/età di batterie: Anche batterie “identiche” possono avere caratteristiche diverse.
Sovraccarico durante i test: Non scendere mai sotto 2,5V. Mai.
Fidarsi solo della tensione: Non posso sottolinearlo abbastanza. La tensione mente.
Quando testare le tue batterie
Non è necessario esagerare con i test.
Ma ecco quando dovresti farlo sicuramente:
- Prima del primo utilizzo (soprattutto fonti sospette)
- Ogni 6 mesi per le batterie di uso regolare
- Dopo qualsiasi incidente fisico (cadute, impatti)
- Quando le prestazioni sembrano fuori norma
- Prima di un deposito a lungo termine
Per applicazioni critiche? Testa più spesso.
Per quella vecchia torcia nel garage? Un test annuale va bene.
Strumenti che rendono i test più facili
Guarda, puoi cavartela con solo un multimetro.
Ma se sei serio sui test delle batterie, questi strumenti cambieranno le regole del gioco:
Opus BT-C3100: Testa tutto in un solo dispositivo
XTAR VC8: Ottimo per testare più batterie
YR1035+: Tester IR professionale
Supporto per Batteria 18650: Rende più facili le connessioni
Modulo di Test di Carico: Per test di carico coerenti
Investimento totale? Circa $100-150 per una configurazione solida.
Ne vale la pena se usi molte 18650.
Il punto chiave sui test delle batterie
Testare le batterie 18650 non è scienza missilistica.
Ma richiede l'approccio e gli strumenti giusti.
Inizia con un'ispezione visiva. Controlla la tensione. Esegui un test di carico. Misura la capacità se puoi. E non dimenticare la resistenza interna.
Soprattutto:
In caso di dubbio, gettala.
Una nuova 18650 costa $5-10. Un incendio di batteria? Molto più costoso.
Ho testato migliaia di batterie usando questi metodi esatti. Funzionano. Ti tengono al sicuro. E garantiscono che i tuoi dispositivi funzionino correttamente.
Ecco tutto. Tutto quello che devi sapere su come verificare se una batteria 18650 è buona.
Ora esci e inizia a testare. I tuoi dispositivi (e la tua sicurezza) ti ringrazieranno.


