Итак, вы хотите узнать как зарядить аккумуляторный блок 18650 безопасно?
Вы в правильном месте.
В этом руководстве, как профессионал производитель аккумуляторных блоков 18650, я покажу вам ТОЧНО, как заряжать ваш аккумуляторный блок 18650 без риска повреждений или проблем с безопасностью.
(Включая конкретные зарядные устройства, напряжения и техники, которые действительно работают в 2025 году.)
Давайте начнем.
Чем отличаются аккумуляторные блоки 18650?
Вот в чем дело:
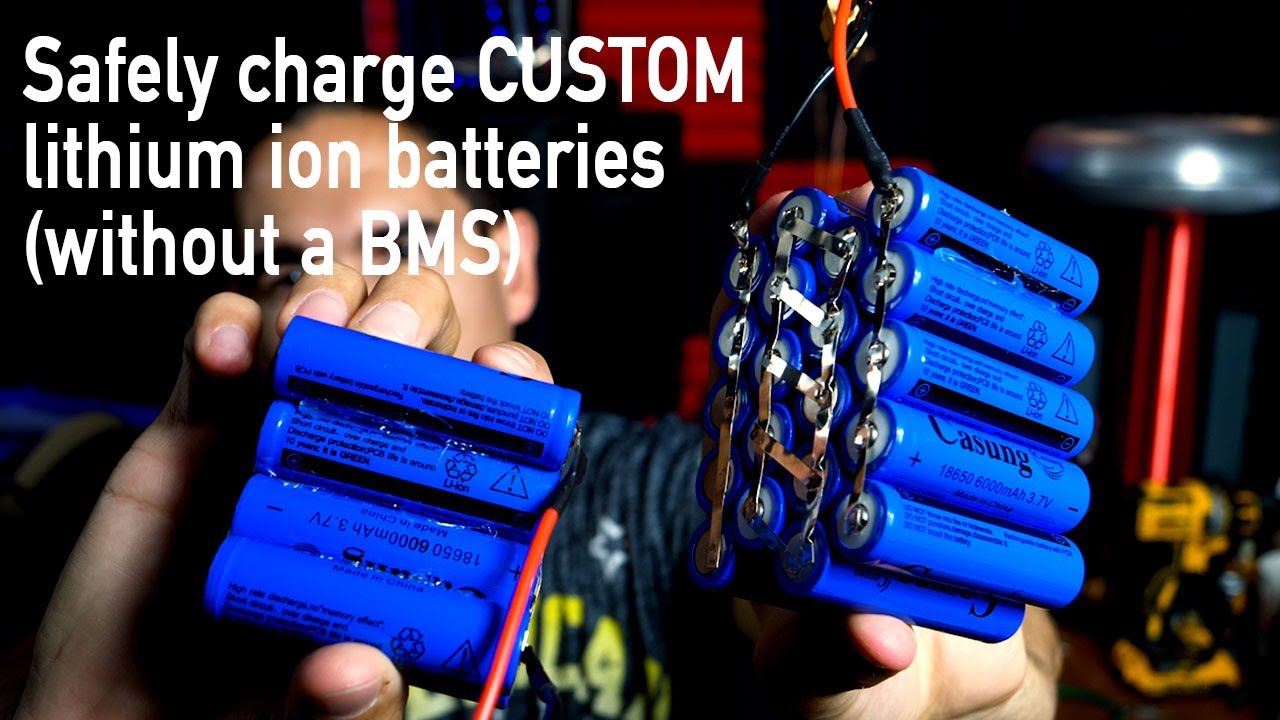
Батареи 18650 — это не обычные батарейки типа АА.
Это литий-ионные элементы, которые обладают серьезной мощностью. Каждый элемент обеспечивает номинальное напряжение 3,7 В и может хранить от 2000 до 3500 мАч энергии.
Но вот где становится интересно:
Когда вы соединяете несколько элементов 18650 вместе (создавая «блок»), всё становится сложнее.
Например:
- Блок 3S = 3 элемента последовательно = номинальное 11,1 В
- Блок 4S2P = 4 элемента последовательно, 2 параллельно = 14,8 В с удвоенной емкостью
И такая конфигурация полностью меняет способ их зарядки.
Двухэтапный процесс зарядки (CC/CV)
Давайте разберёмся:
Все литий-ионные аккумуляторы следуют определенному режиму зарядки, называемому Постоянный Ток/Постоянное Напряжение (CC/CV).
Работает это так:
Этап 1: Постоянный Ток (CC)
Зарядное устройство подает стабильный ток в ваш аккумуляторный блок. Для элемента емкостью 2500 мАч обычно используют 1,25 А (половина номинальной емкости).
Этап 2: Постоянное Напряжение (CV)
Когда каждая ячейка достигает примерно 4,1 В, зарядное устройство переключается. Оно поддерживает 4,2 В на ячейку, пока ток естественным образом не снизится.
Думайте об этом как наполнении стакана водой. Сначала вы наливаете быстро (CC), затем замедляете, чтобы не пролить (CV).
Выбор правильного зарядного устройства (Это критично)
Слушайте:
Использование неправильного зарядного устройства — это самый быстрый способ разрушить аккумуляторные блоки.
Вот что вам нужно учитывать:
Умные зарядные устройства против простых зарядных устройств
Никогда не используйте «глупый» источник питания для литиевых батарей.
Почему?
Потому что литий-ионные ячейки требуют точного контроля напряжения. Даже на 0,1 В выше может вызвать серьезные проблемы.
Вместо этого инвестируйте в умное зарядное устройство, которое включает:
- Автоматическое определение напряжения
- Защиту от перезаряда (остановка точно на 4,2 В на ячейку)
- Мониторинг температуры
- Ограничение тока
Популярные варианты, которые я тестировал, включают:
- Nitecore D4 (для отдельных ячеек)
- ISDT Q8 (для аккумуляторных блоков с балансировочными проводами)
- SkyRC iMAX B6 (универсальный вариант для различных конфигураций)
Совпадение напряжения — не обсуждается
Это очень важно:
Напряжение вашего зарядного устройства ДОЛЖНО соответствовать конфигурации вашего аккумулятора.
Вот краткое руководство:
- Блок 1S (номинал 3,7 В) → зарядное устройство 4,2 В
- Блок 2S (номинал 7,4 В) → зарядное устройство 8,4 В
- Блок 3S (номинал 11,1 В) → зарядное устройство 12,6 В
- Блок 4S (номинал 14,8 В) → зарядное устройство 16,8 В
Ошибетесь — и вы либо недозарядите (уменьшите емкость), либо перезарядите (возникнет риск пожара).
Роль систем управления аккумуляторами (BMS)
Вот что большинство руководств упускают из виду:
Для любого блока с элементами в серии BMS не является опцией — это необходимость.
BMS выполняет три важные функции:
- Балансировка ячеек во время зарядки
- Предотвращение перезаряда отдельных ячеек
- Контролирует температуру и отключение при перегреве
Я видел слишком много самодельных блоков без надлежащей защиты BMS. Не допускайте этой ошибки.
Пошаговый процесс зарядки
Теперь перейдем к самому процессу зарядки.
Перед началом
Сначала осмотрите ваш аккумуляторный блок:
- Проверьте наличие физического повреждения или вздутия
- Убедитесь, что все соединения надежны
- Измерьте напряжение отдельных элементов, если возможно
Если какой-либо элемент ниже 2,5 В или выше 4,2 В, остановитесь и проведите дополнительное расследование.
Во время зарядки
- Подключайте правильно: Всегда подключайте зарядное устройство к аккумулятору ПЕРЕД подключением к электросети
- Установите правильные параметры:
- Напряжение: соответствуйте конфигурации вашего блока
- Ток: начинайте с 0,5C для безопасности (половина номинальной емкости по ампер-часам)
- Следите за температурой: Аккумуляторы должны оставаться едва тёплыми, никогда не горячими
- Следите за током: Он должен постепенно уменьшаться во время фазы CV
Завершение зарядки
Зарядка считается завершённой, когда:
- Напряжение достигает 4.2В на ячейку
- Ток снижается примерно до 3% от начальной скорости зарядки
- Зарядное устройство показывает завершение (обычно зеленый светодиод)
Совет профессионала: для максимальной долговечности батареи заряжайте до 4,1 В на элемент вместо 4,2 В. Вы потеряете примерно 10% емкости, но удвоите срок службы циклов.
Температура: Тихий убийца батареи
Позвольте быть ясным:
Управление температурой — ОГРОМНО для безопасности и долговечности батареи.
Никогда не заряжайте:
- При температуре ниже 0°C (32°F) — вызывает осаждение лития
- Выше 45°C (113°F) — ускоряет деградацию
Золотая середина? 10-30°C (50-86°F).
Я узнал это на собственном опыте, когда оставил аккумулятор заряжаться в гараже зимой. Холодная зарядка навсегда снизила его емкость на 30%.
Последовательность против параллели: применяются разные правила
Это сбивает с толку многих:
Конфигурации последовательных и параллельных соединений требуют разных подходов.
Последовательные блоки (более высокое напряжение)
Последовательные блоки сложны, потому что ячейки со временем могут стать несбалансированными.
Вот почему вы ДОЛЖНЫ использовать:
- Балансирующую зарядку (отслеживает каждую ячейку отдельно)
- Регулярные проверки напряжения
- Качественный BMS с активным балансированием
Параллельные модули (более высокая емкость)
Параллельные модули более терпимы, потому что ячейки самобалансируются.
Но будьте осторожны:
- Никогда не соединяйте ячейки с разным напряжением параллельно
- Используйте подобранные ячейки (один бренд, емкость, возраст)
- Следите за горячими точками во время зарядки
Распространённые ошибки при зарядке (и как их избежать)
Я постоянно вижу эти ошибки:
Ошибка #1: Использование зарядных устройств для ноутбуков
Они подают постоянное напряжение без ограничения тока. Рецепт катастрофы.
Ошибка #2: Быстрая зарядка каждый раз
Конечно, вы МОЖЕТЕ заряжать на 2C или выше. Но это вызывает нагрев и сокращает срок службы батареи.
Ошибка #3: Зарядка без присмотра
Даже с защитными функциями всегда заряжайте там, где вы можете контролировать процесс.
Ошибка #4: Игнорирование балансировочной зарядки
Несбалансированные ячейки = снижение емкости и риски безопасности.
Передовые техники зарядки
Освоив основы, попробуйте эти профессиональные техники:
Хранение при зарядке
Не используете ваш аккумуляторный блок некоторое время?
Заряжайте до 3.7-3.8В на ячейку (примерно 50% емкости) для хранения. Это предотвращает деградацию во время простоя.
Разрыв цикла
Новые элементы выигрывают от 3-5 мягких циклов зарядки/разрядки с током 0,2C, чтобы «разбудить» их и достичь полной емкости.
Температурная компенсация
Некоторые современные зарядные устройства регулируют напряжение в зависимости от температуры. При 0°C они могут заряжать до 4,25В. При 45°C — только 4,15В.
Руководство по безопасности, которое может спасти вашу жизнь
Я не пытаюсь вас напугать, но литиевые батареи требуют уважения.
Следуйте этим правилам:
- Заряжайте в огнестойком месте (металлический ящик, бетонный пол)
- Никогда не оставляйте зарядку без присмотра на ночь
- Держите поблизости огнетушитель класса D
- Используйте дымовой детектор в зоне зарядки
- Немедленно утилизируйте поврежденные элементы
Я работаю с этими батареями уже много лет без инцидентов. Но это потому, что я строго соблюдаю эти правила.
Реальные сценарии зарядки
Позвольте мне поделиться некоторыми практическими примерами:
Пример 1: Аккумулятор электровелосипеда (13S4P)
- Конфигурация: номинальное напряжение 48В, емкость 20Ач
- Требуемое зарядное устройство: 54,6В, выход 2-4А
- Время зарядки: 5-10 часов в зависимости от тока
- Особое условие: должен быть BMS для 13 элементов в серии
Пример 2: Блок питания для электроинструмента (5S2P)
- Конфигурация: номинальное напряжение 18В, емкость 5Ач
- Требуемое зарядное устройство: 21В, выход 2,5А
- Время зарядки: 2-3 часа
- Особое внимание: Часто включает разъемы, специфичные для инструмента
Пример 3: Самодельный Powerwall (14S100P)
- Конфигурация: номинальное напряжение 48В, емкость 250Ач
- Требуется зарядное устройство: выход 58.8В, 25-50А
- Время зарядки: 5-10 часов
- Особое внимание: Требует сложной системы управления батареями и охлаждения
Максимизация срока службы батареи с помощью умной зарядки
Хотите, чтобы ваши батареи служили более 1000 циклов?
Вот как:
- Заряжайте медленно, когда возможно (0.5C или менее)
- Избегайте зарядки 100% для ежедневного использования (останавливайтесь на 90%)
- Никогда не разряжайте ниже 20%
- Держите батареи в прохладе во время зарядки
- Балансируйте заряд раз в месяц для последовательных блоков
Следуя этим рекомендациям, у меня есть комплекты с 2019 года, которые все еще обеспечивают 90% исходной емкости.
Итоги
Безопасная зарядка аккумуляторных блоков 18650 сводится к трем вещам:
- Использование правильного оборудования (умное зарядное устройство, BMS)
- Следование правильным процедурам (правильное напряжение, безопасный ток)
- Уважение к технологии (температурные ограничения, меры безопасности)
Правильное выполнение этих правил обеспечит долгую и надежную работу ваших аккумуляторов.
Пропустите их, и вы играете с огнем — буквально.
Хорошая новость?
Как только вы поймете основы как зарядить аккумуляторный блок 18650 правильных конфигураций, это станет второй натурой. Как и в любой другой сфере работы с электроникой, знания и уважение к технологии идут рука об руку.


