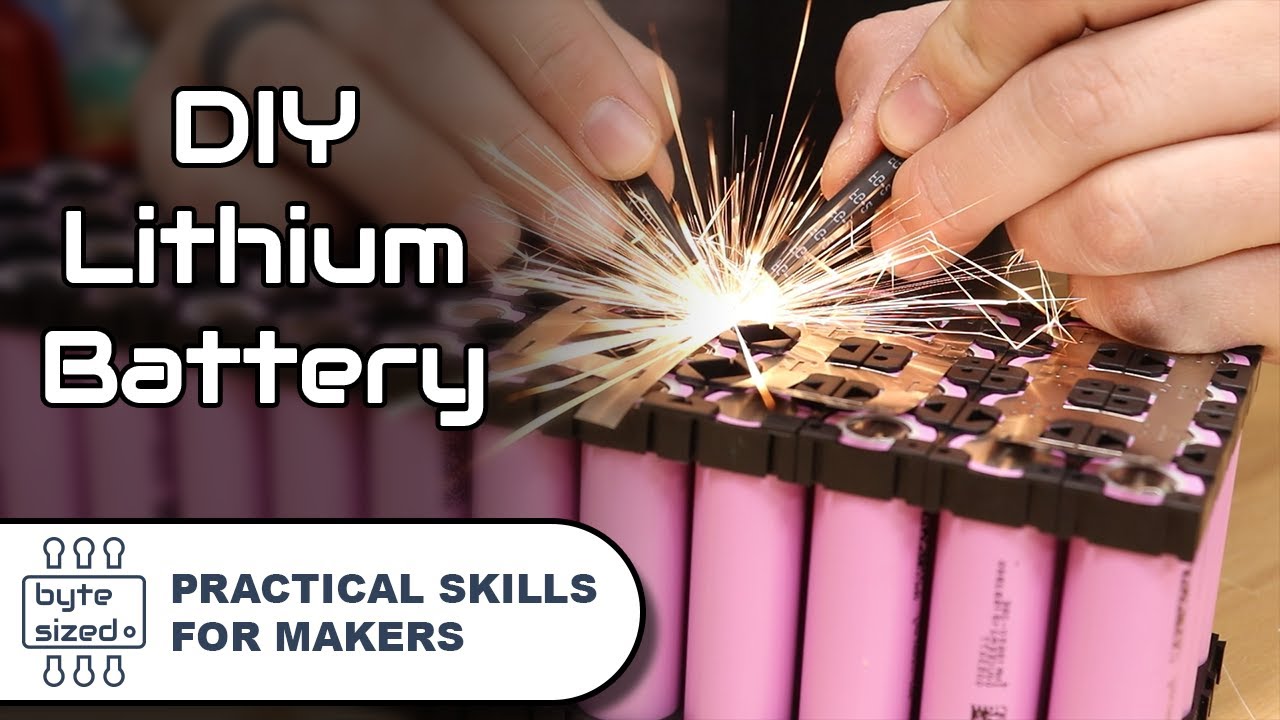
Chcesz zbudować własne niestandardowe rozwiązanie zasilania? Nauka jak zrobić pakiet baterii 18650 jest łatwiejsza niż myślisz. W tym kompleksowym przewodniku, jako profesjonalista producent pakietów baterii 18650, przeprowadzę Cię przez wszystko, co musisz wiedzieć, aby stworzyć niezawodny, wysokowydajny pakiet baterii z ogniw litowo-jonowych 18650.
Spędziłem niezliczone godziny na badaniach i testowaniu różnych metod, i podzielę się dokładnym, krok po kroku procesem, który naprawdę działa w 2025 roku.
Zanurzmy się w to.

Dlaczego warto zbudować własny pakiet baterii 18650?
Niestandardowe pakiety baterii dają pełną kontrolę nad:
- Pojemność: Zbuduj dokładnie to, czego potrzebujesz
- Napięcie: Skonfiguruj pod swoje konkretne urządzenie
- Kształt: Zaprojektuj tak, aby pasował do Twojej przestrzeni
- Koszt: Zaoszczędź pieniądze w porównaniu do gotowych rozwiązań
- Jakość: Użyj wysokiej jakości ogniw dla lepszej wydajności
Poza tym, jest coś niezwykle satysfakcjonującego w zasilaniu swoich urządzeń czymś, co sam zbudowałeś.
Jak zrobić pakiet baterii 18650?
Podstawowy sprzęt bezpieczeństwa
Przed dotknięciem jakiegokolwiek akumulatora, przygotuj te elementy bezpieczeństwa:
- Okulary ochronne
- Rękawice elektryczne
- Powierzchnia robocza odporna na ogień
- Gaśnica (o klasie odporności na pożary elektryczne)
Nigdy nie pomijaj sprzętu ochronnego. Nawet wysokiej jakości ogniwa 18650 mogą być niebezpieczne przy niewłaściwym obchodzeniu się z nimi.
Wybór odpowiednich ogniw 18650
To być może najważniejszy krok w budowie wysokiej jakości pakietu baterii.
Oto prawda: nie wszystkie ogniwa 18650 są takie same.
Znajdziesz niezliczone opcje od $1 do $10 na ogniwo, ale oto co musisz wiedzieć:
Trzymaj się renomowanych marek. Gorąco polecam ogniwa od Panasonic, Samsung, Sanyo i LG. Ci producenci mają doskonałą kontrolę jakości i dobrze udokumentowane parametry wydajności.
Unikaj tanich podróbek. Trzymaj się z dala od marek z „FIRE” w nazwie (Ultrafire, Surefire, Trustfire). To często odrzuty fabryczne przepakowane w eleganckie opakowania. Reklamują pojemności do 5000mAh, ale zazwyczaj dostarczają tylko 1000-2000mAh. Co gorsza, stanowią poważne ryzyko wybuchu podczas ładowania lub rozładowywania.
Do moich własnych projektów używam ogniw Panasonic 18650B o pojemności 3400mAh. Kosztują więcej na początku, ale zapewniają niezawodną wydajność na przestrzeni czasu.
Zrozumienie konfiguracji baterii
Przed budową musisz zrozumieć dwie podstawowe konfiguracje:
Połączenie szeregowe: Zwiększa napięcie przy zachowaniu tej samej pojemności
- Przykład: Cztery ogniwa 3,7V w szeregu = 14,8V przy tym samym nominale mAh
Połączenie równoległe: Zwiększa pojemność przy zachowaniu tej samej wartości napięcia
- Przykład: Cztery ogniwa 3,7V/3400mAh w równoległym połączeniu = 3,7V przy 13 600mAh
Najbardziej przydatne zestawy baterii używają kombinacji obu (szeregowo-równoległej), aby osiągnąć pożądane napięcie i pojemność.
Kluczowe kwestie projektowe
Najpierw określ wymagania dotyczące prądu obciążenia. To jest absolutnie konieczne, ponieważ wpływa na:
- Dobór przekroju przewodu
- Liczbę potrzebnych ogniw
- Wymagania dotyczące zarządzania ciepłem
- Specyfikacje BMS (System Zarządzania Bateriami)
Prąd pobierany przez Twoje urządzenie bezpośrednio wpływa na to, jak zaprojektujesz swój pakiet.
Rozważ kwestie równowagi. Podczas łączenia ogniw w szeregu, powinny one być w granicach 0,1V od siebie. Jest to szczególnie ważne przy używanych ogniwach, ale warto to sprawdzić również przy nowych.
Proces budowy krok po kroku
Krok 1: Zaprojektuj swoją konfigurację
Zacznij od odpowiedzi na te pytania:
- Jakie napięcie wymaga Twoje urządzenie?
- Ile pojemności (czas pracy) potrzebujesz?
- Jaki jest Twój maksymalny pobór prądu?
Na przykład, jeśli potrzebujesz baterii 12V o pojemności około 6800mAh:
- 3 ogniwa w szeregu = 11,1V (wystarczająco blisko 12V dla większości zastosowań)
- 2 grupy równoległe = 6800mAh (3400mAh × 2)
- Całkowita konfiguracja: 3S2P (łącznie 6 ogniw)
Krok 2: Testuj wszystkie ogniwa
Ten krok jest nie do negocjacji. Przed budową:
- Naładuj wszystkie ogniwa do pełna za pomocą wysokiej jakości ładowarki Li-ion
- Zmierz i zanotuj napięcie każdego ogniwa
- Grupuj ogniwa o podobnych napięciach (w granicach 0,1V)
- Dla najlepszych rezultatów, zmierz rzeczywistą pojemność za pomocą analizatora baterii
Krok 3: Przygotuj swoje materiały
Zbierz te niezbędne elementy:
- Uchwyt na baterie 18650 lub stwórz własny uchwyt
- Taśma niklowa (minimum 0,15mm grubości)
- Spawarka punktowa (preferowana) lub specjalistyczny sprzęt do lutowania
- Materiały izolacyjne
- BMS (System Zarządzania Bateriami) odpowiedni do Twojej konfiguracji
- Okablowanie i złącza
- Tuba termokurczliwa
Krok 4: Podłącz komórki
Ważne: Nigdy nie lutuj bezpośrednio do komórek 18650. Ciepło może uszkodzić wewnętrzne mechanizmy bezpieczeństwa. Zawsze używaj spawarki punktowej lub komórek z wstępnie zamocowanymi zakładkami.
- Ułóż komórki zgodnie z projektem
- Najpierw połącz grupy równoległe za pomocą pasków niklowych
- Połącz grupy równoległe szeregowo
- Dodaj izolację między grupami komórek, aby zapobiec zwarciom
Krok 5: Zainstaluj BMS
System Zarządzania Akumulatorami jest kluczowy dla:
- Ochrona przed przeładowaniem
- Ochrona przed nadmiernym rozładowaniem
- Ochrona przed zwarciem
- Balansowania komórek podczas ładowania
- Podłącz przewody balansu BMS do każdego połączenia szeregowego
- Podłącz główne przewody dodatni i ujemny
- Starannie izoluj wszystkie połączenia
Krok 6: Ostateczny montaż i testy
- Zmierz napięcie na terminalach wyjściowych, aby zweryfikować poprawną konfigurację
- Izoluj cały pakiet za pomocą papieru rybnego lub taśmy Kapton
- Owiń taśmą termokurczliwą dla ochrony mechanicznej
- Przeprowadź test ładowania i rozładowania przy niskim prądzie, aby zweryfikować funkcjonalność
- Przetestuj z zamierzonym urządzeniem pod nadzorem
Rozwiązywanie typowych problemów
Pakiet nie ładuje się: Sprawdź połączenia BMS i zweryfikuj, czy napięcia ogniw nie są zbyt niskie, aby BMS mógł się aktywować.
Zmniejszonej pojemności: Prawdopodobnie spowodowane przez niezrównoważone ogniwa lub jedno słabe ogniwo w grupie równoległej.
Pakiet przegrzewa się: Może to wskazywać na nadmierny pobór prądu, niewłaściwy przekrój przewodów lub słabe połączenia między ogniwami.
Tworzenie wytrzymałej obudowy baterii
Dla trwałości i bezpieczeństwa rozważ:
- Druk 3D niestandardowej obudowy z odpowiednią wentylacją
- Dodanie piankowej wyściółki, aby zapobiec przemieszczaniu się
- Zawieranie czujnika temperatury do monitorowania
- Projektowanie łatwego dostępu do przyszłej konserwacji
Utrzymanie własnego zestawu baterii DIY
- Regularnie go ładuj, nawet podczas przechowywania
- Przechowuj na poziomie 30-50% naładowania, jeśli nie używasz przez dłuższy czas
- Przechowuj w chłodnych, suchych warunkach
- Unikaj całkowitego rozładowania, o ile to możliwe
- Okresowo sprawdzaj połączenia
Przemyślenia końcowe
Budowa własnego zestawu baterii 18650 jest niezwykle satysfakcjonująca. Nie tylko otrzymujesz niestandardowe rozwiązanie zasilania, ale także zdobywasz cenne umiejętności i wiedzę.
Zapamiętaj te kluczowe punkty:
- Zawsze priorytetowo traktuj bezpieczeństwo
- Używaj wysokiej jakości ogniw od renomowanych producentów
- Poświęć czas na odpowiednie zaprojektowanie przed budową
- Zawiera wysokiej jakości BMS
- Testuj dokładnie przed regularnym użyciem
Z krokami opisanymi w tym przewodniku, masz teraz wszystko, co musisz wiedzieć o jak zrobić pakiet baterii 18650 konfiguracjach, które są bezpieczne, niezawodne i idealnie dopasowane do Twoich potrzeb.
Czy zbudowałeś własny pakiet baterii? Z jakimi wyzwaniami się spotkałeś? Daj znać w komentarzach poniżej!


