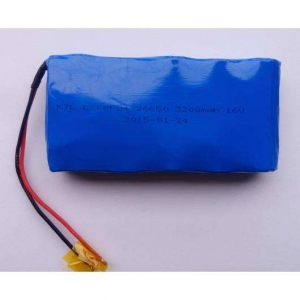
มาดูกันเถอะ: แบตเตอรี่ 18650 ให้พลังงานทุกอย่างตั้งแต่ไฟฉายระดับสูงไปจนถึงรถ Tesla แต่การชาร์จพวกมันอย่างไม่ถูกต้องไม่ใช่แค่ทำให้แบตเสื่อมเร็วขึ้น — มันอาจเป็นอันตรายอย่างร้ายแรงได้
อันที่จริง การศึกษาในปี 2024 พบว่าการชาร์จที่ไม่เหมาะสมเป็นสาเหตุของความล้มเหลวของแบตเตอรี่ลิเธียมไอออนถึง 78% ว้าว
วิธีชาร์จแบตเตอรี่ 18650 ชาร์จอย่างปลอดภัยและมีประสิทธิภาพ? นั่นคือสิ่งที่ฉันจะครอบคลุมในคู่มือฉบับสมบูรณ์นี้
ในฐานะมืออาชีพ ผู้ผลิตชุดแบตเตอรี่ 18650, ฉันได้ทดสอบวิธีการชาร์จหลายสิบวิธีและใช้เวลานับไม่ถ้วนในการค้นคว้าข้อปฏิบัติที่ดีที่สุด นี่ไม่ใช่แค่ทฤษฎี — เป็นคำแนะนำที่ผ่านการทดสอบในสนามรบที่จะทำให้แบตเตอรี่ของคุณใช้งานได้นานขึ้นและปลอดภัยขึ้น
เรามาเริ่มกันเลย

ทำความเข้าใจเกี่ยวกับแบตเตอรี่ 18650 (พื้นฐาน)
ก่อนที่เราจะพูดถึงการชาร์จ มาทำความเข้าใจให้ตรงกันก่อนว่าแบตเตอรี่เหล่านี้คืออะไรจริงๆ
แบตเตอรี่ 18650 เป็นเซลล์ลิเธียมไอออนที่สามารถชาร์จใหม่ได้ในรูปแบบขนาดเฉพาะ (เส้นผ่านศูนย์กลาง 18 มม. ความยาว 65 มม. — ดังนั้นจึงเรียกว่า “18650”)
นี่คือสิ่งที่ทำให้แบตเตอรี่เหล่านี้พิเศษ:
-
ความหนาแน่นพลังงานสูง: บรรจุพลังงานจำนวนมากในแพ็คเกจขนาดเล็ก
-
ชาร์จใหม่ได้: สามารถชาร์จได้หลายร้อยครั้งเมื่อใช้งานอย่างถูกต้อง
-
อเนกประสงค์: ใช้ในแล็ปท็อป พาวเวอร์แบงค์ รถยนต์ไฟฟ้า และอื่นๆ
-
แรงดันไฟฟ้าชื่อ: 3.7V (แม้จะชาร์จเต็มแล้วก็ประมาณ 4.2V)
คำถามคือ: ทำไมการชาร์จที่ถูกต้องถึงสำคัญมากสำหรับแบตเตอรี่เหล่านี้?
ง่ายมาก ต่างจากแบตเตอรี่ NiCad รุ่นเก่า เซลล์ลิเธียมไอออนมีความไวต่อ:
-
การชาร์จเกิน (เกิน 4.2V)
-
การปล่อยไฟเกิน (ต่ำกว่า 2.5V)
-
ชาร์จเร็วเกินไป
-
การชาร์จในอุณหภูมิสุดขีด
ถ้าคุณทำผิดพลาดใดๆ กับสิ่งเหล่านี้ คุณอาจพบกับความจุลดลง อายุการใช้งานสั้นลง หรือในกรณีที่เลวร้ายที่สุด — ไฟไหม้หรือระเบิด
ตอนที่ฉันเริ่มทำงานกับแบตเตอรี่ 18650 ครั้งแรกในปี 2018 ฉันทำผิดพลาดของมือใหม่: ใช้ที่ชาร์จราคาถูก ไม่มีแบรนด์
ผลลัพธ์? แบตเตอรี่ไหม้และเกือบเกิดเหตุการณ์ความปลอดภัย
นี่คือสิ่งที่คุณจำเป็นต้องมีอย่างแน่นอนสำหรับการชาร์จที่ปลอดภัย:
ที่ชาร์จแบตเตอรี่ลิเธียมไอออนเฉพาะทาง
นี่ไม่ใช่ตัวเลือก คุณต้องใช้ที่ชาร์จที่ออกแบบมาโดยเฉพาะสำหรับเซลล์ลิเธียมไอออน
สิ่งที่ควรมองหาในที่ชาร์จคุณภาพ:
-
โปรไฟล์การชาร์จ CC/CV ที่ถูกต้อง: รับประกันว่าแบตเตอรี่ชาร์จอย่างถูกต้องในทั้งสองเฟส
-
การตรวจสอบเซลล์แต่ละเซลล์: แต่ละช่องแบตเตอรี่ควบคุมแยกต่างหาก
-
การป้องกันการชาร์จเกิน: หยุดอัตโนมัติเมื่อแบตเตอรี่ถึง 4.2V
-
การตรวจสอบอุณหภูมิ: ป้องกันการชาร์จถ้าแบตเตอรี่ร้อนเกินไป
-
ระบบป้องกันขั้วไฟฟ้ากลับด้าน: ในกรณีที่คุณใส่แบตเตอรี่กลับด้าน
-
หน้าจอสถานะ: แสดงความคืบหน้าการชาร์จและสุขภาพของแบตเตอรี่
-
อัตราการชาร์จหลายระดับ: ปรับกระแสไฟฟ้าได้สำหรับความจุแบตเตอรี่ที่แตกต่างกัน
ในปี 2025 ฉันแนะนำให้ใช้ที่ชาร์จจากแบรนด์เช่น Nitecore, XTAR, และ LiitoKala ซึ่งทำผลงานได้ดีอย่างต่อเนื่องในการทดสอบของฉัน
คำแนะนำเชิงมืออาชีพ: หลีกเลี่ยงที่ชาร์จแบบสากลที่อ้างว่าสามารถชาร์จแบตเตอรี่ทุกประเภทได้ พวกเขาแทบจะทำงานได้ดีในทุกประเภท
เคสแบตเตอรี่สำหรับเก็บและขนส่ง
เมื่อคุณไม่ได้ชาร์จ คุณจำเป็นต้องมีเคสเก็บรักษาที่เหมาะสม ซึ่งจะป้องกัน:
-
ไฟฟ้าลัดวงจรโดยกุญแจหรือเหรียญ
-
ความเสียหายทางกายภาพต่อห่อหุ้ม (ซึ่งเป็นคุณสมบัติด้านความปลอดภัย)
-
การสัมผัสกับสิ่งแวดล้อม
เคสแบตเตอรี่พลาสติกพื้นฐานมีราคาต่ำกว่า 1,000 บาท และสามารถช่วยป้องกันอุบัติเหรอร้ายแรงได้
วิธีชาร์จแบตเตอรี่ 18650: ขั้นตอนการชาร์จทีละขั้นตอน
เอาล่ะ มาถึงหัวใจของเรื่องกันเถอะ: คุณจะชาร์จแบตเตอรี่ 18650 อย่างไร อย่างถูกต้อง?
นี่คือกระบวนการที่ฉันพิสูจน์แล้ว:
ขั้นตอนที่ 1: ตรวจสอบแบตเตอรี่ของคุณ
ก่อนที่คุณจะคิดเรื่องการชาร์จ:
-
ตรวจสอบการห่อแบตเตอรี่สำหรับรอยฉีกขาด, เจาะ หรือความเสียหาย
-
มองหาอาการบวม, รั่วไหล หรือความเสียรูปทรงใด ๆ
-
แน่ใจว่าขั้วบวกและขั้วลบสะอาด
-
ตรวจสอบให้แน่ใจว่าแบตเตอรี่ไม่ร้อนหรือเย็นเกินไป
ถ้าคุณสังเกตเห็นปัญหาใด ๆ เหล่านี้ ห้ามชาร์จแบตเตอรี่โดยเด็ดขาด แบตเตอรี่เซลล์ 18650 ที่เสียหายเป็นอันตรายเกินกว่าจะจัดการได้
ขั้นตอนที่ 2: ใส่แบตเตอรี่ให้ถูกต้อง
นี่ดูเหมือนจะชัดเจน แต่คนมักเข้าใจผิดเสมอ:
-
ตรวจสอบสัญลักษณ์บอกทิศทางบนเครื่องชาร์จของคุณ
-
จัดแนวปลายบวกของแบตเตอรี่ (ปลายที่มีปุ่มบน) เข้ากับขั้วบวก
-
ตรวจสอบให้แน่ใจว่าแบตเตอรี่สัมผัสกับทั้งสองขั้วอย่างดี
-
ตรวจสอบให้แน่ใจว่าแบตเตอรี่พอดีอย่างถูกต้อง (อย่าใช้แรงบีบ)
ขั้นตอนที่ 3: เลือกกระแสชาร์จที่เหมาะสม
ที่ชาร์จคุณภาพส่วนใหญ่ให้คุณเลือกอัตราการชาร์จได้ นี่คือสิ่งที่ฉันแนะนำ:
-
การชาร์จมาตรฐาน: 0.5C (ครึ่งหนึ่งของความจุแบตเตอรี่)
-
การชาร์จอ่อนโยน: 0.2C (ยืดอายุแบตเตอรี่แต่ใช้เวลานานขึ้น)
-
การชาร์จเร็ว: 1C (เฉพาะถ้าแบตเตอรี่ของคุณรองรับเท่านั้น)
หมายความว่าอะไรในทางปฏิบัติ? ถ้าคุณมีแบตเตอรี่ความจุ 3000mAh:
-
การชาร์จมาตรฐาน = 1500mA (1.5A)
-
การชาร์จแบบอ่อน = 600mA (0.6A)
-
การชาร์จแบบรวดเร็ว = 3000mA (3A)
ฉันเองมักใช้การชาร์จมาตรฐาน (0.5C) สำหรับสถานการณ์ส่วนใหญ่ มันเป็นจุดที่สมดุลระหว่างความเร็วในการชาร์จและอายุการใช้งานของแบตเตอรี่
ขั้นตอนที่ 4: เฝ้าระวังช่วงเวลาการชาร์จ
รอบการชาร์จลิเธียมไอออนที่เหมาะสมมีสองช่วงหลัก:
-
ช่วงกระแสคงที่ (CC): ตัวชาร์จจ่ายกระแสคงที่ในขณะที่แรงดันไฟฟ้าค่อยๆ เพิ่มขึ้นจนถึง 4.2V
-
ช่วงแรงดันคงที่ (CV): ตัวชาร์จรักษาแรงดันที่ 4.2V ในขณะที่กระแสไฟฟ้าค่อยๆ ลดลง
ที่ชาร์จคุณภาพของคุณจะจัดการเรื่องนี้โดยอัตโนมัติ แต่เป็นเรื่องดีที่จะเข้าใจว่ากำลังเกิดอะไรขึ้น
การชาร์จเต็มจะใช้เวลาประมาณ 2-4 ชั่วโมง ขึ้นอยู่กับความจุของแบตเตอรี่และอัตราการชาร์จ
ขั้นตอนที่ 5: ถอดเมื่อการชาร์จเสร็จสมบูรณ์
เมื่อเครื่องชาร์จของคุณบ่งชี้ว่าแบตเตอรี่ชาร์จเต็มแล้ว:
-
ถอดแบตเตอรี่ออกโดยทันที
-
ตรวจสอบให้แน่ใจว่าเครื่องร้อนเพียงเล็กน้อย (ไม่ร้อนจัด)
-
ปล่อยให้เย็นลงถึงอุณหภูมิห้องก่อนใช้งานถ้าจำเป็น
-
เก็บให้ถูกต้องหากไม่ได้ใช้งานทันที
ข้อควรระวังด้านความปลอดภัยในการชาร์จแบตเตอรี่ 18650
ในช่วงหลายปีที่ทำงานกับแบตเตอรี่เหล่านี้ ผมได้พัฒนากฎความปลอดภัยที่ไม่สามารถต่อรองได้:
สภาพแวดล้อมในการชาร์จ
-
ชาร์จบนพื้นผิวที่ไม่ติดไฟเสมอ (เช่น กระเบื้องเซรามิกหรือโลหะ)
-
เก็บให้ห่างจากวัสดุไวไฟ (กระดาษ, ผ้า, ไม้)
-
ตรวจสอบให้แน่ใจว่ามีการระบายอากาศที่ดี รอบๆ ที่ชาร์จ
-
ห้ามชาร์จใกล้แหล่งน้ำหรือในที่ที่มีความชื้นสูง
-
รักษาระดับอุณหภูมิปานกลาง (10-30°C หรือ 50-86°F เป็นอุณหภูมิที่เหมาะสม)
กฎการดูแล
-
อย่าปล่อยแบตเตอรี่ที่กำลังชาร์จทิ้งไว้โดยไม่มีผู้ดูแล เป็นเวลานาน
-
ตรวจสอบเป็นระยะ ระหว่างการชาร์จเป็นเวลานาน
-
พิจารณาใช้ถุงชาร์จ ที่ออกแบบมาเพื่อป้องกันแบตเตอรี่เสียหาย
-
เตรียมเครื่องดับเพลิงประเภท D ไว้ใกล้ๆ ถ้าเป็นไปได้ (เครื่องดับเพลิงธรรมดาไม่เหมาะสมกับไฟลิเทียม)
สัญญาณอันตรายที่ต้องระวัง
หยุดชาร์จทันทีและย้ายแบตเตอรี่ไปยังที่ปลอดภัย (ควรเป็นกลางแจ้ง) หากคุณสังเกตเห็น:
-
ความร้อนสูงเกินไป แบตเตอรี่ควรอุ่น ไม่ควรมีความร้อนเมื่อสัมผัส
-
บวม หรือ โป่ง
-
เสียงฮิสซิ่ง
-
กลิ่นไม่ปกติ
-
ควันหรือความเสียหายที่มองเห็นได้
ข้อผิดพลาดในการชาร์จที่ควรหลีกเลี่ยง
ตลอดหลายปีที่ผ่านมา ผมเคยเห็นคนทำผิดซ้ำแล้วซ้ำเล่า อย่าเป็นหนึ่งในนั้น:
1. ใช้ที่ชาร์จผิดประเภท
ผมไม่สามารถเน้นย้ำได้เพียงพอ: การใช้ที่ชาร์จที่ไม่ได้ออกแบบมาโดยเฉพาะสำหรับแบตเตอรี่ลิเทียมไอออนคือการเล่นกับไฟ (บางครั้งก็เป็นไฟจริงๆ)
ผู้กระทำผิดที่เลวร้ายที่สุด:
-
ที่ชาร์จ NiMH/NiCad – โปรไฟล์การชาร์จที่แตกต่างอย่างสิ้นเชิง
-
อุปกรณ์ชาร์จ DIY – เว้นแต่คุณจะเป็นวิศวกรไฟฟ้า ก็อย่าใช้
-
ที่ชาร์จราคาถูกไม่มีชื่อเสียง – มักขาดคุณสมบัติด้านความปลอดภัยพื้นฐาน
2. การชาร์จในอุณหภูมิสุดขีด
แบตเตอรี่ลิเธียมไอออนมีความไวต่ออุณหภูมิ ช่วงอุณหภูมิที่เหมาะสมสำหรับการชาร์จคือ 10-30°C (50-86°F)
-
อากาศหนาวเกินไป (ต่ำกว่า 0°C/32°F): อาจทำให้เกิดการเคลือบลิเธียม จนทำให้แบตเตอรี่เสียหายถาวร
-
อากาศร้อนเกินไป (สูงกว่า 45°C/113°F): เร่งการเสื่อมสภาพและเพิ่มความเสี่ยงไฟไหม้
ในปี 2025 ที่ชาร์จคุณภาพส่วนใหญ่จะมีเซ็นเซอร์วัดอุณหภูมิที่ป้องกันการชาร์จเกินช่วงปลอดภัย
3. เพิกเฉยต่ออัตราความจุเมื่อกำหนดกระแสชาร์จ
“อัตรา C” สำคัญมาก หลายคนตั้งค่าที่ชาร์จเป็นกระแสสูงสุดที่สามารถทำได้ ซึ่งอาจทำให้แบตเตอรี่เสียหาย
ตัวอย่างเช่น การชาร์จแบตเตอรี่ 1500mAh ที่ 3A (3000mA) หมายถึงอัตรา 2C – สูงเกินไปสำหรับแบตเตอรี่ 18650 มาตรฐานส่วนใหญ่
4. ปล่อยให้แบตเตอรี่ชาร์จเป็นเวลาหลายวัน
“ตั้งแล้วปล่อยเลย” ไม่เหมาะสมกับการชาร์จลิเทียมไอออน แม้จะมีการตัดไฟอัตโนมัติ การปล่อยให้แบตเตอรี่ชาร์จเป็นเวลานานอาจทำให้แบตเตอรี่เสื่อมสภาพโดยไม่จำเป็น
เคล็ดลับการชาร์จขั้นสูงเพื่ออายุแบตเตอรี่สูงสุด
ตอนนี้เรามาพูดถึงเทคนิคการชาร์จแบตเตอรี่ลิเทียมไอออนที่สามารถยืดอายุการใช้งานของแบตเตอรี่ได้อย่างมีนัยสำคัญ ซึ่งเป็นจุดที่การชาร์จอย่างถูกต้องคุ้มค่าจริงๆ
การชาร์จบางส่วนเพื่ออายุการใช้งานที่ยาวนานขึ้น
นี่คือสิ่งที่ขัดแย้งกับความรู้สึกทั่วไป: การชาร์จเต็มและการปล่อยเต็มจริงๆ ทำให้แบตเตอรี่ลิเทียมไอออนเสื่อมเร็วขึ้น
งานวิจัยแบตเตอรี่แสดงให้เห็นว่าการรักษาแบต 18650 ให้อยู่ระหว่าง 30% ถึง 80% สามารถเพิ่มอายุรอบการใช้งานได้เกือบสองเท่า
สำหรับแบตเตอรี่ที่คุณไม่จำเป็นต้องใช้เต็มความจุ ลองพิจารณา:
-
ชาร์จเพียง 80-90% (ประมาณ 4.1V แทน 4.2V)
-
ชาร์จใหม่เมื่อแบตเตอรี่ถึง 30-40% (ไม่ต้องปล่อยให้หมดสนิท)
บางเครื่องชาร์จขั้นสูงอนุญาตให้คุณตั้งค่าสูงสุดของแรงดันไฟฟ้าที่ต่ำกว่า 4.2V เพื่อวัตถุประสงค์นี้โดยเฉพาะ
อัตราการชาร์จที่เหมาะสมตามการใช้งาน
ขึ้นอยู่กับวิธีการใช้งานแบตเตอรี่ การตั้งค่าการชาร์จที่แตกต่างกันก็สมเหตุสมผล:
-
สำหรับอายุรอบสูงสุด: ชาร์จที่ 0.3C หรือต่ำกว่า
-
สำหรับการใช้งานในชีวิตประจำวัน: ชาร์จที่ 0.5C
-
สำหรับการใช้งานฉุกเฉินเป็นครั้งคราว: การชาร์จมาตรฐานก็เพียงพอแล้ว
-
สำหรับแบตเตอรี่ที่เก็บในระยะยาว: ควรชาร์จที่ 40-60% คงที่
การชาร์จเก็บรักษา
ถ้าคุณจะไม่ใช้แบตเตอรี่เป็นเวลาหลายสัปดาห์หรือหลายเดือน อย่าเก็บไว้ในสภาพชาร์จเต็ม แทนที่จะเป็น:
-
ชาร์จหรือปล่อยไฟจนเหลือประมาณ 3.7-3.8V (ประมาณความจุ 40-60%)
-
เก็บในที่เย็น (15-20°C / 59-68°F เป็นอุณหภูมิที่เหมาะสม)
-
ตรวจสอบแรงดันไฟฟ้าทุกไม่กี่เดือน
-
ชาร์จใหม่เป็น 40-60% หากแรงดันต่ำกว่า 3.6V
การปฏิบัตินี้ง่ายๆ สามารถลดการสูญเสียความจุในระหว่างการเก็บรักษาได้อย่างมาก
การแก้ไขปัญหาการชาร์จแบตเตอรี่ 18650
แม้จะมีอุปกรณ์และเทคนิคที่เหมาะสม คุณอาจพบปัญหา นี่คือวิธีจัดการกับปัญหาที่พบบ่อยที่สุด:
แบตเตอรี่ไม่ถูกตรวจพบโดยเครื่องชาร์จ
ถ้าที่ชาร์จของคุณไม่ตรวจจับแบตเตอรี่:
-
ตรวจสอบแรงดันไฟฟ้า – อาจปล่อยไฟหมดเกินไป (ต่ำกว่า 2.5V)
-
ทำความสะอาดขั้วต่อ – การกัดกร่อนอาจทำให้การติดต่อไม่ดี
-
ตรวจสอบห่อหุ้ม – ความเสียหายอาจทำให้เกิดวงจรลัด
-
ลองช่องเสียบอื่น – บางครั้งช่องชาร์จหนึ่งอาจล้มเหลว
สำหรับแบตเตอรี่ที่ปล่อยไฟหมดอย่างรุนแรง ที่ชาร์จขั้นสูงบางรุ่นมี “โหมดกู้คืน” ที่สามารถนำแบตเตอรี่กลับมามีชีวิตได้ หากของคุณไม่มี ลองพิจารณาเปลี่ยนแบตเตอรี่
เครื่องชาร์จแสดงรหัสข้อผิดพลาด
เครื่องชาร์จคุณภาพส่วนใหญ่จะแสดงรหัสข้อผิดพลาดเฉพาะ ซึ่งมีทั่วไปดังนี้:
-
ข้อผิดพลาดด้านอุณหภูมิ – ให้แบตเตอรี่เย็นลงหรืออุ่นขึ้น
-
ขั้วไฟฟ้าสลับทิศทาง – ใส่แบตเตอรี่ให้ถูกต้องอีกครั้ง
-
ตรวจพบแบตเตอรี่เสียหาย – เปลี่ยนแบตเตอรี่
-
แรงดันไฟฟ้าสูง/ต่ำเกินไป – อาจบ่งชี้ว่าเซลล์ไม่มาตรฐานหรือเสียหาย
ตรวจสอบคู่มือที่ชาร์จของคุณเสมอเพื่อดูความหมายเฉพาะของรหัสข้อผิดพลาด
แบตเตอรี่ชาร์จเร็วเกินไป
หากแบตเตอรี่ชาร์จเสร็จอย่างน่าสงสัยเร็ว:
-
ความจุจริงน่าจะต่ำกว่าที่ระบุไว้มาก
-
อาจใกล้หมดอายุการใช้งาน
-
อาจมีวงจรลัดภายใน (อันตราย!)
แบตเตอรี่ที่ชาร์จเร็วเกินไปควรทดสอบความจุหรือรีไซเคิล
สรุปโดยย่อ: การชาร์จแบตเตอรี่ 18650 อย่างปลอดภัย
ตลอดคู่มือนี้ เราได้ครอบคลุมทุกสิ่งที่คุณจำเป็นต้องรู้เกี่ยวกับ วิธีการชาร์จแบตเตอรี่ 18650 การชาร์จอย่างถูกต้อง มาทบทวนจุดสำคัญที่สุดกัน:
-
ใช้ที่ชาร์จแบตเตอรี่ลิเธียมไอออนโดยเฉพาะพร้อมคุณสมบัติด้านความปลอดภัยที่เหมาะสมเสมอ
-
ตรวจสอบแบตเตอรี่ก่อนชาร์จและอย่าชาร์จเซลล์ที่เสียหาย
-
ชาร์จด้วยอัตรากระแสที่เหมาะสม (0.5C เป็นจุดที่ดีที่สุดสำหรับการใช้งานส่วนใหญ่)
-
เก็บแบตเตอรี่ที่ความจุ 40-60% เมื่อไม่ได้ใช้งาน
-
อย่าปล่อยแบตเตอรี่ที่กำลังชาร์จทิ้งไว้โดยไม่มีผู้ดูแล
-
พิจารณาการชาร์จบางส่วน (ถึง 80-90%) เพื่อยืดอายุแบตเตอรี่สูงสุด
โปรดจำไว้ว่าการดูแลแบตเตอรี่ให้ถูกต้องไม่ใช่แค่เรื่องความปลอดภัยเท่านั้น แต่ยังเป็นเรื่องความประหยัดอีกด้วย แบตเตอรี่ 18650 ที่ดูแลอย่างดีสามารถใช้งานได้นานหลายปี ช่วยประหยัดเงินและลดของเสีย
ถ้าคุณยังสงสัยอยู่แน่ๆ คุณจะชาร์จแบตเตอรี่ 18650 อย่างไร สำหรับการใช้งานเฉพาะของคุณ ให้ปฏิบัติตามแนวทางของผู้ผลิตทั้งแบตเตอรี่และที่ชาร์จ พวกเขาจะให้คำแนะนำที่เฉพาะเจาะจงที่สุดสำหรับอุปกรณ์ของคุณ
วิธีการชาร์จใดที่ได้ผลดีที่สุดสำหรับคุณ? แจ้งให้ฉันทราบในคอมเมนต์ด้านล่าง!


