Golf Arabası için Lityum Pil: 2025 Tam Yükseltme Rehberi
Golf arabası için lityum pil Yükseltmeler şu anda popülerlikte patlama yaşıyor. Ve bunun iyi bir nedeni var.
Yakın zamanda bir arkadaşımın Club Car'ını kurşun-asit yerine lityum pil ile değiştirmesine yardım ettim. Fark nedir? Gündüz ve gece gibi.
Arabası yokuşlarda zorlanmaktan düz zeminde sürüyormuş gibi rahatlamıştı. Ayrıca, 6 aydır hiç pil bakımı aracı kullanmadı.
İşte mesele şu:
Çoğu golf arabası sahibi, eski usul pillerle ciddi performans kaybı yaşadıklarının farkında değil.
Bu nedenle bu rehberde, bir profesyonel olarak lityum pil paketi üreticisi, size tam olarak neden lityum pillerin kurşun-asidi ezdiğini göstereceğim. Ve arabanız için en uygun olanı nasıl seçeceğinizi anlatacağım.
Haydi başlayalım.
Neden Lityum Piller Golf Arabalarını Ele Geçiriyor
İşte beni şaşırtan bir istatistik:
Golf arabası lityum pil satışları geçen yıl 1 arttı. Ve 2027'ye kadar ikiye katlanması bekleniyor.
Bu büyük değişimin nedeni nedir?
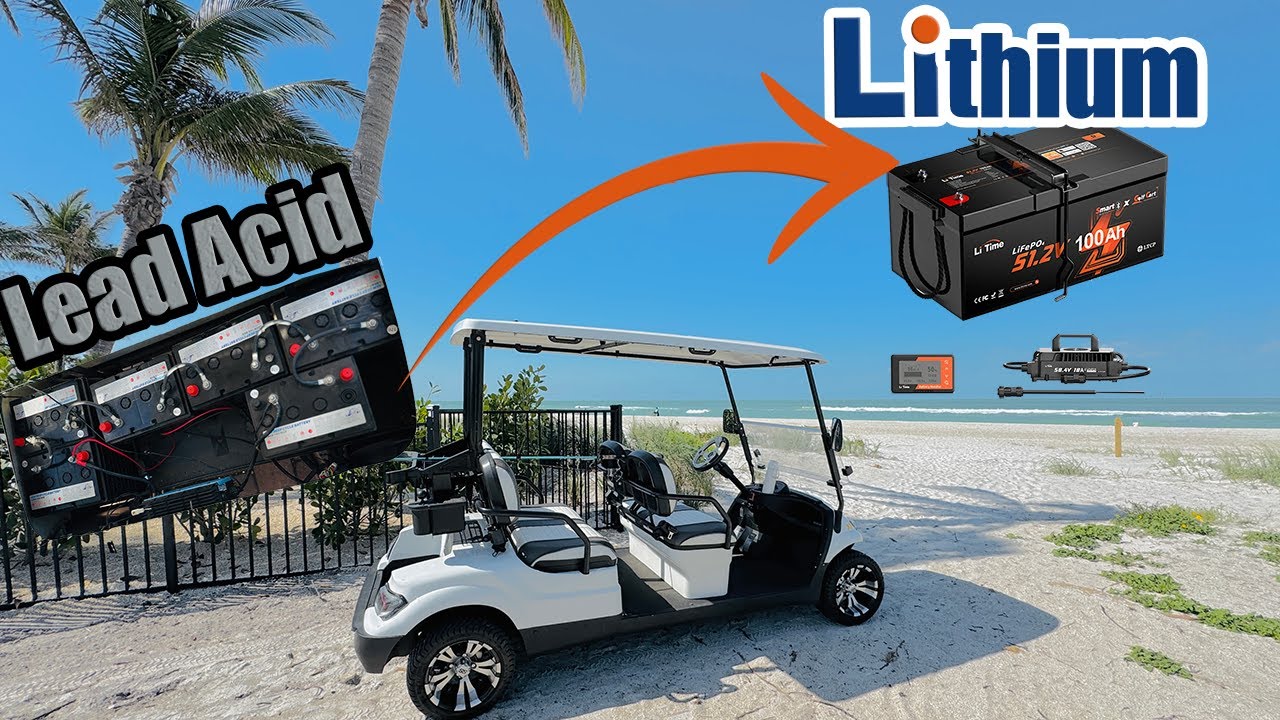
Basit: Lityum demir fosfat (LiFePO4) pilleri, kurşun-asit pillerin neredeyse tüm sorunlarını çözüyor.
Ağırlık Avantajı Her Şeyi Değiştiriyor
Kurşun-asit piller AĞIRdır.
Yani, tipik 48V sistem için 300-400 pound ağırlığında.
Lityum? 90-120 pound civarında.
Bu, 70% ağırlık azaltımıdır. Yani:
- Arabanız daha hızlı hızlanır
- Yokuşlar çok daha kolay hale gelir
- Lastiklerinize ve süspansiyonunuza daha az aşınma olur
- Genel kullanımda daha iyi kontrol sağlar
Sadece ağırlık tasarrufu sayesinde arabaların 3-5 mph kazandığını gördüm.
Neredeyse sonsuza kadar dayanır
Bu sayılara bir bakın:
- Kurşun-asit piller: 500-1.000 şarj döngüsü
- Lityum piller: 2.000-5.000 döngü
Çeviri? Lityum piliniz 8-10 yıl dayanabilir. Kurşun-asit? Sadece 3-5 yıl şanslı olursunuz.
Ve işte püf noktası:
Lityum piller performanslarını tüm süre boyunca korur. Kurşun-asit ise ilk günden itibaren bozulmaya başlar.
Sıfır Bakım Gerektirir
Su seviyelerini kontrol etmeyi hatırlıyor musunuz? Korozyon temizliği? Asit döküntüleriyle uğraşmak?
Evet, bunların hepsini unutun.
Lityum piller tam anlamıyla sıfır bakım gerektirir. Kurulumunu yapın ve unutun.
Konuştuğum bir tesis sahibi, filolarını lityuma geçirdikten sonra pil bakımı için ayda 15 saat tasarruf etti.
Golf Arabaları İçin Doğru Lityum Pil Nasıl Seçilir
Tüm lityum piller eşit değildir.
İşte dikkat edilmesi gerekenler:
Adım 1: Geriliminizi Eşleştirin
Bu çok önemli.
Çoğu golf arabası şu sistemlerle çalışır:
- 36V sistemler (eski modeller)
- 48V sistemler (en yaygın)
- 72V sistemler (yüksek performanslı)
Yanlış voltaj takmak, arabanızın elektroniklerini yakabilir. Bu yüzden önce mevcut kurulumunuzu iki kez kontrol edin.
İpucu: Sandalyenizin altında bir etiket arayın veya kullanım kılavuzunuza bakın.
Adım 2: Doğru Kapasiteyi Seçin (Amper Saatleri)
Kapasite menzilinizi belirler. İşte kullanımınıza göre önerim:
Hafif Kullanım (9-18 delik, düz arazi)
- 60-80Ah kapasite
- Menzil: 32-48 km
Standart Kullanım (36 delik, bazı tepeler)
- 100-105Ah kapasite
- Menzil: 56-80 km
Yoğun Kullanım (tüm gün, engebeli parkurlar)
- 150Ah+ kapasite
- Menzil: 50-70+ mil
Çoğu kişi 48V sistem için 100Ah tercih eder. Bu, menzil ve maliyetin tatlı noktasıdır.
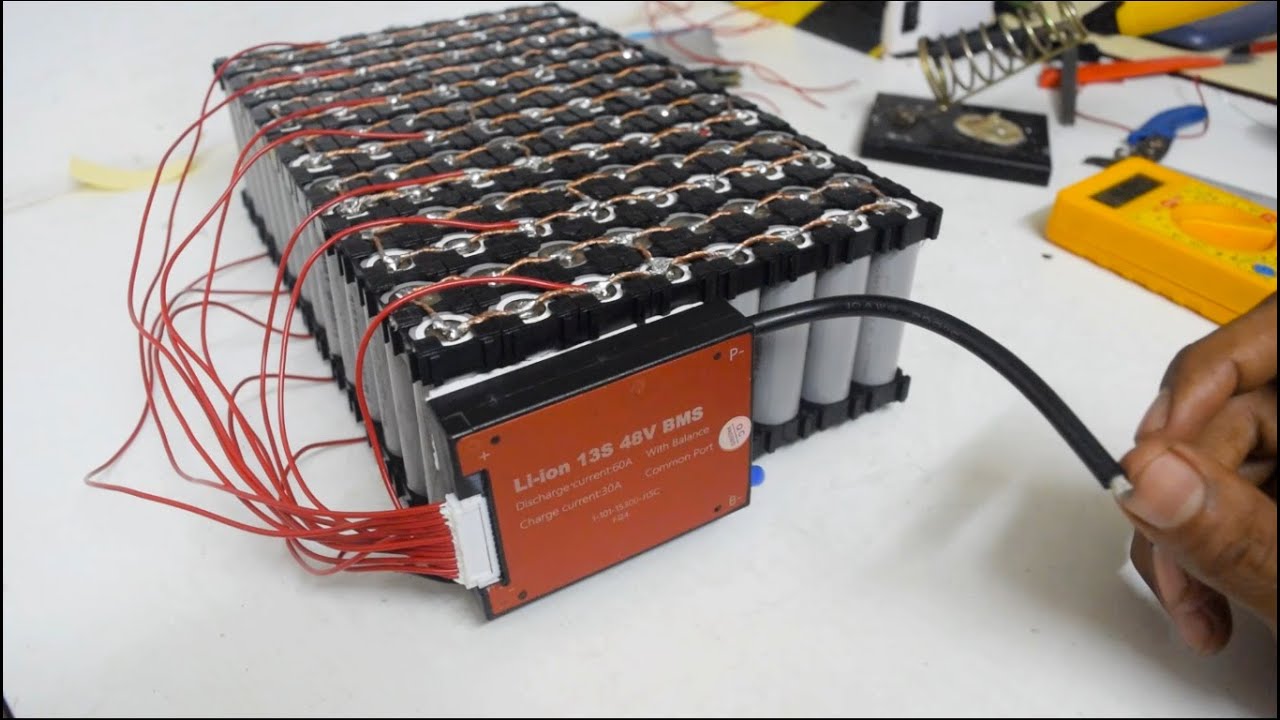
Adım 3: BMS'yi (Batarya Yönetim Sistemi) Kontrol Edin
The BMS bataryanızın beyni gibidir. İyi bir BMS korur:
- Aşırı şarj
- Aşırı deşarj
- Kısa devreler
- Sıcaklık aşırılıkları
Burada ucuz davranmayın. Kaliteli bir BMS, gerçekten bataryanızı (ve arabanızı) hasardan koruyabilir.
Gerçek Performans Sayıları Önemlidir
Size 2025'ten bazı gerçek test verilerini paylaşayım:
Kurşun-asit bataryalı standart EZ-GO RXV:
- Azami hız: 19.2 mil/saat
- Menzil: 28 mil
- Yokuş çıkma yeteneği: Orta
Aynı araba 105Ah lityum ile:
- Azami hız: 22.1 mil/saat
- Menzi̇l: 48 mil
- Yokuş çıkma yeteneği: Mükemmel
Bu pazarlama abartısı değil. Bunlar gerçek dünya rakamları.
Kurulum: Düşündüğünüzden Daha Kolay
Ne düşündüğünüzü biliyorum:
“Bu karmaşık geliyor.”
Ama gerçek şu ki: Çoğu lityum dönüşüm 1-2 saat sürer. Maksimum.
Temel Süreç
- Eski pilleri çıkarın (eldiven takın – ağır ve sızdırma ihtimali yüksek)
- Pil tepsisini temizleyin (korozyon varsa temizleyin)
- Lityum paketi takın (çoğu mükemmel uyacak şekilde tasarlanmıştır)
- Kabloları bağlayın (kırmızı pozitif, siyah negatif)
- Yeni şarj cihazını kurun (lityum farklı bir şarj profilini gerektirir)
- Her şeyi test edin (voltaj, tam 48V paket için yaklaşık 51.2V okuması gerekir)
İşte bu kadar. Ciddiyim.
Allied Lithium ve Eco Battery gibi birçok marka hatta adım adım videolar da içeriyor.
Para Sorusu: Değmeye Değiyorlar mı?
Hadi dolarlar ve kuruşlar hakkında konuşalım.
Peşin maliyetler:
- Kurşun-asit set: $800-1.500
- Lityum set: $2.000-3.500
Pahalı görünüyor, değil mi?
Ama şunu kontrol et:
10 yılda, kurşun-asit piller 2-3 kez alınacak. Ayrıca bakım malzemeleri. Ayrıca elektrik israfı (lityum 40% daha verimli şarj olur).
Sayısal olarak hesapladığınızda, lityum aslında yaklaşık 5 yıl sonra PARA TASARRUFU sağlar.
İşte Florida'daki bir golf sahasından gerçek bir örnek:
2023'te 50 aracı lityuma geçirdi. İlk yatırım: $125.000.
2025'e kadar tasarruf:
- Pillerin değiştirilmesi önlendi: $40.000
- Bakım işçiliği: $36.000
- Elektrik: $8.000
Şimdiden $84.000 önde. 5+ yıl pil ömrü kaldı.
2025 için En İyi Lityum Pil Seçenekleri Golf Arabaları
Araştırmalarıma ve kullanıcı geri bildirimlerine dayanarak, işte öne çıkanlar:
En İyi Genel: Eco Battery 48V 105Ah
- 5.000 döngü ömrü
- Bluetooth izleme
- Tak-çıkar hazır
- Fiyat: $2.800-3.200
En İyi Değer: Bolt Energy 48V 105Ah
- Harika performans
- 10 yıl garanti
- Sadece 25 kilogram
- Fiyat: $2.500-2.900
Modifiye Arabalar İçin En İyi: Allied Lithium
- Yüksek deşarj oranları
- Özelleştirilmiş konfigürasyonlar
- Kanıtlanmış güvenilirlik
- Fiyat: $2.200-2.700
Kaçınılması Gereken Yaygın Hatalar
Lityum yükseltmelerini bozmuş insanların olduğunu gördüm. İşte YAPMAMANIZ GEREKENLER:
Hata #1: Yanlış şarj cihazı kullanmak
Kurşun-asit şarj cihazları lityum pillerine zarar verir. Her zaman lityum özel şarj cihazı kullanın.
Hata #2: Pil türlerini karıştırmak
Lityum ile kurşun-asidi asla karıştırmayın. Asla. Bu tehlikelidir ve her iki pili de yok eder.
Hata #3: Sıcaklık sınırlarını dikkate almamak
Aşırı soğuk (0°F altı) geçici olarak kapasiteyi azaltabilir. Mümkünse arabanızı daha sıcak bir yerde saklayın.
Hata #4: Tanınmamış markalar satın almak
Kurulu şirketlerle devam edin. Kötü bir BMS gerçekten yangınlara neden olabilir.
Gelecek Zaten Burada
Büyük üreticiler dikkat çekiyor.
Club Car artık fabrika seçeneği olarak lityum sunuyor. Yamaha da aynısını yapıyor. Hatta EZ-GO 2024'te katıldı.
Bu, sektörün nereye gittiği hakkında size her şeyi söylüyor.
Hızlı Bakım İpuçları
Lityum piller temelde bakım gerektirmese de, maksimum ömür için şu ipuçlarını izleyin:
- Her kullanımdan sonra şarj edin (kısmi şarjlar sorun değil)
- Aylarca kullanılmayacaksa 50-60% şarjda saklayın
- Bağlantıları temiz ve sıkı tutun
- Mevcutsa BMS yazılımını güncelleyin
- Tamamen boş kalmaya uzun süre bırakmaktan kaçının
Bu, yılda yaklaşık 10 dakika çalışma demektir.
Gerçekten Önemli Çevresel Etki
İşte biraz havalı:
Lityum piller kurşun-asitten çok daha çevreci. Zehirli kurşun yok. Asit dökülmesi yok. Ve % geri dönüştürülebilirler.
Üstelik, 3 kat daha uzun ömürlü oldukları için çok daha az atık oluşturuyorsunuz.
Bir golf sahası, lityuma geçerek önümüzdeki on yıl içinde 12.000 pound kurşun-asit atığını önleyeceklerini hesapladı.
Kararınızı Verme
Sonuç nedir?
Arabanızı düzenli kullanıyorsanız ve 3 yıldan fazla tutmayı planlıyorsanız, lityum mantıklı olur.
Performans artışları tek başına buna değer. Bakım tasarrufları ve daha uzun ömür eklenince? Bu kesinlikle mantıklı.
Kurşun-asit kullanmaya devam etmenin tek nedeni şu durumlar olabilir:
- Arabanızı nadiren kullanıyorsunuz
- Bütçe şu anda çok kısıtlı
- Yakında satacaksınız
Aksi takdirde? Geçiş yapın.
Son Düşünceler
Golf arabası için lityum pil Dönüşümler, mantıklı olan yükseltmelerden biridir.
Daha iyi performans. Daha az zahmet. Daha düşük uzun vadeli maliyetler.
Geri dönüşüm yapmaktan pişman olan biriyle henüz tanışmadım. Ama daha önce yapmış olmayı dileyen birçok kişiyle tanıştım.
Teknoloji kanıtlandı. Fiyatlar makul. Ve faydalar hemen görülüyor.
Ne bekliyorsunuz?