Common Problems with Cordless Vacuums and How to Fix Them

The “Big Three” Performance Killers: Battery Anxiety and Degradation

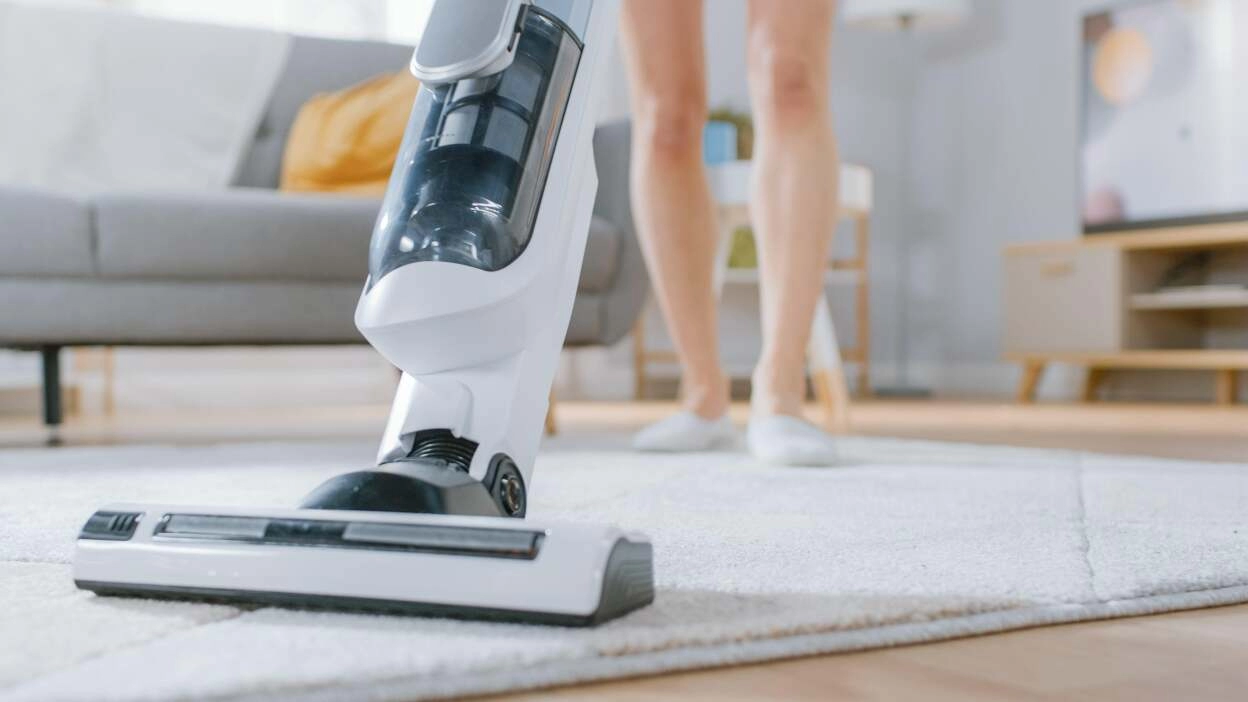
We all know the feeling: you’re halfway through cleaning the living room, and the vacuum motor starts to whine, slow down, and eventually cut out completely. As engineers, we know that the heart of any cordless appliance is its power source. When asking what are common problems with cordless vacuums, the answer almost always points back to the battery technology. Here is the reality behind the “Big Three” issues that plague most consumer models.

The Runtime Myth: Why “up to 40 minutes” often means 10 minutes on “Max Mode”

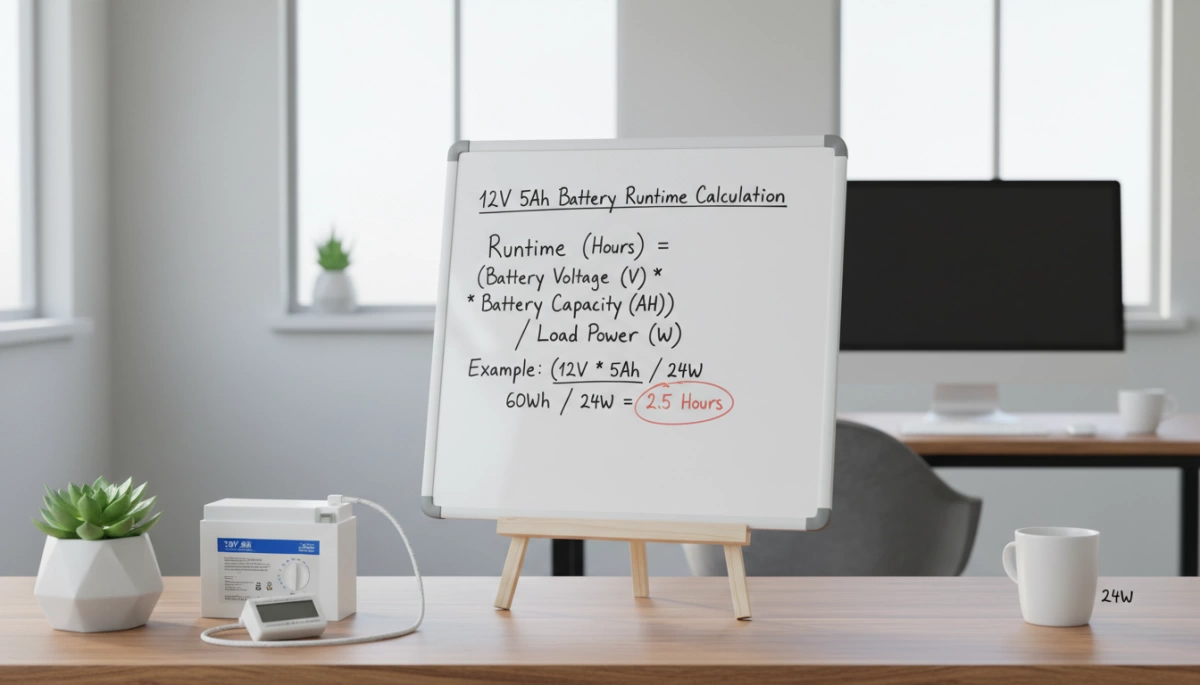
Marketing specs can be incredibly misleading. You see “40-minute runtime” on the box, but that number is usually tested in “Eco Mode” with no motorized attachments running. The moment you switch to “Max Mode” to pull pet hair out of a carpet, the current draw spikes massively.

  • The Math: High suction requires high wattage. A standard battery pack simply drains faster under that load.
  • The Reality: Runtime on max mode often drops to a frustrating 6–10 minutes on standard models.

At Van4NU, we focus on high-capacity Li-ion cells (like 21700 formats) that offer higher energy density. This means we can pack more actual power into the same footprint, bridging the gap between marketing claims and real-world cleaning time.

Fade-Free Power: The difference between consistent suction and power that drops

Have you noticed your vacuum sounding “tired” as the battery bar drops? That is voltage sag, a symptom of poor power management. In cheaper systems, as the battery charge depletes, the voltage supplied to the motor drops, resulting in suction power loss right when you need it most.

True Fade-Free Power requires:

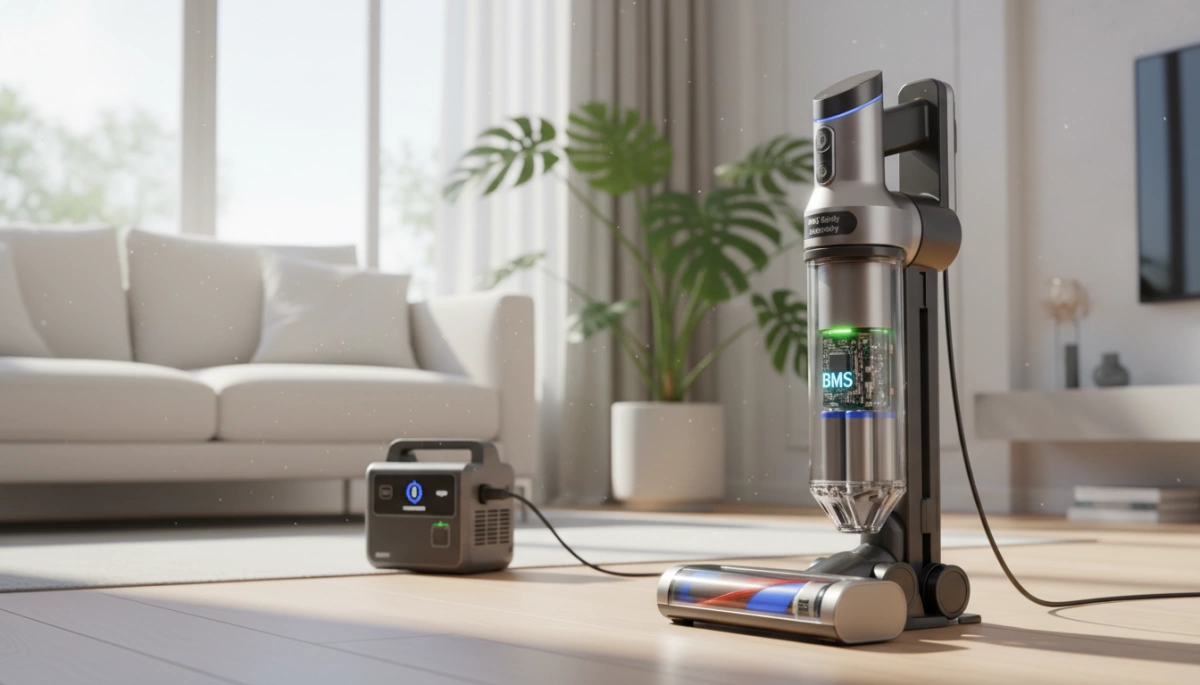
  • Advanced BMS: A Battery Management System that regulates output.
  • Consistent Voltage: Delivering steady power from 100% charge down to 1%.

We engineer our systems to maintain that “fresh off the charger” performance until the very last second. You shouldn’t have to guess if your vacuum is actually cleaning just because the battery is at 20%.

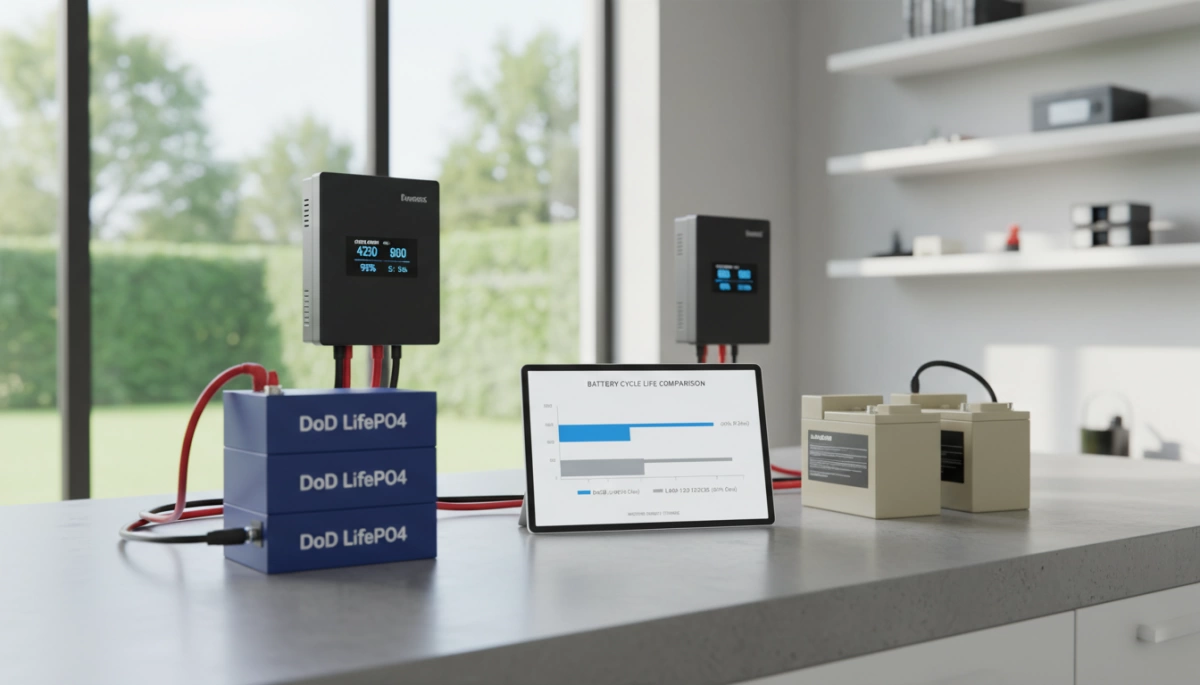
Lifespan Issues: The “throwaway culture” of non-removable batteries

Nothing is more frustrating than a perfectly good motor trapped inside a unit with a dead battery. Lithium-ion battery degradation is a chemical reality; all batteries lose capacity after a few hundred charge cycles.

  • The Problem: Many brands seal the battery inside the handle. When the battery dies, the whole vacuum becomes e-waste.
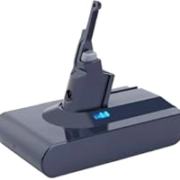
  • The Solution: A removable battery pack.

We champion modular designs. By allowing users to swap out the power pack, we extend the appliance’s life by years. It turns a catastrophic failure into a simple maintenance step, saving your wallet and the landfill.

Suction Power vs. Airflow Blockages

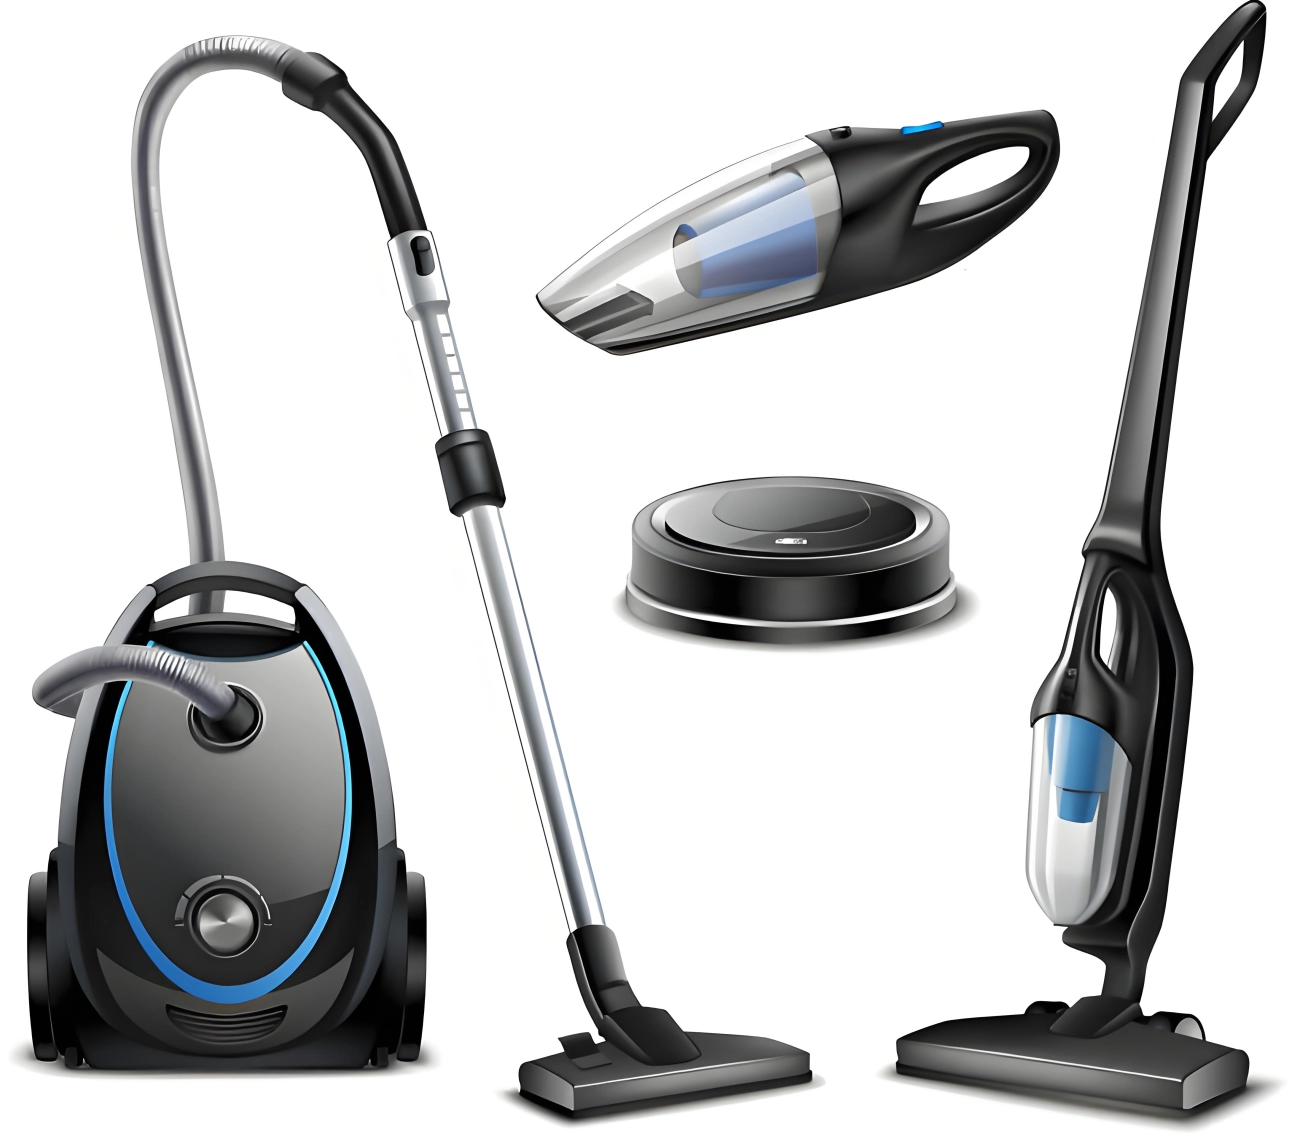
The Power Gap: Corded vs. Cordless Suction

When we compare cordless vs. corded suction, there is an undeniable physics challenge. Corded vacuums draw consistent amperage directly from the wall, allowing them to generate massive Pascal (Pa) pressure continuously. Cordless units are strictly limited by the battery’s discharge rate. Even with a high-end brushless digital motor, if the power source cannot sustain high voltage under load, the user experiences immediate suction power loss. The gap is narrowing, but it requires battery packs capable of high-drain output to match the raw lift of a plug-in canister.

The Filter Clog: Fine Dust and Pre-Motor Filters

Often, what feels like a dying battery is actually an airflow issue. Fine dust particles frequently bypass the primary cyclone and cake onto the pre-motor filters. This creates a dense wall that restricts air intake, choking the motor and reducing suction efficiency significantly.

  • Rapid Clogging: Drywall dust or baking soda can clog a filter in seconds.
  • Heat Buildup: Restricted airflow prevents the motor from cooling, triggering thermal shutoffs.
  • False Diagnostics: Users often replace the battery when airflow blockage troubleshooting and filter cleaning are actually required.

Carpet Performance on High-Pile Rugs

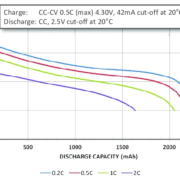
Deep carpet cleaning remains the ultimate stress test for battery-operated devices. High-pile rugs create immense friction against the brush roll, forcing the motor to demand a sudden, massive spike in current to keep spinning. Standard batteries often fail here because they cannot deliver that burst of energy quickly enough. To prevent this, we utilize advanced testing methods, such as interpreting dQ/dV graphs for battery analysis, to ensure our cells maintain stability and power delivery even during the high-torque demands of cleaning thick carpets.

The Small Dust Bin Dilemma

cordless vacuum dustbin capacity tradeoff

Frequent Trips to the Trash

The biggest trade-off in optimizing stick vacuum weight distribution is almost always the collection capacity. To keep the unit lightweight enough for comfortable one-handed use, manufacturers often shrink the canister size. For the average American home—especially those with shedding pets—this creates a frustrating workflow interruption.

You aren’t just cleaning; you are constantly monitoring the fill line. A standard 0.4L to 0.6L dust bin capacity fills up incredibly fast when tackling high-pile carpets or heavy debris. Instead of cleaning the whole floor in one go, you are forced to stop, walk to the garbage, and reset multiple times per session. This inefficiency highlights why optimizing internal space—using compact components like high-density batteries—is critical for maximizing bin volume without increasing the device’s overall footprint.

The Messy Emptying Process

The convenience of “bagless” often disappears the moment you open the latch. Because the bins are compact, debris gets compacted tightly around the inner shroud, leading to the “dust cloud” problem.

  • The “Dig Out” Factor: Gravity isn’t always enough. Users often have to reach in with their fingers or a tool to dislodge clumps of hair and dust that refuse to drop.
  • Re-contamination: Releasing the dirt creates a plume of fine particulate matter. If you suffer from allergies, this “puff” of dust re-entering the air immediately counteracts the benefits of a high-quality filtration system.

Ergonomics and Durability Issues

When shifting from corded units to battery-operated systems, the physical burden moves from the floor to the user’s hand. This introduces distinct design challenges that directly impact user comfort and the long-term viability of the appliance.

Top-Heavy Design Strain

In traditional vacuums, the heavy components sit on the ground. In contrast, cordless stick vacuums cluster the motor, filtration system, and battery pack near the handle. This specific stick vacuum weight distribution creates a lever effect, placing significant torque on the wrist. Users frequently report wrist fatigue after just a few minutes of cleaning, particularly when reaching for overhead cobwebs or maneuvering around furniture. At Nuranu, we focus on high-energy-density cells to keep battery packs compact, helping manufacturers reduce this top-heavy sensation.

Trigger Finger Fatigue

To maximize runtime, many models utilize a “hold-to-run” trigger. While this prevents battery drain when moving between rooms, it requires constant finger pressure. This leads to cramping and discomfort during larger jobs. While effective for power management, it is often cited as a major annoyance compared to simple on/off switches found on corded counterparts.

Durability of Lightweight Plastics

To compensate for the weight of the motor and battery, manufacturers often utilize thinner, lightweight plastics for the body and dust bin. This trade-off often compromises structural integrity:

  • Fragile Components: Dust bins and latches are prone to cracking if the unit is dropped or tipped over.
  • Wear and Tear: Frequent opening of the bin wears down plastic catch mechanisms, leading to loose seals.
  • Internal Pressure: If the power source isn’t managed correctly, thermal issues or expansion can stress the housing. Understanding what causes lithium-ion battery swelling is essential for preventing internal battery failures that can crack or deform these lightweight plastic casings.

Balancing a lightweight form factor with the ruggedness required for daily household use remains a critical engineering hurdle.

The Hidden Maintenance Burden

Owning a cordless vacuum often feels like a trade-off: you ditch the cord, but you inherit a new set of chores. Many users don’t realize that keeping these machines running requires a strict maintenance routine, or performance drops off a cliff. We see this constantly in the industry—great hardware fails early simply because the upkeep is more demanding than consumers expect.

Hair Wrap Headaches

If you have pets or long hair in your home, the brush roll is your enemy. Without advanced anti-tangle technology, hair tightly winds around the roller, stopping the bristles from agitating the carpet effectively.

  • Manual Removal: You often end up flipping the vacuum over and using scissors to cut through layers of wrapped hair.
  • Motor Strain: A jammed brush roll forces the motor to work harder, draining the battery faster and risking vacuum overheating protection shutdowns.

Filter Washing Schedule

The sealed filtration system in modern stick vacuums is great for air quality, but it clogs faster than bagged units. Fine dust coats the pre-motor filter, choking off airflow.

  • Odor Buildup: Neglected filters start to smell like old dog or stale dust.
  • Performance Loss: A clogged filter kills suction power instantly.
  • Component Stress: Restricted airflow causes heat buildup. Excessive heat is actually one of the two major reasons affecting the service life of 18650 lithium batteries, leading to premature failure of the power pack. HEPA filter maintenance isn’t optional; it’s critical for longevity.

Blockage Hunting

When your vacuum starts making a “pulsing” sound (revving up and down), it’s usually a distress signal. This indicates a blockage somewhere in the air path. Airflow blockage troubleshooting involves dismantling the unit to check the wand, the bin inlet, and the cleaner head. It’s a messy process that turns a quick cleanup into a 20-minute repair job.

How to Avoid Common Cordless Vacuum Pitfalls (The Van4NU Solution)

Cordless Vacuum Battery and Motor Issues Solution

We know that a cordless vacuum is only as reliable as the power system driving it. At Van4NU, we tackle the “throwaway culture” of appliances by engineering robust energy solutions that address the root causes of failure. By integrating advanced lithium technology with smart design, we help manufacturers eliminate the frustrations of weak suction and short lifespans.

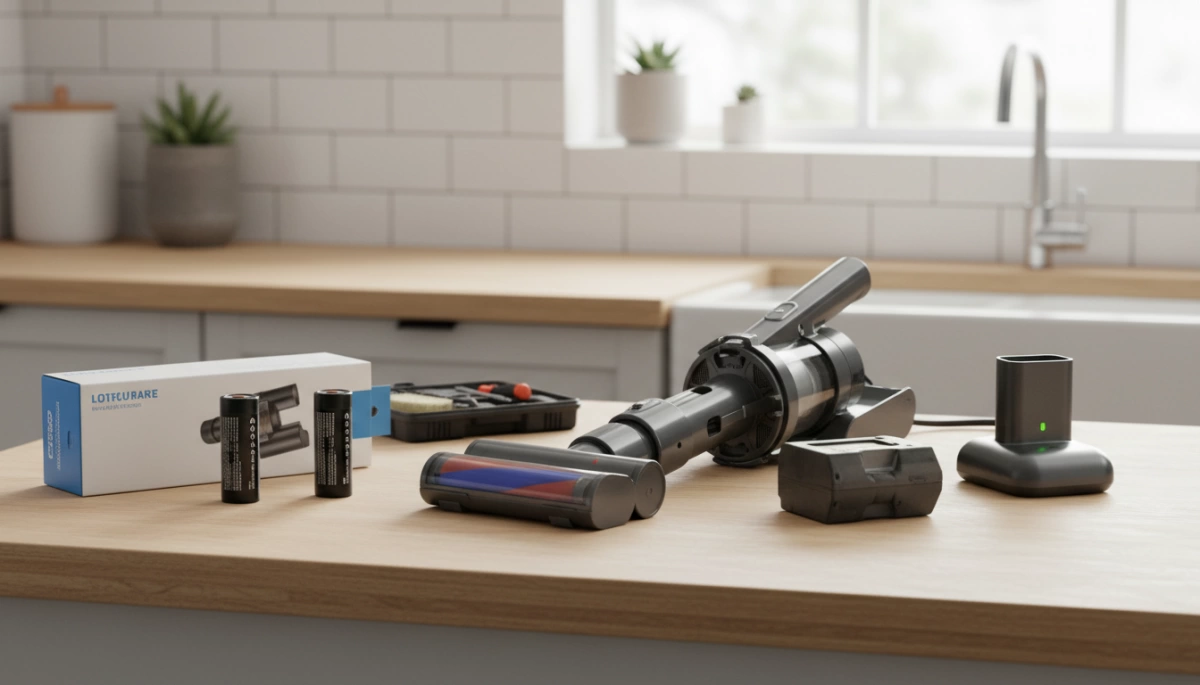
The Battery Solution: Swappable Batteries & Power Management

The biggest flaw in many stick vacuums is a non-removable power source. When the cells die, the whole machine becomes trash. We advocate for and manufacture removable battery pack systems using high-quality 18650 and 21700 cells. This allows users to swap packs for extended cleaning sessions without waiting for a recharge.

Our custom Battery Management Systems (BMS) are the brain behind the brawn. They actively monitor voltage and temperature to prevent lithium-ion battery degradation. Understanding the safety mechanisms inside these packs is crucial; for instance, knowing the difference between protected 18650 batteries vs unprotected 18650 batteries ensures we deliver safe, long-lasting power.

Our Power Management Advantages:

  • Consistent Voltage: Prevents power fade as the battery drains.
  • Thermal Safety: Advanced heat dissipation prevents shutdowns.
  • Extended Cycle Life: Optimized charging protocols reduce wear.

Smart Motor Technology: Brushless Efficiency

Raw power means nothing if it overheats the machine. We pair our high-discharge lithium packs with modern brushless digital motor technology. Unlike older brushed motors that generate friction and heat, brushless systems are more efficient and durable.

Our 24V and 36V battery platforms provide the sustained amperage needed to run these motors at peak performance. This eliminates suction power loss and ensures the vacuum can actually handle deep carpet cleaning without triggering vacuum overheating protection circuits prematurely.

User-Centric Design Features

By switching to energy-dense lithium solutions, we reduce the weight of the power pack by up to 70% compared to older technologies. This weight reduction allows for better ergonomics and frees up space for essential features like larger dust bins and advanced filtration systems.

Optimized Design vs. Standard Issues:

Feature Standard Vacuum Issue The Van4NU Approach
Runtime 10 mins on “Max Mode” Optimized runtime on max mode via high-capacity cells
Filtration Clogged filters reduce airflow Consistent power maintains airflow for HEPA filter maintenance
Emptying Messy, complicated bins Compact battery allows space for one-touch empty mechanisms

We focus on the “drop-in” capability of our technology, meaning we can upgrade existing product lines from concept to production in weeks, ensuring the end user gets a powerful, lightweight tool that actually lasts.

Frequently Asked Questions About Cordless Vacuum Problems

Do cordless vacuums lose suction over time?

Yes, but it isn’t always the motor’s fault. Suction loss usually happens for two main reasons: blocked airflow or battery degradation. As filters get clogged with fine dust, the airflow drops significantly. On the power side, older battery technologies or poorly designed packs suffer from voltage sag as they deplete. We focus on engineering lithium-ion battery packs with stable discharge curves, ensuring the vacuum maintains consistent suction from the first minute to the last, rather than fading as the charge drops.

How long do cordless vacuum batteries actually last?

Most standard lithium-ion batteries in vacuums are rated for about 300 to 500 charge cycles. For the average American household, this translates to roughly 2 to 4 years of useful life before you notice a significant drop in runtime. However, heat and storage habits play a huge role. Leaving a battery on the charger in a hot room can degrade it faster. If you are unsure if your device is performing up to spec, reading up on how long a vacuum cleaner battery should last can help set realistic expectations for replacement intervals.

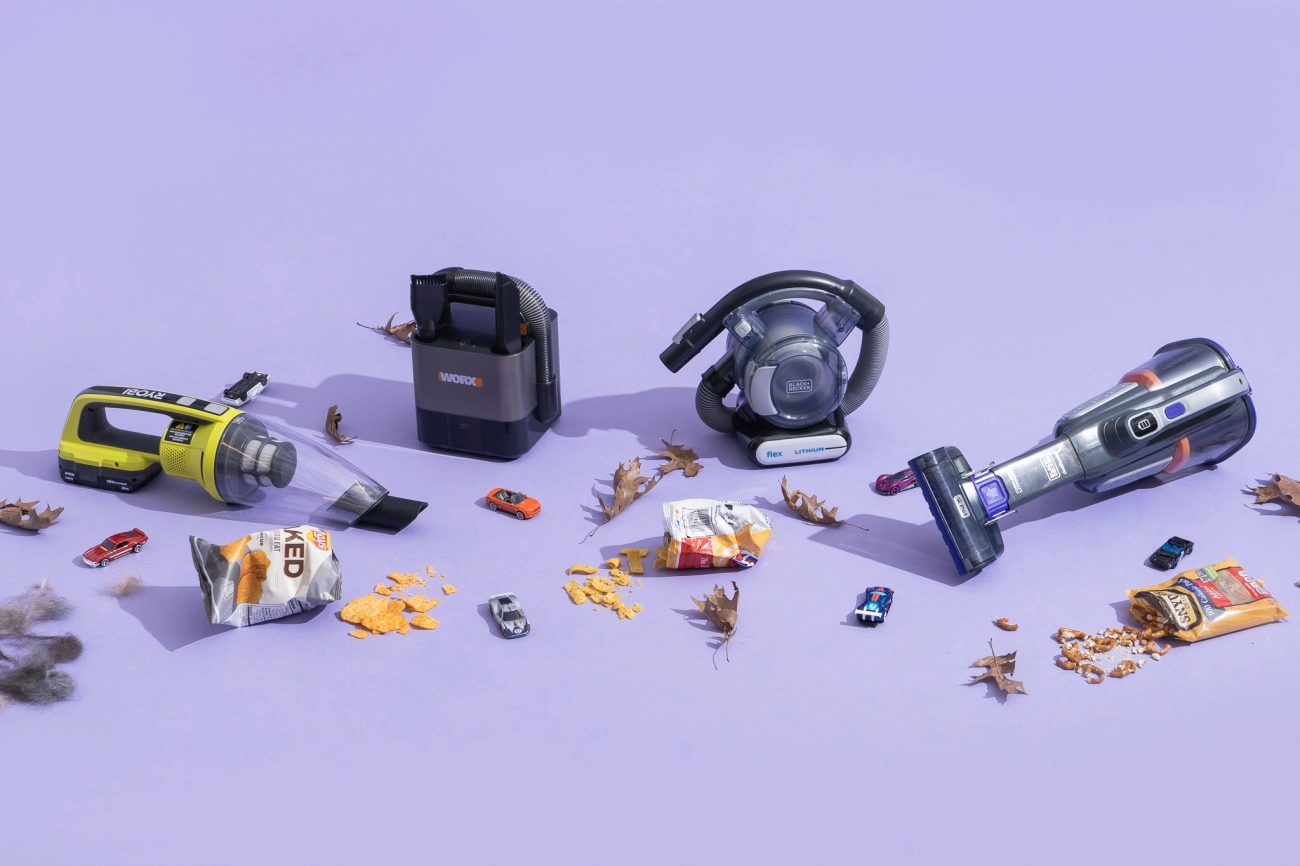
Is a stick vacuum good for pet hair?

Absolutely, provided it has the right specs. A stick vacuum needs two things to handle pet hair effectively:

  • High Suction Power: To pull hair embedded deep in carpet fibers.
  • Motorized Brush Roll: To physically agitate the rug and prevent tangles.
    Without a specialized brushless digital motor and a battery capable of sustaining high-drain output (Max Mode), pet hair can easily stall the brush roll or clog the intake.

Can you replace the battery in a cordless vacuum?

This depends entirely on the manufacturer’s design. Many modern stick vacuums now feature removable battery packs, allowing you to snap in a fresh one when the old one dies or runs out of juice mid-clean. However, some cheaper or older models still use built-in batteries that are difficult to service. From a manufacturing perspective, we always advocate for swappable designs—it extends the product’s lifespan and reduces electronic waste.

How to Fix My Vacuum Cleaner Not Charging Expert Guide

Step 1: Power Source and Connection Sanity Check

Before we start unscrewing battery compartments or ordering expensive parts, I always recommend starting with the simplest explanations. You would be surprised how often the solution to “How do I fix my vacuum cleaner not charging?” is just a loose cable or a tripped breaker. Let’s rule out the external factors first with a quick sanity check.

Electrical Outlet Testing

First, we need to confirm that electricity is actually flowing to the wall socket. It is common for a GFCI outlet to trip or for a wall switch to accidentally cut power to the plug without you realizing it.

  • The Lamp Test: Unplug your vacuum charger and plug a lamp or your phone charger into the same socket.
  • The Verdict: If the lamp doesn’t turn on, the issue isn’t your Van4NU vacuum—it’s your home’s electrical circuit.

Inspect the Power Adapter

Next, take a close look at the charger itself. Power cords take a lot of abuse, especially if they get run over by the vacuum or chewed on by curious pets.

  • Check for Damage: Look closely for fraying, exposed wires, or severe kinks in the cable insulation.
  • Safety First: If you see copper wire or deep chew marks, do not plug it in. A damaged adapter is a fire hazard and needs immediate replacement.

The Connection Fit

Finally, ensure the physical connection is solid. Over time, charging ports can get loose, or the vacuum might not be sitting perfectly in its cradle.

  • Docking Stations: Make sure the vacuum is seated firmly. Sometimes it just needs a little wiggle to settle onto the pins correctly.
  • Direct Plugs: If you plug the cable directly into the vacuum, push it in until you feel a distinct click or resistance. A loose connection prevents the steady flow of current needed for a full charge.

Step 2: Inspecting the Charging Dock and Contact Points

vacuum cleaner charging dock contact cleaning

If you are dealing with robot vacuum docking station issues or a cordless stick vacuum that refuses to power up, the problem often lies physically between the machine and the base. Since these devices live on the floor, they are constantly exposed to dust, pet hair, and debris that can coat the metal charging plates, effectively cutting off the power supply.

Dealing with Dirty Contacts

Over time, a thin layer of dust or invisible oxidation builds up on the metal plates, breaking the electrical circuit. This prevents the current from flowing into the unit. To fix this, you need to clean charging contact points thoroughly to restore the connection.

How to clean them safely:

  • Materials: Use a dry microfiber cloth or a cotton swab.
  • Solvent: Apply a small dab of high-percentage rubbing alcohol (isopropyl alcohol) to the cloth or swab. Never spray liquid directly onto the vacuum or dock electronics.
  • Action: Gently wipe the metal contact points on both the charging station and the bottom (or back) of the vacuum cleaner until they shine.
  • Dry: Let the contacts air dry completely for a few minutes before reconnecting.

Ensuring a clean, solid connection is vital for efficiently charging your lithium-ion or LiPo battery and preventing intermittent power cycles that can harm the cell.

Check for Alignment Issues

Sometimes the hardware is fine, but the fit is wrong. Stick vacuums usually have a specific “click-in” mechanism; if you don’t hear that audible click, the pins aren’t touching. For robot vacuums, which often rely on gravity to sit on their charging pads, verify that the base is on a hard, flat surface. Placing the dock on a thick carpet can sometimes tilt the base, preventing the robot from aligning correctly with the charging nodes.

Step 3: Assessing the Battery Health

If the power source and dock are working perfectly, the issue usually lies with the power cell itself. Batteries are consumable components, meaning they don’t last forever.

The Lifespan Reality

Most modern machines rely on Lithium-ion battery life cycles. Generally, these batteries maintain peak performance for about 2 to 4 years, depending on how often you clean. If your vacuum is older than that and barely holds a charge, the battery chemistry has likely degraded naturally. When a handheld vacuum is not holding a charge, it is often just a sign of age rather than a mechanical failure.

Visual Inspection and Safety

Before you attempt any fixes, take a close look at the battery pack.

  • Swelling: If the plastic casing looks bulged or warped, the battery is damaged and dangerous.
  • Leakage: Look for any fluid or sticky residue.
  • Corrosion: Check for green or white crust on the metal terminals.

Safety Warning: If you see swelling or leakage, do not attempt to charge the device. It is a fire hazard and needs immediate disposal at a recycling center. If you are comfortable handling the internal components, knowing how to check if an 18650 battery is good can help you verify if specific cells within the pack have failed, but visible physical damage always warrants a full replacement.

The “Reset” Trick

Sometimes the battery management system (BMS) gets out of sync with the actual charge level. You can try a vacuum battery reset procedure to recalibrate it:

  1. Drain the Power: Turn the vacuum on and let it run until it shuts off completely.
  2. Cool Down: Let the unit sit for 30 minutes to ensure the battery cells are cool.
  3. Long Charge: Plug it into the charger and leave it for 12+ hours uninterrupted, even if the “fully charged” light comes on sooner.

Replaceable vs. Built-in Batteries

Identifying your battery type determines the difficulty of the fix.

  • Click-in Batteries: These are user-friendly and detach with a simple button press. Cordless vacuum battery replacement for these models takes seconds.
  • Built-in Batteries: These are integrated into the handle or motor housing. You will likely need a screwdriver to open the casing and disconnect the internal connector. Always double-check your manual before unscrewing the body to avoid voiding warranties.

Step 4: Checking for Blockages and Overheating (Safety Cut-offs)

vacuum cleaner not charging safety check

Sometimes, the reason your vacuum isn’t charging has nothing to do with a broken component and everything to do with built-in safety features. Modern cordless vacuums are smart; they are designed to protect their internal electronics and battery cells from damage. If you have just finished a heavy cleaning session on “Max” mode, or if the machine is clogged, the system may prevent charging until conditions return to a safe range.

Understanding the Vacuum Overheating Safety Cut-off

Lithium-ion batteries are sensitive to extreme temperatures. If the battery cells are too hot immediately after use, the Battery Management System (BMS) will block the charging current to prevent thermal runaway or permanent degradation. Before you assume the worst and start looking up how to fix a dead 18650 battery, realize that your vacuum might simply be in self-preservation mode. This is a standard vacuum overheating safety cut-off feature found in almost all high-quality brands like Van4NU, Dyson, and Shark.

The Cool Down Period

If your vacuum feels warm to the touch near the handle or battery pack, it likely won’t accept a charge.

  • Disconnect the charger: Unplug it immediately.
  • Wait it out: Let the machine sit in a cool, dry place for 30 to 60 minutes.
  • Retest: Once the unit has returned to room temperature, try plugging it back in.

Filter and Airway Check

Overheating is often caused by the motor working overtime to pull air through a blockage. If the airflow is restricted, the vacuum runs hotter than usual, triggering those safety sensors. While you are waiting for the unit to cool down, perform a quick maintenance check:

  • Inspect the HEPA Filters: If your filters are caked in dust, wash them (if washable) or replace them. A clogged filter is the number one cause of motor strain.
  • Check the Main Tube: Look through the wand to ensure no debris, socks, or pet hair clumps are blocking the airway.
  • Clear the Brush Bar: Ensure the roller at the bottom spins freely and isn’t jammed with hair.

By clearing these blockages, you ensure the vacuum runs cooler next time, preventing the safety cut-off from interrupting your charging routine.

Step 5: Advanced Troubleshooting (For the DIY Savvy)

If the basic cleaning and reset tricks didn’t get your machine running, we need to get a bit more technical. This step is for those who are comfortable handling tools and want to definitively rule out hardware failure before spending money on replacements.

Multimeter Test for Charger

Visual inspections can only tell you so much. To know for sure if your charger is delivering the juice, you need to perform a multimeter test for charger output. This confirms whether the problem is the wall adapter or the vacuum itself.

  1. Check the Label: Look at the “Output” voltage printed on your power adapter (e.g., 24V or 30V).
  2. Set the Multimeter: Turn the dial to the DC Voltage setting (usually denoted by a V with a straight line).
  3. Test the Connection: Plug the adapter into the wall. Touch the red probe to the inner center of the plug and the black probe to the outer barrel.
  4. Analyze Results: If the reading matches the label (or is slightly higher), your charger is fine. If you get a reading of zero or significantly lower than the rated vacuum power adapter voltage, the charger is dead and needs replacing.

Checking Fuses and Internal Components

Unlike UK plugs, standard US plugs typically do not house a user-replaceable fuse. However, the vacuum unit itself often contains an internal fuse on the mainboard to protect the motor and battery from surges.

If you are out of warranty and comfortable opening the casing, look for the main circuit board. You are checking for:

  • Blown Fuses: Look for a small glass tube where the internal wire is broken or the glass is blackened.
  • Loose Wires: Vibrations can sometimes shake internal connectors loose.

If the charger provides the correct voltage but the unit still refuses to charge, the fault likely lies within the internal battery management system or the battery cells themselves. This is common in complex solutions for vacuum cleaners where safety sensors prevent charging to avoid hazards.

When to Service or Replace Your Van4NU Vacuum

Sometimes, despite your best efforts with cleaning contacts and checking outlets, the vacuum simply won’t charge. At Van4NU, we design our machines for durability, but electrical components and lithium-ion batteries naturally degrade over time. Before you make a final decision, you need to weigh the options of repair versus replacement.

Check Your Warranty Status First

Before you grab a screwdriver to open the casing, stop and check your paperwork. Most Van4NU models come with a specific warranty period that covers internal electrical faults and motor issues. Opening the main housing or tampering with internal wiring often voids this warranty immediately. If you are still within the coverage window, contact our support team. We can often arrange a service or replacement without any out-of-pocket cost to you.

Authentic Spare Parts Availability

If your warranty has expired, the next logical step is sourcing Van4NU vacuum spare parts. Whether you need a cordless vacuum battery replacement or a new power adapter, it is crucial to use authentic parts. Universal or generic parts may not match the specific voltage requirements of our motors, leading to potential overheating or permanent damage.

If you suspect the battery is the culprit but aren’t ready to buy a new one yet, you might want to understand the mechanics of how to revive a lithium-ion battery to see if the cell is just in a sleep mode or truly dead. However, if you see any physical damage or swelling, purchase a replacement immediately for safety.

The Cost vs. Benefit Calculation

When does a repair become too expensive? We recommend using the 50% Rule:

  • Calculate Repair Costs: Add up the cost of the replacement parts (battery, charger, or motor) and any shipping fees.
  • Compare to New Unit: Look at the current price of a new Van4NU model.
  • The Verdict: If the repair cost is more than 50% of the price of a new unit, it is generally smarter to upgrade.

Newer models often come with improved battery management systems and stronger suction, offering better long-term value than patching up an aging machine.

Frequently Asked Questions (FAQs)

I hear these questions all the time from customers trying to figure out why their gear isn’t cooperating. Here are the quick answers to the most common charging issues.

Why is my vacuum light blinking red while charging?

A blinking red light on vacuum indicators is almost always a distress signal. It rarely means the machine is just “thinking.”

  • Overheating: If you threw the vacuum on the charger immediately after a long run on “Max” mode, the vacuum overheating safety cut-off might be active. The battery is simply too hot to accept a charge safely.
  • Battery Failure: If the unit has been cool for an hour and still blinks red, the battery cells might be dead or damaged.
  • Connection Error: Check for debris. Sometimes a handheld vacuum not holding charge is just the result of a bad connection at the terminal.

Can I use a universal charger for my vacuum?

I generally advise against grabbing a cheap universal vacuum charger off the shelf unless you know exactly what you are doing. Vacuums are picky about voltage and amperage.

  • Check the Voltage: You must match the vacuum power adapter voltage exactly. If your vacuum needs 26V and you feed it 19V, it won’t charge. If you feed it 30V, you could fry the motherboard.
  • Connector Fit: Even if the voltage matches, universal plugs often fit loosely, leading to poor contact and heat buildup. Stick to the manufacturer’s original charger whenever possible.

How long should a vacuum battery last per run?

Lithium-ion battery life varies wildly depending on the suction mode you use.

  • Eco/Low Mode: You should get 40–60 minutes of runtime.
  • Max/Boost Mode: This drains power fast, usually lasting only 6–15 minutes.

If your runtime has dropped significantly (e.g., lasting only 2 minutes after a full charge), the battery is likely degraded. Understanding the chemistry helps; for instance, seeing how modern tech performs in a Gel vs. Lithium battery showdown explains why we rely on Lithium for these high-drain devices despite the eventual wear and tear.

How Long Should a Vacuum Cleaner Battery Last Runtime and Lifespan

Distinguishing the Two Types of Battery Life

When customers ask me, “How long should a vacuum cleaner battery last?”, they are usually asking two very different questions without realizing it. There is the immediate frustration of a vacuum dying halfway through the living room, and then there is the long-term worry that the battery pack itself is dead after just two years of ownership.

To understand the value of your cordless stick vacuum, we have to separate runtime (minutes per clean) from lifespan (years of service).

Runtime (Per Clean): Understanding mAh and Run Time

Think of the mAh rating (milliampere-hour) as the size of the gas tank in your car. A higher number generally means you hold more energy. However, cordless vacuum runtime isn’t determined by the battery size alone; it depends heavily on how efficiently the vacuum’s motor uses that power.

At Van4NU, we focus on balancing high-capacity cells with efficient motors. A standard battery might offer anywhere from 20 to 60 minutes of operation, but this number fluctuates wildly based on the floor surface. Thick carpets require more energy to spin the brush bar than hard floors, draining the mAh rating faster even if you don’t change settings.

The Max Mode Trap: High Suction vs. Eco Modes

This is the most common misunderstanding in the industry. You might see a “60-minute runtime” advertised on the box, but that specific number almost always applies to the lowest power setting.

  • Eco Mode: Designed for hard floors and light dust. This is where you get maximum runtime.
  • Turbo Mode: Delivers maximum suction for deep cleaning carpets but creates a massive energy draw.

If you run your device constantly in Turbo mode, you might see that 60-minute capability drop to just 10 or 12 minutes. This isn’t a defect; it is the physics of vacuum suction power modes. Relying exclusively on high power puts immense strain on the cells, causing voltage sag and shorter cleaning sessions.

Lifespan (Total Longevity): Charge Cycles and Degradation

Eventually, every battery fails to hold a charge. This is the inevitable result of Lithium-ion battery degradation. We measure the total life of a battery pack in battery charge cycles.

One “cycle” is defined as using 100% of the battery’s capacity, whether you do it all at once or over several cleaning sessions.

  • Cycle Life: Most high-quality lithium-ion batteries are rated for 300 to 500 complete cycles.
  • Capacity Drop: After hitting that cycle limit, the battery doesn’t just die; it simply holds less charge (usually dropping below 80% of its original capacity).

Understanding this chemistry helps manage expectations. If you use and recharge your vacuum heavily every single day, you will burn through those cycles faster than someone who cleans twice a week.

What is the Average Lifespan of a Vacuum Battery?

When asking how long should a vacuum cleaner battery last, we are looking at the total years of service before the pack refuses to hold a charge. Generally, a high-quality battery lasts between 2 to 4 years. This isn’t a timer set to expire on a specific date; the longevity depends entirely on how often you pull the trigger and the quality of the cells inside.

Industry Standards: Usage Frequency

Manufacturers rate lifespan in battery charge cycles. One cycle is defined as a full discharge followed by a full recharge. Most decent packs are rated for roughly 300 to 500 cycles.

  • Daily Users: If you clean every single day, you might notice lithium-ion battery degradation within 18 months.
  • Weekly Users: If you only vacuum on Saturdays, that same battery could easily last 4+ years.
  • Heavy Duty: Using “Turbo” or “Max” modes exclusively burns through cycles faster than standard settings.

Chemistry Matters: Li-ion vs. NiCad

Old-school Nickel-Cadmium (NiCad) batteries were notorious for the “memory effect”—if you didn’t drain them fully, they “forgot” their capacity. Modern vacuums use standard lithium-ion battery packs because they are lighter, hold a charge longer, and do not suffer from memory issues. They provide a steady voltage until they are empty, rather than fading out slowly like their predecessors.

Warranty vs. Reality

Most brands offer a vacuum battery warranty of 1 to 2 years. However, reality hits differently. You will likely see a drop in performance—maybe 5 minutes less runtime—after the first year. This is normal chemical aging. By the third year, if you are struggling to finish one room before the unit dies, it is likely time to look for a replacement battery pack. Don’t expect the battery to perform like day one forever; physics simply doesn’t work that way.

5 Factors That Kill Your Vacuum Battery Faster

Vacuum Cleaner Battery Life Killers

We all want to know how long should a vacuum cleaner battery last, but the reality is that your daily habits play a massive role in that timeline. Even high-end lithium-ion packs have a finite number of cycles, and certain behaviors can drastically accelerate degradation. If you want to avoid buying a replacement pack prematurely, you need to watch out for these common killers.

Excessive Heat: The Number One Enemy

Heat is absolute kryptonite for battery chemistry. If you leave your vacuum charging in direct sunlight or store it in a hot garage during the summer, you are essentially cooking the cells. Most cordless vacuums rely on standard cylindrical cells, and understanding how long an 18650 battery will last often comes down to strict temperature control.

  • The Rule: Never charge a hot battery. If you just finished vacuuming, let the unit cool down for 15 minutes before plugging it in.

Constant Turbo Usage

We all love the raw power of Turbo mode, but using it for every clean puts immense strain on the battery cells. High vacuum suction power modes draw energy at a rapid rate, causing voltage sag and internal heat buildup.

  • The Impact: Constant high-discharge drains the battery quickly and reduces the total number of battery charge cycles available over its life.
  • The Fix: Reserve Max mode for carpets and use Eco mode for hard floors.

Deep Discharging

Running your vacuum until it completely dies is a habit you need to break. While a modern Battery Management System (BMS) includes deep discharge protection to stop the pack from bricking itself, frequently hitting that 0% mark stresses the internal chemistry. It is much healthier for the battery to be recharged when it hits around 20% rather than running it until the motor stops.

Filter Maintenance

Believe it or not, a dirty filter destroys battery life. When your filters are clogged with dust and pet hair, the vacuum motor has to work twice as hard to pull air through the system. This increased resistance forces the battery to output more power, leading to faster lithium-ion battery degradation and potential overheating.

  • Routine: Check your filters monthly.
  • Benefit: Keeps the airflow smooth and reduces the load on the battery.

Storage Habits

Leaving your vacuum plugged in 24/7 isn’t always the best move, especially if you don’t use it daily. Keeping a battery sat at 100% voltage for weeks at a time can accelerate chemical aging. If you are going on vacation or won’t be using the vacuum for a while, store it at roughly 50% charge rather than keeping it constantly connected to the charger.

How to Extend the Life of Your Van4NU Vacuum Battery

Vacuum Cleaner Battery Lifespan Tips

We build our Van4NU vacuums to be reliable workhorses, but the battery is a consumable component that requires specific care to maximize its ROI. You don’t need a degree in chemistry to keep your power pack healthy; you just need to adjust a few daily habits. By managing how you charge and store the device, you can significantly slow down lithium-ion battery degradation and keep your runtime consistent for years.

The 20-80 Rule: Optimal Charging Ranges

One of the biggest myths is that you must drain a battery completely before recharging. That was true for old nickel-cadmium packs, but it actually harms modern Li-ion cells. We recommend sticking to the 20-80 rule: try not to let the battery drop below 20% and, if you aren’t planning a marathon cleaning session, stop charging around 80%. Keeping the charge in this “sweet spot” reduces stress on the internal chemistry and preserves your battery charge cycles. For those using standard cells, understanding how long to charge an 18650 battery properly can prevent overcharging issues that shorten lifespan.

Cool Down Before Charging: The 10-Minute Rule

Heat is the silent killer of battery performance. After running your vacuum—especially if you’ve been using high-suction modes—the battery cells are hot. Plugging a hot battery immediately into a charger forces it to accept energy while it is already thermally stressed, which can trigger the overheating protection or permanently damage the capacity.

  • The Rule: Wait at least 10 to 15 minutes after vacuuming before plugging the unit in.
  • The Benefit: This allows the cells to return to a safe temperature, ensuring the battery management system (BMS) can charge them efficiently without risk.

Regular Cleaning: Reducing Mechanical Resistance

Believe it or not, cleaning your vacuum helps the battery. When filters are clogged or hair is wrapped around the brush roll, the motor has to work twice as hard to create suction. This increased mechanical resistance causes a spike in amperage draw, draining the battery faster and generating excess heat. Proper cordless stick vacuum maintenance—like washing filters and clearing the intake—ensures the motor runs efficiently, putting less strain on the battery pack.

Storage Tips: Best Practices for Vacations

If you are heading out of town or won’t be using the vacuum for a few weeks, do not leave the battery sitting at 100% or 0%. A fully charged battery stored for long periods can degrade faster due to internal pressure, while a dead battery might drop below the critical voltage threshold and never wake up.

  • Ideal State: Store the battery at roughly 50% to 60% charge.
  • Environment: Keep it in a cool, dry place away from direct sunlight.
  • Action: If your model allows, remove the battery from the unit to prevent any passive power drain.

Signs It’s Time for a Replacement Battery

Vacuum Cleaner Battery Replacement Signs

Even the best hardware eventually wears out. You don’t want to be caught halfway through cleaning the living room when the power cuts out. Recognizing the symptoms of a dying power source early can save you frustration and keep your home clean. Here is how to tell if your pack is ready for retirement.

Drastic Runtime Drop

The most obvious sign is a massive reduction in cordless vacuum runtime. If your machine used to handle the whole downstairs on a single charge (say, 40 to 60 minutes) but now dies after 5 minutes, the capacity is gone. The battery might charge to “100%” quickly, but the cells have developed high internal resistance. As soon as you pull the trigger, you get an immediate battery voltage drop, causing the vacuum to shut down to protect itself.

Failure to Charge and Indicator Lights

Sometimes the vacuum just refuses to wake up. You might see:

  • Rapid flashing red lights: Usually indicates a fault detected by the Battery Management System (BMS).
  • Charger light stays green: The charger thinks the battery is full because the cells won’t accept current.
  • No lights at all: The circuit board inside the battery may have failed.

If you are unsure whether it’s the charger or the pack, learning about identifying bad lithium-ion battery symptoms can help you diagnose the specific issue before you buy parts.

Physical Swelling

This is a critical safety warning. Lithium-ion battery degradation can sometimes cause gas buildup inside the cells, leading to swelling. If the battery pack is bulging, difficult to remove from the vacuum, or the plastic casing is cracking, stop using it immediately. A swollen battery is a fire hazard and needs to be recycled properly.

The Cost-Benefit Analysis: New Battery vs. New Vacuum

When the battery dies, many people assume the whole vacuum is trash. That is a mistake. High-end cordless vacuums from brands like Dyson, Shark, or Tineco often cost between $300 and $700. In contrast, a high-quality replacement battery pack usually costs a fraction of that.

Unless your motor is burnt out or the plastic body is shattered, simply swapping the power source is the smartest financial move. We provide reliable replacement batteries for vacuum cleaners that restore your machine to its original performance, saving you hundreds of dollars compared to buying a brand-new unit.

Frequently Asked Questions (FAQ)

Can I leave my cordless vacuum on the charger all the time?

For daily use, yes. Most modern cordless stick vacuum models feature a built-in battery management system (BMS) that stops current flow once the battery hits 100%, preventing the risk of overcharging. However, if you are heading out on vacation or won’t use the vacuum for a few weeks, unplug it. Leaving a battery at 100% capacity for long periods can stress the chemistry. To store your battery cells safely and preserve their overall health, it is best to keep them partially charged in a cool, dry place rather than constantly docked.

Does using higher suction power damage the battery?

Using Turbo mode constantly won’t “break” the vacuum immediately, but it significantly accelerates Lithium-ion battery degradation. High vacuum suction power modes draw energy rapidly, causing the battery temperature to spike. Since heat is the primary cause of wear, relying exclusively on max power reduces the total number of battery charge cycles the pack can handle. I always recommend using Eco mode for general cleaning to keep the battery cool and saving the high power for stubborn messes.

Are replacement batteries universal?

Absolutely not. You cannot swap battery packs between different brands or even different models within the same brand. Each vacuum requires a specific voltage and pin configuration. Using an incompatible replacement battery pack can damage the motor or lead to dangerous overheating protection failures. When the time comes, ensure you choose a high-quality lithium-ion battery that is specifically rated for your machine to avoid safety hazards and performance drops.

Can Cordless Vacuum Batteries Be Replaced Van4NU Guide

You might be asking yourself: Can cordless vacuum batteries be replaced? or is my expensive appliance destined for the trash?

Here is the truth: Most manufacturers don’t want you to know how easy it is to revive your vacuum.

Instead of spending $500 on a new machine, a simple battery swap can restore your suction power and runtime instantly.

In this guide, you’re going to learn exactly how to diagnose a dead battery, choose the right replacement, and install it in minutes.

Ready to save money and get your cleaning power back?

Let’s dive right in.

Why Do Cordless Vacuum Batteries Die?

It is a scenario I see all the time: you grab your trusty vacuum for a quick cleanup, but it shuts off before you even finish the living room rug. You aren’t imagining things—cordless vacuum batteries degrade over time. It is an unavoidable fact of chemistry, not necessarily a defect in your machine.

Understanding Lithium-Ion Lifecycles

Most modern machines rely on Lithium-ion battery technology. While powerful and lightweight, these cells have a finite lifespan, typically measured in charge cycles. Think of a cycle as draining the battery from 100% to 0% and charging it back up.

  • Natural Degradation: After roughly 300 to 500 cycles, the battery’s capacity to hold energy naturally diminishes.
  • Chemical Aging: Even if you don’t use the vacuum daily, the chemicals inside the cells break down over the years, leading to a shorter Lithium-ion battery lifespan.

Common Culprits: Heat and Overcharging

Beyond natural aging, how we treat our tools matters. Heat is the number one enemy of battery health. Running your vacuum on “Max” or “Turbo” mode exclusively generates excessive internal heat, which accelerates wear on the cells. Similarly, leaving a battery plugged in constantly in a hot environment can stress the internal components, causing them to fail prematurely.

Signs It Is Time to Replace

If you are wondering if your unit is on its last legs, look for these red flags. These are clear indicators that you likely need a replacement rather than a whole new vacuum:

  • Runtime Drop: The vacuum runs for 5 minutes instead of the original 40.
  • Pulsing: The motor starts and stops repeatedly (often mistaken for a filter blockage).
  • Failure to Charge: The vacuum battery not charging at all when placed on the dock, or the LED light flashes red.
  • Low Power: You notice the cordless vacuum losing suction power significantly faster than usual, even with clean filters.

Types of Vacuum Batteries: Snap-in vs. Screw-in

When figuring out if can cordless vacuum batteries be replaced, the answer often depends on the specific mounting style of your device. Not all power packs are created equal, and manufacturers generally use three main designs to house the cells. Understanding the factors to consider when designing and manufacturing 18650 lithium batteries helps explain why some brands opt for sealed units while others prioritize easy swapping.

Snap-in (Click-in) User-Friendly Designs

This is the gold standard for convenience. Many modern high-end stick vacuums utilize a click-in battery swap system. You simply press a release button—usually red or grey—and the battery slides right out.

  • No tools required: You can swap a dead battery for a fresh one in seconds.
  • Extended runtime: Because they are so easy to change, many users keep a spare charged and ready to go.
  • Visual cues: These often have built-in LED indicators showing charge levels.

Screw-in (Internal) Designs

Older models, particularly earlier Dyson V-series (like the V6, V7, and some V8s), use a screw-in battery installation method. While not as instant as the click-in type, these are still fully replaceable.

  • Tools needed: You will typically need a small Phillips-head screwdriver to remove three screws (one in the handle, two on the underside).
  • Secure fit: The screws ensure the battery doesn’t wiggle during vigorous cleaning.
  • Availability: Replacement parts are widely available, even if the installation takes about five minutes longer.

Built-in Units in Low-End Models

In budget-friendly handhelds or older dustbusters, the battery is often integrated deep inside the housing. These are not designed for the average user to service.

  • Difficult access: Reaching the battery often requires opening the entire motor housing.
  • Soldering required: The wires are frequently soldered directly to the board rather than using a connector.
  • Repair viability: For these units, professional handheld vacuum repair is often more expensive than the vacuum itself, making them essentially disposable once the battery dies.

Is Replacing the Battery Worth It? (Cost Benefit Analysis)

Let’s be real for a second. When your vacuum starts dying five minutes into a cleaning session, the impulse is often to hop online and buy a brand-new machine. But before you drop hundreds of dollars, we need to look at the math. Can cordless vacuum batteries be replaced to save your wallet? Absolutely.

Comparing Replacement Costs vs. Buying New

The financial gap between a swap and a new purchase is massive. High-end cordless vacuums in the US market can easily range from $300 to over $700. In contrast, the vacuum battery replacement cost typically sits between $40 and $100, depending on the model and capacity.

Here is the breakdown of why I almost always recommend the swap:

  • Cost Efficiency: You save roughly 80-90% of the cost of a new appliance.
  • Performance Restoration: A new battery often restores the original suction power and runtime, making the vacuum feel new again.
  • Retaining Accessories: You don’t have to deal with incompatible attachments or mounting docks that come with switching brands or models.

Environmental Impact and Reducing E-Waste

Beyond the savings, there is a serious environmental argument here. We live in a “throw-away” culture, but tossing a perfectly good motor and plastic housing just because the lithium cells have degraded is incredibly wasteful.

By replacing just the power pack, you keep pounds of non-biodegradable plastic and metal out of landfills. It is a simple way to extend the lifecycle of your appliances. Furthermore, responsible ownership involves recycling rechargeable batteries properly rather than trashing them. Most hardware stores and recycling centers accept old lithium-ion packs, ensuring hazardous materials are processed safely while you enjoy a refreshed vacuum.

Choosing the Right Replacement: OEM vs. High-Quality Aftermarket

Cordless vacuum battery replacement options

Once you’ve confirmed that can cordless vacuum batteries be replaced, the next logical step is deciding where to buy the replacement. You generally have two options: sticking with the brand that made your vacuum (OEM) or choosing a specialized third-party manufacturer.

OEM vs Aftermarket Battery: The Pros and Cons

Original Equipment Manufacturer (OEM) batteries are the safe, default choice. You know they will fit, and they carry the brand name you trust. However, they often come with a premium price tag—sometimes costing nearly half as much as a brand-new vacuum. Additionally, OEM stock can be limited for older models, leaving you waiting on backorders.

High-quality aftermarket options, like the ones we engineer at Van4NU, offer a compelling alternative. We focus on performance and value. Often, a high-capacity vacuum battery from a specialized third-party can actually offer more runtime than the original battery did when it was new, simply because we utilize newer, denser battery cell technology.

Comparison at a Glance:

Feature OEM Battery Van4NU (High-Quality Aftermarket)
Price Point High ($$$) Budget-Friendly ($$)
Capacity (mAh) Standard Often Upgraded (Longer Runtime)
Compatibility Guaranteed Precision Molded
Availability Variable Readily Available

Critical Safety Features

Cheap knock-offs give aftermarket batteries a bad reputation. It is vital to distinguish between “cheap” and “high-quality.” When selecting a replacement, especially for high-drain devices like vacuums, you must ensure the battery pack includes a robust Battery Management System (BMS).

At Van4NU, we integrate specific protections to match the safety standards of major US appliance brands:

  • Overcharge Protection: Prevents the battery from accepting current once it reaches 100%, which is critical for preventing fires.
  • Temperature Monitoring: Sensors that cut power if the cells get too hot during “Max Mode” suction.
  • Short-Circuit Prevention: Safeguards the vacuum’s motor from electrical faults.

Understanding how power is managed is key to longevity. For example, optimized battery charging mechanisms are essential for maintaining the health of the lithium cells over hundreds of cycles. Always look for safety certifications (like CE, FCC, or RoHS) on the label to ensure you aren’t compromising your home’s safety for a lower price.

Step-by-Step Guide: How to Replace Your Vacuum Battery

Replacing Cordless Vacuum Batteries Guide

Replacing the power source in your cordless vacuum is usually a straightforward process that takes less than ten minutes. Whether you are dealing with a Dyson battery replacement or swapping a pack on a Shark or Tineco, the fundamentals remain the same. I always recommend clearing a small workspace and gathering a Phillips-head screwdriver just in case your model isn’t a tool-free design.

Safety First: Power Down

Before doing anything, ensure the vacuum is completely powered off and disconnected from the charging dock or cable. Never attempt to remove a battery while the device is plugged into the wall. This simple step prevents electrical shorts and protects the vacuum’s internal circuitry during the swap.

Step 1: Identifying the Model Number

To ensure compatibility, locate the manufacturer’s label on your current battery or the underside of the vacuum handle. You need to match the voltage (V) and the model number exactly.

  • Check the Label: Look for specific codes (e.g., SV10 for Dyson V8).
  • Verify Voltage: A 21.6V system will not work with a 25.2V battery.
  • Understand Capacity: If you see a higher mAh rating on a replacement, that’s actually a good thing. A higher battery mAh rating explained simply means the fuel tank is larger, giving you longer runtimes.

Step 2: Removal Instructions

The removal process depends entirely on whether your vacuum uses a click-in battery swap system or a screw-in battery installation.

  • Snap-in (Click-in): These are the easiest to handle. Locate the large release button (usually red or grey) on the battery pack. Press it firmly and slide the battery down and out of the handle.
  • Screw-in (Internal): These require a bit more work. You will typically find three screws: one at the back of the handle and two on the underside of the battery.
    1. Remove the dust bin to access the front screws easily.
    2. Unscrew the fasteners and keep them safe—you will need them for the new pack.
    3. Pull the battery downwards to disengage it from the terminal.

Step 3: Installing the New Van4NU Battery

Take your new Van4NU high-capacity battery and slide it into the slot.

  • For Snap-in: Push it up until you hear a solid “click.” Give it a gentle tug to ensure it is locked in place.
  • For Screw-in: Align the guide rails and slide the battery into the handle. Reinsert the screws, starting with the one in the handle to hold the weight, followed by the underside screws. Tighten them firmly but do not over-tighten to avoid cracking the plastic casing.

Step 4: Calibrating with the Initial Charge

Once installed, do not run the vacuum immediately. The new lithium-ion cells need to synchronize with the vacuum’s Battery Management System (BMS). Place the vacuum on the charger and let it reach 100% capacity. This initial charge is critical for calibrating the fuel gauge so the vacuum accurately displays remaining power. While our packs are robust, understanding the chemistry, much like knowing can you trickle charge a 18650 battery pack, helps you realize why proper charging cycles are vital for maintaining the health of the cells inside your new pack. If the device doesn’t start after charging, check your cordless vacuum troubleshooting guide to ensure the contacts are clean and seated correctly.

How to Maximize Your New Battery’s Lifespan

Cordless Vacuum Battery Maintenance Tips

Now that you have a fresh power source installed, you want to ensure you aren’t shopping for another replacement next year. I often see perfectly good batteries fail early simply because of poor maintenance habits. To extend vacuum battery life, you need to treat the lithium-ion chemistry with a bit of care. Since many of these packs are constructed using standard cylindrical cells, understanding the components—similar to learning how to identify 18650 battery specs—can help you realize why temperature and physical stress matter so much.

Follow these simple rules to get the best performance out of your new battery:

  • Avoid Extreme Heat: Heat is the number one killer of lithium batteries. Never store your vacuum or its charging dock in a hot garage, near a radiator, or in direct sunlight. Room temperature (around 65°F–75°F) is the sweet spot for storage.
  • Smart Charging Habits: You do not need to drain the battery to 0% before recharging. Unlike older battery technologies, lithium-ion prefers partial discharges. However, if you are going away for a week or more, unplug the charger; leaving it at 100% charge for weeks on end can stress the cells.
  • Clean Your Filters: This is the most overlooked factor for vacuum runtime improvement. A clogged filter restricts airflow, forcing the vacuum motor to work harder to create suction. This increased load pulls more amps from the battery, causing it to overheat and degrade faster. Keep your filters clean to reduce strain on the system.

Proper Disposal of Old Batteries

Now that we have established that can cordless vacuum batteries be replaced, and you have successfully installed a fresh pack, you are left with the old hardware. It is absolutely critical that you do not throw lithium-ion batteries in your household trash.

These batteries contain volatile chemicals and heavy metals. If a battery is crushed in a standard garbage truck compactor, it can puncture, short-circuit, and cause a dangerous fire. Just as there are specific precautions when using a 26650 lithium-ion battery, there are strict safety rules for disposing of any lithium-based power cell to prevent thermal runaway and environmental contamination.

Locating Recycling Centers and Drop-Off Points

Recycling rechargeable batteries in the United States is straightforward thanks to widespread collection programs. You likely visit these locations regularly:

  • Home Improvement Stores: Major chains like Home Depot and Lowe’s typically have dedicated “Call2Recycle” bins near the entrance or customer service desk.
  • Electronics Retailers: Best Buy and Staples generally accept old battery packs and e-waste.
  • Municipal Hazardous Waste: Check your local city or county website. Most municipalities have designated drop-off days or facilities for hazardous household waste.

Safety Tip: Before dropping off your battery, place a piece of electrical tape over the metal terminals. This prevents the battery from shorting out against other batteries in the recycling bin.

Which Battery Is Used in a Vacuum Cleaner High Discharge Li ion Guide

The Dominance of Lithium-Ion Technology in Home Appliances

When clients ask me, “Which battery is used in a vacuum cleaner?“, the answer for any modern, high-performance device is almost exclusively Lithium-Ion (Li-ion). Gone are the days of heavy, inefficient power sources. Today, the cordless vacuum battery pack relies on Li-ion technology because it is the only chemistry that effectively balances weight, power, and longevity for handheld appliances.

Why Li-Ion Beats NiMH and NiCd

In the past, the industry relied on Nickel-Metal Hydride (NiMH) and Nickel-Cadmium (NiCd) batteries. Honestly, they were a headache. They suffered from the “memory effect,” meaning if you didn’t drain them completely before charging, they lost capacity permanently. Rechargeable appliance batteries based on Li-ion chemistry have a significantly higher energy density. This allows us to pack more power into a lighter, smaller footprint without that annoying memory issue, making the vacuum easier to maneuver.

High-Drain Requirements: Powering the Motor

Vacuum cleaners are beastly machines compared to other electronics. They are a high-drain battery application. The motor demands a massive, instant surge of current to generate strong suction (Air Watts). Standard batteries simply cannot handle this load without overheating or experiencing a rapid voltage drop. We use high discharge lithium cells specifically designed to deliver these massive power surges consistently without faltering.

Cycle Life and Longevity

Nobody wants to replace their vacuum battery every six months. Battery cycle life is critical here. A high-quality Li-ion pack can withstand hundreds of charge cycles while maintaining most of its original capacity. This ensures the appliance runs like new for years, providing a better ROI for the end-user.

Comparison of Vacuum Battery Chemistries:

Feature Lithium-Ion (Li-ion) NiMH / NiCd
Energy Density High (Lightweight, long runtime) Low (Heavy, bulky)
Memory Effect None High (Must fully discharge)
Power Delivery Excellent for high-drain motors Moderate to Low
Self-Discharge Very Low High (Loses charge while sitting)

Cell Form Factors: 18650 vs. 21700

When you crack open a cordless vacuum battery pack, you aren’t looking at a single solid block of energy. You are looking at a cluster of cylindrical cells wired in series and parallel. For the US market, where suction power and run-time are top priorities, the choice between cell sizes defines the performance of the appliance.

The 18650 Standard: Balancing Size and Capacity

The 18650 battery for vacuum cleaner applications has been the industry workhorse for over a decade. Measuring 18mm in diameter and 65mm in length, these cells offer a proven balance between energy density and physical weight.

For handheld stick vacuums, weight is a critical factor. You don’t want the user’s arm to fatigue after five minutes of cleaning. The 18650 form factor allows us to build compact, lightweight packs that still deliver respectable power. While form factor defines the size, the internal chemistry dictates performance, a distinction detailed in our comparison of Lithium-ion and LiFePO4 battery technologies.

The 21700 Evolution: Higher Capacity for Heavy-Duty Vacuums

As vacuum motors have evolved to rival corded performance, the demand for power has outgrown the standard 18650. Enter the 21700 Li-ion cells. These are slightly larger at 21mm by 70mm, but the performance gain is massive.

  • Higher Capacity: A single 21700 cell can hold significantly more energy (mAh) than an 18650, extending runtime without adding too many extra cells.
  • Better Thermal Management: The larger surface area and internal volume allow for better heat dissipation during high-drain battery application scenarios.
  • Current Handling: They can sustain higher discharge rates, essential for those “Turbo” or “Max” modes on premium vacuums.

Van4NU’s Role in Sourcing and Assembly

As an experienced OEM battery manufacturer, Van4NU doesn’t just pick random cells off the shelf. We understand that a custom lithium battery solutions provider must match the cell to the motor.

We source high-grade cells specifically designed for high-discharge appliances. Whether your design calls for the compact nature of the 18650 or the raw power of the 21700, we handle the precise sorting, spot welding, and assembly. We ensure that every pack leaving our line is optimized for the specific voltage and amperage requirements of your vacuum cleaner.

Voltage Platforms and Suction Power

Vacuum Cleaner Battery Voltage and Power Levels

Voltage Equals Power: The Air Watts Connection

When we talk about raw cleaning performance, voltage is the primary driver. In the US market, consumers equate higher voltage with better suction, and generally, they are right. The voltage of a cordless vacuum battery pack directly correlates to the motor’s ability to generate Air Watts. Simply put, higher voltage allows the motor to spin faster and harder, providing the torque needed to pull debris from deep pile carpets. A higher voltage platform allows us to deliver more power without increasing the current to dangerous levels, keeping the system efficient and cool.

Common Configurations: 18V to 36V Systems

We typically see a specific range of configurations depending on whether the device is a lightweight handheld or a heavy-duty upright replacement.

  • 18V – 21.6V (5S-6S): The standard for lightweight stick vacuums and handheld units. Good balance of weight and power.
  • 25.2V – 29.6V (7S-8S): This is the sweet spot for high-end models. A 25.2V vacuum battery offers the sustained power needed for whole-home cleaning.
  • 36V+ (10S): Reserved for commercial-grade or industrial heavy-duty vacuums requiring massive suction.

Customization for Motor Requirements

At Van4NU, we don’t just grab a standard pack off the shelf. We engineer custom lithium battery solutions to match the specific torque and RPM curves of your vacuum motor. This ensures the voltage curve remains stable during discharge, preventing that annoying power “fade” as the battery drains. To maintain this stability across different voltage platforms, understanding what is BMS in lithium batteries is crucial, as it regulates the output to protect both the motor and the cells. We align the cell series configuration to hit the exact sweet spot your appliance requires, ensuring the high-drain battery application delivers consistent power from the first minute to the last.

The Critical Role of the BMS (Battery Management System)

You can pack the highest capacity cells into a casing, but without a robust vacuum cleaner BMS, you are essentially holding a volatile energy source. In high-drain battery applications like cordless vacuums, the battery isn’t just sitting idle; it is pushing massive amps to the motor instantly. This rapid energy transfer generates significant heat and stress, making the management system the brain of the operation.

Safety First: Preventing Fire Hazards

Safety is the absolute priority when we design power systems. Lithium-ion chemistry is incredibly efficient, but it can be volatile if pushed beyond its limits. A quality BMS acts as the gatekeeper, constantly monitoring voltage and temperature to prevent thermal runaway—the primary cause of battery fires. We design our custom lithium battery solutions to cut power instantly if parameters go out of the safe zone, ensuring the appliance remains safe in American homes regardless of how hard the user pushes the vacuum.

Key Functions: Thermal Management and Balancing

A BMS does more than just stop fires; it optimizes the daily performance of the vacuum.

  • Thermal Management: Actively monitors heat buildup during those “Max Power” cleaning sessions to prevent component damage.
  • Cell Balancing: Ensures every cell charges and discharges at the same rate. If one cell drifts, the whole pack suffers.
  • Protection Circuits: Prevents over-charging and deep discharging. While knowing how to judge if a 18650 lithium battery is damaged is useful for troubleshooting, a superior BMS prevents that damage from happening in the first place.

The Van4NU Advantage: Custom BMS with Predictive Diagnostics

At Van4NU, we don’t rely on off-the-shelf generic boards for high-performance appliances. We engineer custom BMS units equipped with predictive diagnostics. This smart technology communicates directly with the vacuum’s main controller, providing real-time data on battery health and predicting maintenance needs before a hard failure occurs. This level of integration is what separates a premium OEM product from a budget knock-off.

Beyond Standard Li-Ion: LiFePO4 and Li-Polymer Options

While cylindrical NMC cells dominate the market, we are seeing a shift toward specialized chemistries for specific cordless vacuum battery pack applications. Not every appliance needs the raw energy density of a 21700 cell; sometimes, safety, longevity, or physical shape takes precedence. At Van4NU, we engineer custom lithium battery solutions that match the chemistry to the device’s exact mission profile.

LiFePO4: Safety and Long Cycle Life for Robotic Vacuums

For autonomous devices like robotic vacuums that spend most of their lives on a charging dock, the Lithium Iron Phosphate vacuum battery (LiFePO4) is becoming a top-tier choice. Unlike standard Li-ion, LiFePO4 is incredibly stable thermally and chemically. It is virtually impossible to overheat during normal charging cycles, making it the safest option for devices running unattended in US homes.

The real advantage here is battery cycle life. A standard Li-ion pack might give you 500-800 cycles, but a LiFePO4 pack can easily hit 2,000+ cycles before significant degradation. This means the battery often outlasts the vacuum itself.

Li-Polymer: Pouch Cells for Ultra-Slim Handheld Designs

When industrial designers want to create a vacuum that looks more like a sleek wand than a power tool, cylindrical cells often don’t fit. This is where Li-Polymer (LiPo) pouch cells come in. These soft-pack batteries can be manufactured in custom sizes and shapes to fit into tight, curved handles.

While we frequently supply robust 18650 lithium battery packs for underwater vacuum cleaners and heavy-duty dry vacs, the trend for lightweight “stick” vacuums demands the weight savings of LiPo technology. These cells offer high discharge rates necessary for suction but in a much lighter package. However, they require precise management; knowing tips to extend the cycle times of lithium polymer battery packs is critical for engineering the BMS to prevent premature swelling or capacity loss.

Comparison of Vacuum Battery Chemistries

Feature Standard Li-Ion (NMC) LiFePO4 (LFP) Li-Polymer (LiPo)
Best For High-power uprights/stick vacs Robotic vacuums Ultra-slim handhelds
Cycle Life 500 – 800 cycles 2000+ cycles 300 – 500 cycles
Safety Moderate (Requires BMS) Excellent (High stability) Moderate (Sensitive to puncture)
Energy Density High Moderate High
Form Factor Cylindrical (Hard shell) Cylindrical or Prismatic Pouch (Soft shell)

Sourcing Considerations for OEM Vacuum Manufacturers

When you are looking for a partner to build your next cordless vacuum battery pack, you aren’t just buying cells; you are investing in brand reputation and safety. In the US market, regulations are strict, and consumers have zero tolerance for power failures or safety hazards. As an experienced OEM battery manufacturer, we know that cutting corners on compliance is not an option.

We ensure every battery solution meets the rigorous standards required for global distribution:

  • UN38.3: Mandatory for the safe transport of lithium batteries.
  • UL & CE: Critical safety marks for entering US and European retail markets.
  • IEC 62133 certification: The international benchmark for safety testing that we strictly adhere to.

Speed and capacity are just as important as certifications. We bridge the gap between initial design and mass production, allowing you to scale up without supply chain bottlenecks. Our process relies on strict quality assurance, starting with automated sorting to match cell voltage and internal resistance perfectly. We utilize industrial-grade assembly methods—far more advanced than learning how to solder 18650 batteries together manually—to ensure every connection is robust and vibration-resistant for high-power vacuum applications.

Why Partner with Van4NU for Your Next Appliance Project?

When you are developing a high-performance vacuum cleaner, the battery pack isn’t just a component; it is the heart of the machine. Choosing the right power source determines whether your product dominates the market or gets returned due to poor runtime. At Van4NU, we operate as a dedicated OEM battery manufacturer, shifting the dynamic from a simple transaction to a strategic technical partnership.

The Technical Partner Approach vs. Off-the-Shelf Buying

Buying a generic battery pack off the shelf often leads to integration headaches. Standard packs rarely align perfectly with the unique geometry or discharge curves of a proprietary vacuum motor. We take a different route. We engineer custom lithium battery solutions specifically tailored to your device’s architecture. This ensures that the cordless appliance power systems we deliver maximize energy density without compromising safety or form factor.

Comparison: Generic Supplier vs. Van4NU Partnership

Feature Generic Off-the-Shelf Supplier Van4NU Technical Partnership
Fit & Form Standard sizes only; limits design freedom. Custom shapes to utilize every millimeter of space.
BMS Design Basic protection; often reactive. Custom BMS with predictive diagnostics and thermal balancing.
Discharge Rate Fixed limits; may choke high-power motors. Optimized for high-drain surges and specific motor loads.
Support Transactional; limited engineering help. Full engineering support from prototype to mass production.

In-House Engineering and Global Experience

Our value lies in our ability to solve complex power challenges in-house. We don’t just assemble cells; we design the entire energy ecosystem. Our engineering team has extensive experience navigating the strict safety standards required for the US market, ensuring your products are compliant and reliable.

We have successfully deployed power solutions across a wide range of industries. You can explore our diverse battery applications by usage to see how we adapt our technology to different high-demand environments. Whether you need a compact pack for a handheld unit or a heavy-duty array for an industrial cleaner, we bring global manufacturing expertise directly to your project.

  • Custom BMS Development: We write the logic that keeps your battery safe and efficient.
  • Rapid Prototyping: We move quickly from concept to a testable unit to keep your launch schedule on track.
  • Supply Chain Stability: We have secured access to top-tier 18650 and 21700 cells, ensuring consistent quality even during market shortages.

Best Battery Vacuum Cleaner Guide from Van4NU Battery Experts

You’re tired of dragging a cord around, but you’re terrified of a vacuum that dies halfway through the living room.

Searching for what is the best battery vacuum cleaner?

Most reviews obsess over attachments, bin size, and fancy LCD screens.

But as battery experts, we know the uncomfortable truth: The power source defines the performance. A vacuum is only as good as the lithium cells driving it.

In this guide, we are cutting through the marketing fluff to focus on what actually matters: Voltage, Cell Chemistry, and Real-World Runtime.

We’ll help you spot the difference between a gadget that fades after six months and a powerful tool engineered to last for years.

Ready to cut the cord with confidence?

Let’s dive in.

The 3 Pillars of a Top-Tier Battery Vacuum

When you ask, “What is the best battery vacuum cleaner?”, you aren’t just looking for a brand name; you are looking for reliability. As experts in manufacturing custom lithium battery systems, we know that the “best” vacuum is only as good as the power plant inside it. We strip away the marketing fluff to focus on the three technical pillars that actually determine performance: chemistry, efficiency, and modularity.

Battery Chemistry & Voltage (The Engine)

The heart of any high suction power cordless vacuum is its cell chemistry. We utilize premium Lithium-Ion (18650 and 21700 cells) and LiFePO4 technology to balance weight with raw power.

  • Voltage Matters: Higher voltage platforms (typically 24V or 36V) generally translate to higher Air Watts (AW) and stronger suction for deep cleaning.
  • Chemistry Choice: Lithium-Ion offers the best energy density for lightweight handheld vacuums, while LiFePO4 provides superior safety and cycle life.
  • Consistency: A top-tier battery maintains steady voltage output even as the charge depletes, ensuring your vacuum doesn’t lose suction halfway through the job.

Runtime vs. Charge Time Realities

A common frustration is a vacuum that dies in 15 minutes but takes 4 hours to charge. The lithium-ion vacuum battery life is dictated by the quality of the cells and the efficiency of the Battery Management System (BMS).

  • Cycle Life: We engineer batteries designed for thousands of charge cycles, ensuring the appliance runs like new for years, not just months.
  • Fast Charging: A fast charging vacuum cleaner requires robust thermal management to prevent overheating while accepting energy quickly.
  • The Trade-off: High capacity (longer runtime) usually means a heavier battery. We work with OEMs to find the perfect “Goldilocks” zone—enough power to clean a whole floor without weighing down your wrist.

The “Swappable” Factor for Longevity

One of the most critical features to look for is a removable battery vacuum cleaner. Batteries are consumables; they eventually degrade. If the battery is sealed inside the unit, a dead battery means a dead appliance.

  • Extended Cleaning: With a rechargeable battery pack replacement system, you can swap in a fresh pack to double your runtime immediately.
  • Sustainability: Swappable designs reduce e-waste. You replace the power source, not the entire machine.
  • Future-Proofing: A removable interface allows for easy upgrades if battery technology improves during the vacuum’s lifespan.

Which Battery Vacuum Fits Your Lifestyle?

Selecting the best battery vacuum cleaner isn’t just about picking the brand with the flashiest marketing; it’s about matching the power plant—the battery—to your specific daily routine. As a manufacturer of custom lithium systems, I know that different cleaning demands require different cell configurations. Whether you are managing a sprawling suburban home or a compact city apartment, the battery architecture dictates performance.

Best for Large Homes (High Capacity Options)

If you have over 2,000 square feet of floor space, runtime per charge is your most critical metric. You cannot afford to run out of juice halfway through the living room. For these environments, we recommend vacuums powered by high-capacity 21700 cells or dual-battery systems. These setups often utilize a removable battery vacuum cleaner design, allowing you to swap a depleted pack for a fresh one instantly.

  • Look for: 25.2V to 36V systems.
  • Key Feature: “Swappable” or “Click-in” battery packs.
  • Benefit: Infinite runtime (as long as you have a second pack charged).

Best for Quick Cleanups (Lightweight Stick Vacuums)

For quick messes or smaller apartments, a heavy-duty battery is overkill and adds unnecessary weight. You want a lightweight handheld vacuum that is easy to maneuver. These devices typically rely on compact, efficient power sources, similar to our 7.4V lithium battery packs for specialized vacuums, which provide ample power without the bulk. The goal here is agility; the battery should be light enough that lifting the unit to clean blinds or shelves doesn’t strain your wrist.

Best for Pet Owners (High Suction & Filtration)

Pet hair is notoriously difficult to remove from carpets, requiring a high suction power cordless vacuum driven by a high-torque brushless digital motor. This demands a battery with a high discharge rate to sustain peak power without voltage sag. Additionally, these units must power a motorized brush bar and often a HEPA filtration system, which adds to the energy draw.

Lifestyle Priority Feature Recommended Battery Tech
Large Home Extended Runtime High-capacity 21700 cells (Swappable)
Quick Cleanups Lightweight/Agility Compact 18650 packs (Lower Voltage)
Pet Owner Max Suction Power High-discharge Lithium-ion cells

Pro Tip: Always check the Lithium-ion vacuum battery life ratings on “Max” mode. Most manufacturers advertise runtime on “Eco” mode, but pet owners will need the battery to perform under high stress.

Why the Battery Management System (BMS) Matters

Battery Vacuum Cleaner BMS Safety and Longevity

The difference between a cheap knockoff and the best battery vacuum cleaner isn’t just the suction power; it’s the brain controlling the energy. We call this the Battery Management System (BMS). As manufacturers, we know that without a smart BMS, even the highest-quality lithium-ion cells will fail prematurely. The BMS is the unseen guardian that dictates safety, performance, and how many years your appliance will last.

Safety Features: Overheating and Overcharging

Safety is our non-negotiable priority. A robust BMS constantly monitors voltage, current, and temperature in real-time. When you leave your vacuum on the dock, the BMS cuts off the current once the cells reach capacity, preventing the dangerous chemical instability caused by overcharging.

During operation, high-suction modes generate significant heat. Our systems utilize thermal management protocols to detect rapid temperature spikes. If the pack gets too hot, the BMS throttles power or shuts down the unit to prevent thermal runaway, ensuring your cordless cleaning solution remains safe to handle.

Longevity: Balancing Cells for 500+ Cycles

Vacuum battery packs consist of multiple cells working in series. If one cell degrades faster than the others, it drags down the performance of the entire pack. A premium BMS performs active cell balancing, ensuring every individual cell charges and discharges at the exact same rate.

This balancing act is crucial regardless of the cell form factor, whether we are engineering packs with standard 18650 cells or managing the larger size of 32650 battery configurations often found in heavy-duty industrial equipment. By keeping the cells in sync, we can extend the lithium-ion vacuum battery life significantly, often exceeding 500 charge cycles.

The Van4NU Standard in Battery Engineering

At Nuranu, we don’t just assemble battery packs; we engineer the logic that drives them. The Van4NU standard means integrating predictive diagnostics directly into the circuit board. This allows the vacuum to communicate with the user—flashing a red light before a battery is critically low or indicating a filter blockage that is causing motor strain.

BMS Capability Comparison:

Feature Generic BMS Van4NU Advanced BMS
Overcharge Protection Basic Cut-off Precision Voltage Monitoring
Thermal Safety Fuse Only Real-time Thermal Sensors
Cell Balancing Passive/None Active Dynamic Balancing
Short Circuit Protection Standard Fast-Response Electronic Fuse

We design these systems to solve power challenges before they ever impact your cleaning routine, ensuring that your vacuum is ready to go the moment you pull it off the wall.

How to Keep Your Battery Vacuum Running Like New

Best Battery Vacuum Maintenance Tips

As manufacturers of the power systems driving top-tier appliances, we know that Lithium-ion vacuum battery life depends heavily on how the device is treated after it leaves the factory. While we engineer our packs with advanced protection, a few simple habits can significantly extend the lifespan of your cordless cleaning solution.

The 20-80 Charging Rule

To get the most out of your battery, avoid keeping it at 100% or letting it drop to 0% constantly. Lithium-ion cells are happiest when kept between 20% and 80% charge.

  • Don’t drain it dry: Deep discharges cause chemical stress that reduces capacity over time.
  • Unplug when full: While a good Battery Management System (BMS) prevents overcharging, keeping the battery at maximum voltage for weeks generates excess heat and degrades the cells.

Temperature Control and Storage Tips

Heat is the number one enemy of battery longevity. Storing your vacuum or battery pack in a hot garage or direct sunlight can permanently damage the internal chemistry. Conversely, charging a battery in freezing conditions can be dangerous. Proper storage is essential for maintaining performance and understanding if 18650 batteries are safe during long-term use.

  • Store batteries at room temperature (around 68°F / 20°C).
  • If you aren’t using the vacuum for a month, charge the battery to about 50% before storing it.

Filter Cleaning to Protect Battery Life

Many users don’t realize that a clogged HEPA filtration system directly impacts the battery. When airflow is restricted, the vacuum’s motor has to work harder to maintain suction.

  • Increased Load: A blocked filter forces the motor to draw more current (amps).
  • Heat Buildup: This extra energy draw creates heat, which stresses the battery pack.
  • Premature Failure: Consistently running a vacuum with dirty filters will lead to an early need for a rechargeable battery pack replacement.

Keep the airways clear, and your battery won’t have to fight to provide the power you need.

Frequently Asked Questions About Battery Vacuums

How long do cordless vacuum batteries actually last?

Most standard lithium-ion vacuum batteries are rated for about 300 to 500 charge cycles before they start losing significant capacity. In real-world terms, that usually means 3 to 4 years of regular use. However, the industry is shifting toward more durable solutions. For example, appliances utilizing LiFePO4 battery technology can handle thousands of cycles, meaning the battery pack could outlast the vacuum itself. If you notice your runtime dropping significantly after a year, it might be due to heat damage or poor storage habits rather than just age.

Can I leave my vacuum on the charger all the time?

Yes, you generally can. Modern cordless stick vacuums are equipped with a Battery Management System (BMS) that prevents overcharging. Once the battery hits 100%, the system stops drawing current to protect the cells. That said, heat is the enemy of lithium batteries. If your docking station is in a hot spot—like direct sunlight or a non-ventilated utility closet—it can degrade the battery chemistry over time. For the best longevity, keep the charger in a cool, dry place.

Is higher voltage better for suction power?

In most cases, yes. A higher voltage platform (like 24V or 36V) allows the vacuum’s brushless digital motor to generate more torque and higher Air Watts (AW) without overheating the wires. This is crucial for deep cleaning carpets where high suction is non-negotiable. However, voltage is just one part of the equation. We verify the true capability of a power system using rigorous battery load testing methods to ensure the pack can deliver consistent power output without sagging, ensuring your vacuum sucks just as hard at 20% charge as it does at 100%.

Ring Battery Replacement Guide with nuranu High-Capacity Spare Battery

Identify Your Ring Device Model

Before you attempt a Ring battery replacement, you absolutely must know which generation of hardware is mounted to your doorframe. Ring devices generally fall into two power categories: those with internal non-removable batteries and those utilizing the modern Quick Release Battery Pack system. Getting this wrong means buying the wrong parts or struggling to remove a device that isn\’t designed to pop open.

Internal Batteries vs. Quick Release Battery Packs

We see a lot of confusion here. Older models and specific budget-friendly units often house the battery inside the main chassis. This means the battery is not swappable. Conversely, the newer \”Video Doorbell 2, 3, 4\” and \”Battery Plus\” lines use a universal lithium-ion rechargeable battery that slides out.

Here is a quick breakdown to help you spot the difference:

Feature Internal Battery Models Quick Release Battery Models
Common Devices Original Ring Video Doorbell (1st Gen), Ring Video Doorbell (2nd Gen – 2020) Doorbell 2, 3, 3 Plus, 4, Battery Doorbell Plus, Stick Up Cams
Removal Method Must remove the entire unit from the wall bracket Only the faceplate and battery pack are removed
Charging USB port is on the back of the doorbell unit USB port is directly on the removable battery pack
Downtime Device is offline while charging (hours) Zero downtime if you swap with a spare nuranu pack

Visual Cues: Checking for the Silver Release Tab

The fastest way to confirm you have a Quick Release Battery Pack is to look for the silver release tab.

  1. Remove the Security Screw: Look at the bottom of your doorbell.
  2. Pop the Faceplate: Squeeze the sides and pull the bottom faceplate off.
  3. Spot the Tab: If you see a rectangular silver or gray tab at the bottom of the black battery unit, you have a removable system. Pressing this tab releases the battery.

If you remove the faceplate and see no silver tab, or if the faceplate doesn\’t come off separately from the camera housing, you likely have a model with an integrated battery.

Determining if the Whole Unit Comes Off the Wall

If you are rocking an original Ring Video Doorbell (1st or 2nd Gen), you won\’t be sliding a battery out. instead, the whole unit comes off the wall. You will need to loosen the security screws on the bottom and slide the entire doorbell up and off its mounting bracket. Once it\’s in your hand, you\’ll find the micro-USB charging port on the back of the device itself.

For Quick Release owners, the doorbell stays mounted. You only take the battery inside to charge. This is where upgrading to a high-capacity nuranu replacement battery changes the game—you simply swap the dead pack for a fresh one without ever leaving your home unprotected.

How to Remove and Charge Your Ring Battery

Ring Battery Replacement Guide

Getting your Ring device back online starts with a proper removal and charge cycle. If you rush this part, you risk stripping screws or damaging the locking mechanism. Here is the straightforward way to handle the Ring Battery Replacement process without the headache.

Essential Tools: T15 Torx Security Screwdriver and Micro-USB Cable

Before you head out to the porch, make sure you have the right gear. You cannot use a standard Phillips head screwdriver here. Ring devices use a star-shaped security screw to prevent theft.

  • T15 Torx Screwdriver: This is usually the orange tool included in the box. If you lost it, you need a replacement specifically labeled as a T15 Torx security bit.
  • Micro-USB Charging Cable: Most Ring batteries use the older standard Micro-USB, not the newer USB-C found on phones. Grab a sturdy cable and a reliable wall adapter (at least 2.1 amps) to speed up the process.

Step-by-Step Removal Process for Quick Release Models

For devices like the Ring Video Doorbell 3, 4, or the Spotlight Cam Battery, removing the power source is designed to be easy, provided you follow the order of operations.

  1. Security Screw Removal: Loosen the security screw at the bottom of the faceplate. You don\’t always need to take it all the way out—just enough to release the cover.
  2. Faceplate Removal: Squeeze the sides of the faceplate and pull it away from the wall to expose the battery compartment.
  3. Release the Battery: Locate the silver metal tab on the Quick Release Battery Pack. Press it down to unlock the mechanism.
  4. Slide Out: The battery should slide out smoothly. If it feels stuck, don\’t force it; ensure the tab is fully depressed.

Plugging In and Understanding LED Indicators (Amber vs. Green)

Once the battery is inside, plug your Micro-USB charging cable into the port on the battery itself, not the camera. You will see two LED lights on the top of the battery that tell you exactly what is happening.

  • Amber and Green Lights On: The battery is currently charging.
  • Solid Green Light Only: The battery is fully charged.

It is important to let the cycle finish completely. Understanding the two major reasons that affect the service life of lithium batteries—specifically charge cycling and temperature—will help you maintain the health of your Ring battery over time. Don\’t pull it off the charger the second the light turns green; give it a few extra minutes to stabilize.

Realistic Charging Time Estimates for Full Power

Don\’t expect a quick 30-minute top-up. A standard Ring battery takes anywhere from 5 to 10 hours to reach 100% capacity, depending on whether the USB cable is plugged into a high-speed wall adapter or a low-power USB port on a computer.

If you plug the battery back in and the Ring app battery status doesn\’t update immediately, don\’t panic. The device often needs a few motion events or a \”Live View\” activation to refresh its data with the server and register the new voltage level.

The \”Zero Downtime\” Strategy: Why You Need a Spare

Ring Battery Replacement Hot-Swap Guide

When you remove your battery for recharging, your home security effectively goes dark. Depending on the power source and battery health, a standard recharge cycle via a Micro-USB charging cable can take anywhere from 6 to 10 hours. That is a significant security vulnerability gap where your property remains unmonitored.

The most practical solution is the \”hot-swap\” method. By keeping a fully charged backup Quick Release Battery Pack on hand, you can replace the depleted unit in seconds. This ensures your Ring Video Doorbell or Spotlight Cam comes back online immediately, maintaining continuous protection without the downtime associated with waiting for a green light.

Why nuranu Replacement Batteries Are the Best Upgrade

Not all power cells are created equal. While standard OEM packs function adequately, upgrading to our nuranu high-capacity replacement battery options provides superior longevity. We focus on maximizing energy density to ensure your device operates longer between swaps. Understanding the underlying technology, such as the differences between 18650 Lithium-Ion vs. Lithium Polymer batteries, highlights why premium cell quality is critical for consistent performance.

Comparing OEM vs. High-Capacity Aftermarket Options:

Feature Standard OEM Battery nuranu High-Capacity Battery
Capacity Standard (approx. 6040mAh) Extended Capacity for longer runtime
Chemistry Basic Li-ion Premium Lithium-ion rechargeable battery cells
Durability Standard casing Reinforced for smart home security maintenance
Value Higher retail markup Optimized performance-to-cost ratio

We engineer our batteries to withstand the real-world demands of frequent motion alerts and Live View usage, giving you a robust power source that minimizes how often you need to break out the tool kit.

Step 3: Reinstalling the Battery and Resetting the Device

Ring Battery Replacement Steps and Troubleshooting

Once your pack is fully charged, getting your security system back online is a straightforward process, but precision matters. Slide the Quick Release Battery Pack firmly into the battery compartment. You must push until you hear a distinct audible click or feel the metal release tab lock into place. If the battery isn\’t seated correctly, the device won\’t power on, leaving your home unmonitored. While handling these components, always adhere to guidelines for the safe use of polymer lithium batteries to prevent damage to the contacts or the cell itself.

Waiting for the Blue Ring Light Power-Up Sequence

After the battery clicks in, look immediately at the front of the doorbell. You should see the circular LED light begin to spin or flash blue. This power-up sequence indicates the hardware is waking up and attempting to reconnect to your Wi-Fi network. Do not attempt to attach the faceplate until you see this light, as it confirms the battery is successfully delivering power.

Reattaching the Faceplate Without Overtightening

Once the device is powered, slide the faceplate back on—hook the top first, then snap the bottom into place. Reinsert the security screw using your T15 Torx driver. Warning: Do not overtighten this screw. It only needs to be snug enough to keep the cover secure. excessive force can strip the screw head or crack the plastic housing, making future Ring battery replacement difficult.

Troubleshooting: Refreshing the App Dashboard Status

A common frustration is opening the app immediately after a swap and seeing the old battery percentage. The Ring app battery status does not always update in real-time. If the dashboard still shows a low charge or \”Offline,\” try these steps:

  • Force Close the App: Completely shut down the app on your phone and reopen it to clear the cache.
  • Trigger an Event: Walk in front of the camera or press the doorbell button. This forces the device to \”check in\” with the server and update its status.
  • Check Connection: If the device remains unresponsive, perform Ring device offline troubleshooting by checking your router or Wi-Fi signal strength.

How to Extend Your Ring Battery Life

Ring Battery Life Optimization Tips

Constant recharging is a hassle. If you find yourself climbing a ladder every two weeks to swap out your Quick Release Battery Pack, your settings are likely too aggressive for your environment. By tweaking a few configurations in the Ring app and understanding the chemistry of your lithium-ion rechargeable battery, you can significantly extend the time between charges.

Optimizing Motion Sensitivity and Frequency Settings

The biggest drain on your battery is the motion sensor. Every time the camera detects movement, it wakes up, records, and transmits data via Wi-Fi. If you live on a busy street, your motion zone sensitivity might be triggering hundreds of \”false positive\” events a day—like passing cars or swaying trees—which kills the battery fast.

To fix this:

  • Adjust Motion Zones: In the Ring app, redraw your zones to exclude high-traffic areas like sidewalks or streets.
  • Lower Motion Frequency: Change the setting to \”Regular\” or \”Periodically.\” This inserts a short \”cool-down\” period after an alert, preventing the camera from recording back-to-back clips of the same event.
  • Smart Alerts: Enable \”Person Detection\” so the camera ignores pets and debris.

Managing Snapshot Capture to Prevent Rapid Drain

Snapshot Capture is a feature that takes still photos at set intervals (every 14 minutes to every hour) between motion events. While this fills in the gaps in your timeline, it keeps the device constantly active.

If Ring app battery status shows a rapid decline, check this setting immediately. Turning Snapshot Capture off is the single most effective way to boost battery longevity. If you need it on, set the frequency to the longest interval available (every 60 minutes) to minimize power consumption.

The Impact of Wi-Fi Signal Strength (RSSI) on Battery Performance

Many users don\’t realize that a weak Wi-Fi signal physically drains the battery. When the signal is poor (indicated by a high RSSI number in the \”Device Health\” section), the internal radio has to work much harder to maintain a connection to your router.

If your RSSI is worse than -60, your device may struggle to upload video, leading to Ring device offline troubleshooting scenarios that burn through power. Installing a Wi-Fi extender (specifically a Ring Chime Pro) near the door can bridge the gap, allowing the battery to transmit data efficiently without overworking.

Cold Weather Mode: How nuranu Cells Handle Winter Stress

Cold weather battery drain is a physical limitation of all lithium-ion batteries. As temperatures drop, the chemical reaction inside the battery slows down, causing it to lose charge faster and eventually stop working entirely below freezing.

At Nuranu, we engineer our replacement cells with high-quality materials designed to maintain stability better than standard generic options. However, even the best batteries need care during extreme winters. If you keep a spare rotation, knowing how to store batteries safely inside your home ensures your backup is healthy and fully charged when it\’s time to swap them out in the freezing cold. Keeping your spares at room temperature prevents degradation and ensures you aren\’t swapping in a dud.

Frequently Asked Questions (FAQ) regarding Ring Batteries

Can I Use a Generic Micro-USB Cable for Charging?

Yes, you absolutely can. While the orange cable included in the box is iconic, there is no proprietary chip inside it. Any standard Micro-USB charging cable will work perfectly for a Ring Battery Replacement or recharge.

However, the power source matters more than the cable. For the fastest charge time (usually around 5 to 10 hours), plug the USB cable into a dedicated wall adapter (like your phone charger) rather than a computer USB port, which often provides lower amperage.

Real-World Battery Lifespan vs. Advertised Specs

Ring often advertises battery life lasting anywhere from 6 to 12 months, but in the real world, this varies heavily based on your settings. High motion sensitivity, frequent \”Live View\” usage, and cold weather can drain the pack in just a few weeks.

Most Quick Release Battery Packs rely on standard lithium-ion chemistry. Understanding how long 18650 batteries last is crucial because the internal cells degrade over time with repeated cycling. If you find yourself recharging every two weeks despite moderate usage, the internal cells have likely reached the end of their lifespan, and it is time for a replacement.

Safety and Compatibility of Third-Party Batteries like nuranu

Using high-quality third-party batteries is a safe and cost-effective way to maintain your security system. Our nuranu replacement batteries are engineered to match the exact voltage and amperage requirements of Ring devices.

We focus on using premium lithium-ion cells that offer stability and longevity comparable to or exceeding OEM standards. Always ensure the battery clicks firmly into the compartment to maintain weather resistance.

What to Do If You Lose Your Security Screwdriver

This is a common headache. The screw at the bottom of the faceplate is a T15 Torx Security Screw (star-shaped), not a standard Phillips or flathead.

  • Do not force it: Using the wrong screwdriver will strip the head, making security screw removal nearly impossible without drilling.
  • The solution: You can easily find a replacement T15 screwdriver at a local hardware store or order a specific Ring spare parts kit online. We always recommend keeping this tool in a specific \”junk drawer\” or taped to the inside of a utility cabinet so it never goes missing during a critical battery swap.

How Long Do Lithium Batteries Last Explained Li-Ion Cycle Life Guide

You might already know that Lithium batteries are superior to traditional Lead-Acid options…

But how long do they actually last?

Is it 3 years? 5 years? Or a decade?

Well, the answer isn\’t just about time—it lies in a metric most manufacturers hide in the fine print: Cycle Life.

The reality is that not all lithium is created equal. A phone battery and a marine battery are worlds apart.

In this post, I’m going to break down the critical difference between Calendar Life and Cycle Life, and explain why LiFePO4 chemistry is the only logical choice for deep-cycle applications.

If you are looking to maximize your ROI and get 10+ years of reliable power for your RV or boat, this guide is for you.

Let’s dive right in.

What Actually is \”Cycle Life\”?

When we discuss how long a battery lasts, we aren\’t just talking about years on a calendar. We are talking about Cycle Life—the total number of complete charge and discharge rounds a battery can handle before its capacity drops below 80% of its original rating.

Defining a Full Cycle

A single cycle is defined as discharging a battery from 100% State of Charge (SoC) down to 0% and charging it back up to 100%. However, in real-world applications like RVs or marine setups, you rarely drain your battery completely in one go.

Partial Cycles and Cumulative Usage

Most users operate in partial cycles. If you use 50% of your battery capacity today and recharge it, that is only half a cycle. You would need to do that twice to equal one full cycle.

This cumulative math is why lithium batteries are so efficient for solar energy storage. You can top them off daily without \”wasting\” a cycle or worrying about memory effects.

  • Day 1: Discharge 20% → Recharge (0.2 cycles)
  • Day 2: Discharge 30% → Recharge (0.3 cycles)
  • Day 3: Discharge 50% → Recharge (0.5 cycles)
  • Total: 1 Full Cycle completed over 3 days.

Calendar Life vs. Cycle Life

It is critical to distinguish between how old a battery is (time) and how much work it has done (usage).

Feature Calendar Life Cycle Life
Definition The lifespan of the battery based on time, regardless of use. The lifespan based on the number of charge/discharge rounds.
Main Enemy Heat, high storage voltage, and natural chemical aging. Deep discharges, high currents, and extreme temperatures.
Nuranu Advantage Low Self-Discharge: <3% per month, ensuring long shelf life. High Throughput: Rated for 4,000–6,000+ cycles.

For our customers, Cycle Life is the metric that matters most for ROI. While a lead-acid battery might physically exist for 5 years (Calendar Life), it may fail after only 300 cycles. In contrast, our LiFePO4 technology ensures the battery remains operational for thousands of cycles, often outlasting the equipment it powers.

Not All Lithium is Created Equal: NCM vs. LiFePO4

When people ask \”how long do lithium batteries last,\” they often confuse the battery in their smartphone with the battery in their RV or solar setup. It is crucial to understand that not all lithium chemistry is the same. The two main players you will encounter are Lithium Nickel Manganese Cobalt Oxide (NCM) and Lithium Iron Phosphate (LiFePO4).

NCM Chemistry Limitations

Most consumer electronics, like laptops and electric tools, use NCM chemistry. These batteries are lightweight and energy-dense, but they sacrifice longevity for size.

  • Short Lifespan: NCM batteries typically offer only 500 to 800 cycles. This is why your phone battery starts dying quickly after just two years of daily charging.
  • Volatility: They are more sensitive to heat and physical damage.
  • Degradation: If you are curious why small electronics fail, understanding do 18650 batteries go bad reveals how standard lithium cells degrade much faster than industrial-grade options.

The LiFePO4 Longevity Advantage

At Nuranu, we exclusively use Lithium Iron Phosphate (LiFePO4) chemistry for our deep cycle batteries. This chemistry is specifically engineered for long-term energy storage rather than just being lightweight.

  • Massive Cycle Life: Unlike NCM, LiFePO4 batteries are rated for 4,000 to 6,000+ cycles at 80% Depth of Discharge (DOD). That is roughly 10 times the lifespan of a standard lead-acid battery.
  • Stable Chemistry: LiFePO4 has an extremely strong chemical bond. It is much harder to break down, meaning the battery retains its capacity for over a decade.

Safety and Stability for Deep-Cycle Use

Safety is just as important as lifespan, especially when you are sleeping in an RV or boat on top of your battery bank.

  • Thermal Runaway Protection: NCM batteries can be prone to \”thermal runaway\” (catching fire) if punctured or overcharged. LiFePO4 is chemically incombustible and stable, making it the safest lithium technology available.
  • High-Temp Tolerance: Our batteries handle heat much better, operating safely up to 140°F (60°C).

By choosing the right LiFePO4 battery manufacturer, you ensure you are getting Grade A cells that actually deliver on these safety and longevity promises, rather than cheap knock-offs that degrade like phone batteries.

The \”Depth of Discharge\” (DoD) Factor

Battery Cycle Life Comparison DoD LiFePO4 vs Lead Acid

When we talk about battery longevity, Depth of Discharge (DoD) is the single most critical variable. Simply put, DoD refers to the percentage of the battery that has been discharged relative to its total capacity. Understanding this concept is the key to seeing why traditional batteries end up costing you more money in the long run compared to modern lithium technology.

Limitations of Lead-Acid Batteries

If you are still using traditional Lead-Acid or AGM batteries, you are effectively paying for capacity you cannot use. These batteries have a severe limitation: they should never be discharged below 50% DoD.

Once you dip below that 50% mark, the internal chemistry begins to degrade rapidly due to sulfation. This means a 100Ah lead-acid battery really only gives you 50Ah of usable power. Pushing them harder significantly shortens their lifespan, often reducing them to fewer than 300 cycles.

Nuranu LiFePO4 Capability

In contrast, our Nuranu LiFePO4 batteries are designed for deep cycling. Thanks to the high-quality Grade A cells we use, you can safely discharge these batteries to 80-100% DoD without causing damage. Our built-in Battery Management System (BMS) ensures the cells remain balanced and protected even during deep discharge cycles.

This efficiency means a 100Ah Nuranu battery actually provides nearly 100Ah of usable power. You can explore our full range of lithium-ion battery products to find the right capacity for your setup. We engineer them to handle the heavy lifting that would destroy a standard flooded battery.

Cycle Life Math: Lead Acid vs. Lithium

The difference in cycle life becomes obvious when you look at the numbers side-by-side. Here is how the math works out when you compare the two chemistries under real-world usage conditions:

  • Lead-Acid / AGM:

    • Usable Capacity: ~50%
    • Cycle Life: 300 – 500 cycles
    • Result: Frequent replacements (every 2-3 years).
  • Nuranu LiFePO4:

    • Usable Capacity: ~80% to 100%
    • Cycle Life: 4,000 – 6,000+ cycles
    • Result: Long-term reliability (10+ years).

By switching to lithium, you aren\’t just getting more power per charge; you are investing in a system that lasts 10x longer than the competition. Whether for marine, RV, or solar applications, the ability to utilize the full depth of the battery changes the economics of your power system entirely.

What Kills a Lithium Battery? (And How to Prevent It)

Even though our LiFePO4 batteries are built like tanks compared to fragile lead-acid units, they aren\’t invincible. To get that massive cycle life we promised, you need to avoid a few specific scenarios that can degrade the internal chemistry or trigger safety mechanisms. Lithium battery maintenance is mostly hands-off, but ignoring these environmental factors will kill your investment fast.

Temperature Extremes and Internal Chemistry

Heat is the silent killer of battery longevity. Operating consistently above 115°F (45°C) accelerates chemical degradation and can lead to capacity fade. In extreme cases of abuse or manufacturing defects, excessive heat can even be a precursor to thermal runaway. If you notice your battery casing looking distorted, it is crucial to understand what causes lithium-ion battery swelling so you can remove it from service immediately.

On the flip side, cold weather requires a different approach. While you can discharge (use) the battery in freezing temps, never charge a lithium battery below freezing (32°F / 0°C). Doing so causes Lithium Plating, where metallic lithium builds up on the anode. This is permanent damage that reduces capacity and increases the risk of short circuits. Our Nuranu batteries feature a smart Battery Management System (BMS) that usually blocks charging in these conditions to protect you, but it is a rule you must live by.

The Danger of Lead-Acid Chargers

One of the most common mistakes we see is RV owners plugging a modern lithium bank into an old \”dumb\” charger. Specifically, chargers with a \”Desulfation\” or \”Equalization\” mode are dangerous. These modes spike the voltage way above the safe limit for LiFePO4 cells (often over 15V). This can fry the BMS or damage the cells. Always use a dedicated lithium charger or a programmable unit set to the correct lithium profile.

Best Practices for Long-Term Storage

If you are parking your boat or RV for the winter, do not leave your batteries at 100% State of Charge (SoC), and definitely don\’t leave them dead at 0%.

  • The Sweet Spot: Store them at 40-60% SoC. This keeps the internal chemistry stable.
  • Disconnect Loads: Even small phantom draws can drain a battery over months.
  • Check Voltage: Every 3-6 months, give it a quick check.

Following these basic precautions for the use of lithium batteries ensures that when you pull your rig out of storage, your power system is ready to go without any nasty surprises.

The Economics of Longevity: Cost Per Cycle

When you look at the price tag of a premium LiFePO4 battery compared to a standard flooded lead-acid or AGM battery, the difference is obvious. Lithium requires a higher initial investment. However, smart energy management isn\’t about the purchase price; it\’s about the Cost Per Cycle.

We approach battery power as a long-term asset, not a disposable consumable. When you calculate the Return on Investment (ROI) based on usable energy and lifespan, LiFePO4 vs Lead Acid becomes a simple math problem where lithium wins every time.

Upfront Cost vs. 10-Year Ownership

A standard lead-acid battery typically lasts 300 to 500 cycles before its capacity drops below useful levels. In a daily use scenario—like full-time RV living or off-grid solar—you will likely replace that lead-acid battery every 2 to 3 years. Over a decade, you are buying that \”cheaper\” battery three or four times.

In contrast, a Nuranu LiFePO4 battery is rated for 4,000 to 6,000+ cycles. You buy it once, and it serves you for 10 years or more.

The 10-Year Cost Breakdown:

  • Lead-Acid/AGM: Low upfront cost $times$ 4 replacements + maintenance costs = High Total Cost of Ownership.
  • Nuranu LiFePO4: Higher upfront cost $times$ 1 purchase + zero maintenance = Lowest Cost Per Cycle.

Why Nuranu Offers Better Long-Term Value

Not all lithium batteries deliver on their ROI promises. The market is flooded with budget options using \”Grade B\” or recycled cells that degrade quickly, ruining your cost-per-cycle calculations.

We strictly use Grade A prismatic cells and a robust Battery Management System (BMS). This ensures our batteries actually reach that 10-year mark without significant capacity fade. When you invest in Nuranu, you are securing a reliable power source that costs significantly less per kilowatt-hour over its lifetime than any lead-acid alternative.

Why Nuranu Batteries Outlast the Competition

Long-Lasting Lithium Batteries with Smart BMS

When we engineer our batteries, we aren\’t just looking at the first year of use; we are building for the next decade. The difference between a battery that fails after two seasons and one that lasts for 4,000+ cycles comes down to three critical components: the quality of the cells, the intelligence of the management system, and the durability of the casing.

Grade A Automotive Cells

Not all lithium is created equal. Many budget manufacturers cut costs by using Grade B cells or \”re-purposed\” cells that have already seen use in other applications. At Nuranu, we exclusively use UL-listed Grade A prismatic cells. These are the same high-quality components found in modern electric vehicles. By starting with premium chemistry, we ensure that the Li-Ion Cycle Life isn\’t just a theoretical number on a spec sheet—it is a reliable performance standard you can count on for years.

The Role of Our Smart BMS

The Battery Management System (BMS) is the brain of the operation. Without it, even the best cells can be ruined by a single accidental over-charge or temperature spike. Unlike unprotected cells that carry safety risks, our built-in Smart BMS actively monitors voltage, current, and temperature in real-time.

Our BMS delivers three layers of protection:

  • Cell Balancing: Ensures every cell charges and discharges at the same rate, preventing capacity fade.
  • Safety Cut-offs: Automatically disconnects the battery during short circuits, over-charging, or extreme temperatures to prevent thermal runaway.
  • Optimization: Maximizes the usable energy from every charge cycle without stressing the internal chemistry.

Built for the Elements

We know our customers use these batteries in demanding environments, from pounding waves in a bass boat to the constant vibrations of an RV on a gravel road. We build our casings to be rugged and resistant to the elements. Whether you are powering a trolling motor or an off-grid solar setup, our design ensures that physical stress doesn\’t compromise the electrical integrity inside.

Frequently Asked Questions (FAQ)

Does fast charging reduce cycle life?

Yes, pushing maximum current constantly can generate excess heat, which is the enemy of any battery chemistry. While our LiFePO4 cells are designed to handle high-current demands better than lead-acid, sticking to recommended charging rates is the best way to maximize your Deep Cycle Battery Lifespan. Moderate charging keeps internal temperatures stable, ensuring the Grade A Battery Cells inside remain healthy for the long haul.

How many years will a 4,000-cycle battery last in an RV?

If you were to use a full cycle (100% to 0%) every single day, 4,000 cycles would last roughly 11 years. However, most RVers do not deplete their battery bank entirely every day. With typical usage involving partial cycles and seasonal downtime, a Nuranu battery can easily exceed 10 to 15 years of service. For a deeper dive into these calculations, check out our guide on how long lithium batteries last in professional setups.

Can I leave my Nuranu battery on the charger all winter?

Our built-in Battery Management System (BMS) prevents over-charging, making it safe to leave connected if you are using a compatible smart charger. However, for optimal Lithium Battery Maintenance, we recommend disconnecting the battery if you are storing your vehicle for several months. Since our batteries have an extremely low self-discharge rate (less than 3% per month), you can store them at a partial State of Charge (SoC) and they will be ready to go when spring arrives.

How Long Will a 12V 5Ah Battery Last Explained with Runtime and Lifespan

You’re likely asking the question: How long will a 12V 5Ah battery actually last?

Whether you’re powering a portable fish finder, a kid’s ride-on car, or a backup alarm system, you need a precise answer, not a guess.

Here is the hard truth: Not all 5Ah batteries are created equal.

While the label might say \”5Ah,\” the real-world runtime depends entirely on the battery chemistry and your specific power draw. If you are using standard lead-acid, you might be losing half your power before you even start.

In this guide, I’m going to give you the exact runtime calculator formula you need to plan your day.

I’ll also show you why upgrading to Nuranu LiFePO4 technology can instantly double your usage time compared to traditional Sealed Lead Acid (SLA) batteries.

Ready to do the math?

Let’s dive in.

How Long Will a 12V 5Ah Battery Last? The Honest Answer

When you ask, \”How long will a 12V 5Ah battery last?\”, the honest answer is: it depends entirely on what you are powering.

There is no single magic number because a battery is a fuel tank, not a timer. If you sip the power slowly with a small LED light, it could last all night. If you gulp it down with a high-draw motor, it might only last an hour. However, by understanding the basic math and chemistry, you can predict your runtime with high accuracy.

The \”Rule of Thumb\” Answer

For a quick estimate without grabbing a calculator, think of \”Amp-hours\” (Ah) literally. A 5Ah battery is theoretically designed to provide:

  • 1 Amp of current for 5 hours.
  • 5 Amps of current for 1 hour.
  • 0.5 Amps of current for 10 hours.

While this gives you a ballpark figure, real-world physics—specifically the type of battery chemistry you use—will dictate the actual results.

The Two Definitions of \”Last\”: Runtime vs. Lifespan

Confusion often arises because \”how long it lasts\” has two very different meanings in the battery world. We need to distinguish between them immediately:

  1. Runtime (Hours per Charge): This is how many hours your device will run before the battery hits 0% and needs a recharge. This is strictly about capacity (Amp-hours and Watt-hours).
  2. Lifespan (Total Service Life): This is how many years the battery will survive before it degrades and needs to be thrown in the recycling bin. This is about cycle life.

The Nuranu Difference

Here is where our engineering changes the game. Most generic 12V 5Ah batteries are Sealed Lead Acid (SLA). They suffer from voltage sag and can only safely use about 50% of their rated capacity.

Nuranu LiFePO4 batteries are different. We utilize Lithium Iron Phosphate chemistry with a nominal voltage of 12.8V. This provides distinct advantages:

  • 100% Depth of Discharge (DoD): You get the full 5Ah capacity, not just half.
  • Higher Voltage Stability: Our batteries maintain steady power (above 12V) right until the end, whereas lead-acid drops quickly.
  • Massive Cycle Life: While a standard SLA dies after 300-500 cycles, a Nuranu battery is built for 2,000 to 5,000+ cycles.
Feature Standard Lead-Acid (SLA) Nuranu LiFePO4
Usable Capacity ~2.5Ah (50% DoD) 5Ah (100% DoD)
Voltage Drops steadily under load Constant ~12.8V
Lifespan 2-3 Years 10+ Years
Weight Heavy ~1/3 the weight

When you choose Nuranu, \”lasting longer\” means getting double the runtime per charge and ten times the service life compared to old-school lead batteries.

The Math: How to Calculate Your Battery Runtime

12V 5Ah Battery Runtime Calculation Formula

Stop guessing and start calculating. While environmental factors play a role, we can get a very accurate estimate of how long your gear will run using a simple equation. This method works whether you are powering a fish finder, a small fan, or LED lights.

The Magic Formula: Battery Capacity / Load = Runtime

To figure out your battery runtime, you just need to know how much energy is in the \”tank\” and how fast your device is draining it.

The basic equation looks like this:
$$ text{Total Watt-Hours} div text{Device Wattage} = text{Estimated Hours of Runtime} $$

Step 1: Convert to Watt-Hours

Most people look at Amp-hours (Ah), but that only tells half the story. To get the true energy capacity, we need Watt-hours (Wh). This accounts for the voltage, giving you a standardized measure of energy.

For a Nuranu 12V 5Ah battery, the math is straightforward:
12 Volts × 5 Amp-hours = 60 Watt-hours (Wh)

Think of this as having 60 \”units\” of energy available to spend. If you are looking to understand the deeper engineering behind capacity or want to build a LiFePO4 battery pack yourself, mastering this conversion is the foundation of all system design.

Step 2: Know Your Load

Next, check the power draw of the device you want to run. This is usually printed on a sticker on the back or bottom of the device.

  • If it lists Watts (W): You are ready to go.
  • If it lists Amps (A): Multiply the Amps by 12V to get the Watts. (e.g., 2 Amps × 12V = 24 Watts).

Step 3: Apply the Efficiency Factor

This is where the real world differs from paper calculations. No battery system is 100% efficient, but the chemistry you choose dictates how much energy you actually get to use.

  • Lead-Acid (SLA/AGM): You must apply a 50% efficiency factor. If you drain these batteries below 50%, you damage them permanently. So, a 60Wh lead-acid battery only gives you 30Wh of usable power.
  • Nuranu LiFePO4: Our lithium iron phosphate chemistry allows for a significantly higher depth of discharge. You can safely calculate using 95-100% efficiency. That means you get virtually the full 60Wh of energy to power your devices.

The Result:
If you have a 10-Watt LED light:

  • Lead-Acid: 30Wh usable / 10W = 3 Hours
  • Nuranu LiFePO4: 60Wh usable / 10W = 6 Hours

By switching to Nuranu, you effectively double your runtime without changing the physical size of the battery.

The Hidden Variable: Depth of Discharge (DoD)

12V 5Ah Battery Life and Chemistry Comparison

When calculating runtime, the number printed on the battery label is often misleading. This is due to a factor called Depth of Discharge (DoD), which determines how much of the battery\’s total capacity you can actually use without causing damage.

The Lead-Acid Limitation

If you are using a traditional Sealed Lead Acid (SLA) battery, you are effectively paying for capacity you cannot touch. While the label might say \”12V 5Ah,\” SLA batteries should generally not be discharged below 50%. Going deeper than that significantly shortens their lifespan and can cause permanent failure.

In practical terms, a 5Ah lead-acid battery only provides about 2.5Ah of usable power. Once the voltage drops under load, the device often shuts off prematurely. If you are still weighing your options, our Gel vs. Lithium battery showdown explains why older chemistries just can\’t keep up with modern demands.

The Nuranu LiFePO4 Advantage

We built our Nuranu LiFePO4 batteries to solve this efficiency problem. Our Lithium Iron Phosphate chemistry allows for 100% Depth of Discharge. This means when you buy a 5Ah battery from us, you get the full 5Ah of energy to run your fish finder or LED lights.

Thanks to our integrated Battery Management System (BMS), you can safely drain the battery down to nearly empty. The BMS monitors cell health and cuts power only when necessary to protect the internal components, ensuring you get maximum runtime every single cycle.

Comparison Table: SLA vs. Nuranu LiFePO4

Here is a breakdown of why lithium iron phosphate efficiency beats traditional lead-acid every time:

Feature Standard SLA (Lead-Acid) Nuranu LiFePO4
Labeled Capacity 5Ah 5Ah
Usable Capacity ~2.5Ah (50% DoD) ~5Ah (100% DoD)
Voltage Stability Drops steadily during use Constant ~12.8V until empty
Weight Heavy (~4-5 lbs) Lightweight (~1/3 of SLA)
Cycle Life 300 – 500 cycles 2,000 – 5,000+ cycles
Maintenance Vulnerable to sulfation Maintenance-free

Real-World Runtime Scenarios

Calculating Watt-hours is great for theory, but you need to know how this translates to your actual gear. We know that lab conditions rarely match the outdoors, so here is a breakdown of what you can expect from a Nuranu 12V 5Ah LiFePO4 battery in common US applications.

Fish Finders (Small/Portable)

For kayak anglers and ice fishermen, weight is everything. A standard 4-inch to 5-inch fish finder (like a Garmin Striker or Lowrance Hook) typically draws between 0.25A and 0.5A.

  • Estimated Runtime: 10 to 20 hours.
  • The Nuranu Edge: Unlike lead-acid batteries that drop voltage as they drain—causing your screen to flicker or shut off prematurely—our LiFePO4 chemistry maintains a steady voltage. You get clear sonar readings right up until the battery is empty.

Kids\’ Ride-On Toys (Power Wheels)

Upgrading a Power Wheels or similar ride-on toy is one of the most popular uses for this size battery. These motors have a high amp draw, often pulling 3A to 5A depending on the terrain and the weight of the rider.

  • Estimated Runtime: 45 minutes to 1.5 hours of continuous driving.
  • Performance Note: With standard batteries, the car gets slower as the battery drains. With Nuranu, your kid gets full speed until the very end. Since safety is a priority when powering children\’s vehicles, it is important to know are LiFePO4 batteries safe for these applications? Absolutely—our built-in BMS protects against overheating and short circuits.

LED Strip Lights (Camping/RV)

A 12V 5Ah battery is a perfect portable power supply for camping lighting. A typical 16-foot (5 meter) roll of LED strip lights draws about 1.5A to 2A on full brightness.

  • Estimated Runtime: 2.5 to 3.5 hours on full brightness.
  • Efficiency Tip: If you use a dimmer and run the lights at 50%, you can easily extend this to 6+ hours, providing light for an entire evening at the campsite.

Home Alarm Systems/CCTV

Most home alarm panels use a 12V battery for backup power during outages. These systems are designed to be efficient, usually drawing a very low standby current of around 0.1A to 0.2A.

  • Estimated Runtime: 25 to 50 hours.
  • Reliability: In this application, the 12V 5Ah battery capacity ensures your security system stays online for days, not just hours, during a blackout. Because our batteries have a low self-discharge rate, they remain ready to work even after sitting idle in the panel for months.

Lifespan: How Many Years Will the Battery Survive?

12V 5Ah Battery Lifespan and Cost Analysis

When asking \”how long,\” smart buyers look beyond daily runtime to the total service life of the unit. The lifespan of a battery is technically measured in cycles—one full discharge followed by a full recharge. This metric defines exactly when your battery will need to be replaced, and it is where the chemistry difference becomes undeniable.

Cycle Life Explained

Every time you drain a battery and charge it back up, the internal chemistry degrades slightly. Eventually, the battery loses the ability to hold a useful charge. Battery cycle life is the total number of these charge/discharge rounds a battery can handle before its capacity drops below 80% of its original rating.

SLA Expectancy vs Nuranu LiFePO4 Expectancy

The difference in longevity between traditional lead-acid and our lithium technology is drastic.

  • Sealed Lead Acid (SLA): Typically rated for 300 to 500 cycles. If you cycle the battery daily, you will likely need a replacement in 1 to 2 years.
  • Nuranu LiFePO4: Engineered for 2,000 to 5,000+ cycles. Even with rigorous daily use, this translates to 5 to 10 years of service life.

Cost Per Cycle Analysis

While a lead-acid battery has a lower sticker price, it is often a \”false economy.\” You would need to purchase roughly 10 lead-acid batteries to match the lifespan of a single Nuranu LiFePO4 unit. When you calculate the cost per cycle, lithium is significantly cheaper over the long term. Understanding the relationship between lithium battery voltage and power capacity helps explain why our chemistry maintains performance for years while lead-acid degrades rapidly. Investing in Nuranu means buying a power solution once, rather than renting it repeatedly through constant replacements.

Factors That Kill Your Battery Runtime

12V 5Ah Battery Runtime Factors

Even with the best battery runtime calculator, real-world conditions can skew the numbers. The environment and how you use the power source play a massive role in whether you get the full 5Ah or come up short. Here is what drains your energy reserves faster than expected.

Temperature and Cold Weather Impact

Batteries rely on chemical reactions to release energy, and cold weather slows those reactions down. If you are using your 12V 5Ah battery for ice fishing or winter camping, you will notice a drop in performance.

  • Cold: Increases internal resistance. While our LiFePO4 chemistry handles the cold far better than lead-acid, freezing temperatures can still temporarily reduce usable capacity.
  • Heat: Extreme heat improves performance temporarily but degrades the battery\’s internal components over time, shortening its overall life.

For the best portable power supply duration, try to keep the battery insulated or within a moderate temperature range (ideally above freezing and below 110°F).

High Current Draw (Peukert’s Effect)

This is a technical concept with a simple reality: the faster you drain a battery, the less total energy you get out of it. This is known as Peukert’s Effect.

  • Lead-Acid: Suffers heavily here. If you pull a high amp draw (like starting a motor), the effective capacity plummets. A 5Ah SLA might only give you 3Ah of usable power under high load.
  • Nuranu LiFePO4: Our lithium chemistry significantly minimizes this effect. We provide a consistent voltage and capacity even when powering demanding devices, ensuring your 12 volt battery discharge curve remains flat and efficient.

Self-Discharge and Storage Tips

If you grab your battery off the shelf after months of non-use, it might be empty. All batteries suffer from self-discharge, leaking energy even when disconnected.

  • The Rate: Traditional lead-acid batteries lose charge quickly (up to 15% per month) and can suffer permanent damage if left flat. Nuranu LiFePO4 batteries have a very low self-discharge rate (<3% per month).
  • Storage: Store your battery at roughly 50% charge in a cool, dry place. Neglecting storage maintenance is the main reason users end up wondering how often to replace their battery sooner than the warranty period.

Why Choose Nuranu 12V 5Ah for Your Portable Power?

When you switch to a Nuranu LiFePO4 battery, you aren\’t just buying a battery; you are investing in a premium power solution designed to outperform traditional lead-acid options in every metric. Whether you are powering a kayak fish finder, a remote sensor, or a portable lighting rig, our Nuranu 12V 5Ah specs deliver reliability that old-school chemistry simply cannot match.

Lightweight Advantages

Portability is king when you are on the move. A standard sealed lead-acid (SLA) battery is heavy and cumbersome, often weighing three times more than our lithium equivalent. Our 12V 5Ah LiFePO4 battery is featherlight, making it the ideal choice for applications where every ounce counts, such as hiking with ham radio gear or rigging a small boat. You get the same energy capacity without the \”brick\” weighing you down.

BMS Protection: The Brain of the Battery

Safety and longevity are non-negotiable. Every Nuranu battery features a built-in Battery Management System (BMS). This intelligent circuit board monitors the battery\’s health in real-time, protecting against common killers like overcharging, deep discharging, overloading, and short circuits. This level of protection ensures that your portable power supply duration isn\’t cut short by accidental misuse. Our safety standards are rigorous, making our technology reliable enough even for medical equipments where failure isn\’t an option.

Constant Voltage Performance

One of the biggest frustrations with lead-acid batteries is the voltage sag. As you use them, the voltage drops, causing lights to dim or motors to slow down long before the battery is actually empty. Nuranu LiFePO4 batteries maintain a steady ~12.8V output throughout nearly the entire discharge cycle. Your devices run at peak efficiency—lights stay bright and fish finders stay accurate—right up until the battery is depleted.

Nuranu Advantage

Feature Standard Lead-Acid (SLA) Nuranu LiFePO4
Weight Heavy / Bulky ~1/3 the Weight
Usable Capacity ~50% (Safe Limit) 100% (Full 5Ah)
Voltage Curve Drops steadily during use Flat / Constant 12.8V
Protection None (Fuses required) Integrated BMS
Lifespan 300 – 500 Cycles 2,000 – 5,000+ Cycles

The Beginner’s Guide to Small 12 Volt Batteries and LiFePO4 Benefits

The Anatomy of a 12V Battery: Terms You Must Know

Before upgrading your gear, you need to speak the language of power. Understanding the basic specs of a deep cycle battery ensures you choose the right model for your fish finder, alarm system, or scooter. Here is the breakdown of the essential terminology.

Voltage vs. Capacity (The Water Tank Analogy)

The easiest way to understand electricity is to visualize a water tank.

  • Voltage (V): Think of this as water pressure. Most small electronics require a 12V system (nominally 12.8V for our LiFePO4 batteries) to push the energy through the device.
  • Capacity (Ah): This is the size of the tank. An Amp Hour rating (Ah) tells you how much energy is stored. A 12V 7Ah battery and a 12V 20Ah battery have the same \”pressure,\” but the 20Ah tank holds nearly three times as much \”water,\” allowing your device to run longer.

Understanding C-Rating and Draw Speed

The C-Rating measures how fast a battery can safely deliver its energy.

  • 1C Rating: You can drain the entire battery in one hour.
  • Low C-Rating: Designed for slow, steady power (like a memory backup).
  • High C-Rating: Designed for bursts of power (like starting a motor).

Our small-format batteries are designed for consistent, reliable output. Pushing a battery beyond its rated draw speed can trigger the Battery Management System (BMS) to cut power to prevent overheating or damage.

Cycle Life and Longevity Explained

Battery cycle life is the number of times you can discharge and recharge a battery before it degrades. This is where the difference in chemistry becomes undeniable.

  • Sealed Lead Acid (SLA): Typically lasts 300–500 cycles. You might replace these every 1–2 years.
  • Nuranu LiFePO4: Rated for 2,000 to 5,000+ cycles. Even with daily use, these can last 5 to 10 years.

While the upfront cost of lithium is higher, the cost per cycle is significantly lower because you aren\’t buying replacements constantly.

Chemistry Wars: SLA vs. LiFePO4

12V Battery Comparison SLA vs LiFePO4 Benefits

When you are looking to power your electronics, the biggest decision comes down to the chemistry inside the black box. For decades, we relied on lead-acid, but the landscape has shifted. Today, the comparison of LiFePO4 vs Lead Acid is the most critical factor in determining how long your gear runs and how often you have to replace your power source.

The Old Standard: Sealed Lead Acid (SLA)

Sealed Lead Acid (SLA) and Absorbent Glass Mat (AGM) batteries have been the go-to for a long time simply because they are cheap upfront and widely available. However, they come with significant drawbacks for modern applications.

  • Heavy Weight: Lead is heavy. A standard SLA battery weighs about three times as much as its lithium counterpart, making it a burden for portable applications like kayaks or hiking gear.
  • Short Lifespan: Most SLA batteries are rated for only 300 to 500 cycles. If you use them daily, you might be buying a replacement in less than a year.
  • Voltage Sag: As the battery drains, the voltage drops significantly, which can cause sensitive electronics to shut off before the battery is actually empty.

The Modern Standard: LiFePO4 Advantages

At Nuranu, we focus on Lithium Iron Phosphate (LiFePO4) because it solves the inherent problems of older technology. These batteries are designed as \”drop-in\” replacements, meaning they fit the same physical space but offer vastly superior performance.

Why we switched to LiFePO4:

  • Superior Usable Capacity: With lead-acid, you should rarely discharge below 50% to avoid damage. With LiFePO4, you get 100% Depth of Discharge (DoD). This means a 10Ah lithium battery gives you twice the usable run-time of a 10Ah lead-acid battery. Understanding this efficiency is key when mastering watt-hours to amp-hours for your specific device requirements.
  • Massive Cycle Life: Our LiFePO4 units are rated for 2,000 to 5,000+ cycles. You could potentially use the same battery for 5 to 10 years, whereas an SLA battery would have been replaced multiple times.
  • Weight Efficiency: Weighing roughly 1/3 of an equivalent lead-acid battery, these are game-changers for mobility scooters and portable ham radios.
  • Low Self-Discharge: If you store your gear for the winter, a LiFePO4 battery holds its charge much better than lead-acid, which tends to go flat and sulfated if left unattended.

While the upfront cost of a deep cycle battery using lithium chemistry is higher, the cost per cycle is significantly lower over the life of the product. You buy it once, and it works.

Safety First: What is a BMS?

BMS Role in Small 12V Battery Safety

When you switch from old-school lead-acid to modern lithium technology, you aren\’t just changing chemistry; you are adding intelligence to your power setup. The Battery Management System (BMS) is a small electronic circuit board built directly inside the battery case. Think of the BMS as the \”brain\” or the dedicated bodyguard of the battery. Its sole job is to monitor the battery\’s health in real-time and intervene if things get risky.

While traditional batteries will blindly accept or release power until they fail, our LiFePO4 batteries use the BMS to ensure safe operation. This integrated intelligence is a major factor when comparing lithium-ion vs LiFePO4 safety, as it prevents the volatile failures often associated with other battery types.

How the BMS Acts as the \”Brain\”

The BMS constantly checks voltage, current, and temperature. If it detects a parameter moving outside the safe zone, it automatically disconnects the battery to prevent damage. This makes the battery \”worry-free\” for applications like fish finders, mobility scooters, and security systems.

Here is exactly what the BMS manages:

  • Overcharge Protection: It stops the flow of electricity once the battery is full, preventing high-pressure buildup.
  • Over-Discharge Protection: It cuts off power before the voltage drops too low, allowing you to use 100% of the capacity without killing the battery cells.
  • Short Circuit Protection: If the terminals are accidentally bridged, the BMS shuts down the circuit instantly to prevent sparks or fire.
  • Thermal Protection: It monitors internal heat, shutting down operation if the temperature gets too high during charging or discharging.

Sizing Guide: Which Amp-Hour (Ah) Do You Need?

When selecting a battery, the Amp-hour rating (Ah) is essentially the size of your fuel tank. It determines how long your device will run before needing a recharge. Since our LiFePO4 batteries allow for 100% Depth of Discharge (DoD)—unlike the 50% limit of lead-acid—you effectively get double the usable power in the same physical size. Choosing the right capacity depends entirely on your specific application and power demands.

Lightweight Power: 7Ah to 10Ah

This range is the industry standard for compact, low-draw electronics. These batteries are incredibly light, making them the ideal portable power source for gear you have to carry.

  • Home Security & UPS: The 7Ah model is the most common 12V 7Ah battery replacement for home alarm systems, gate openers, and Uninterruptible Power Supply (UPS) backups.
  • Fish Finders: For kayak anglers, a 10Ah battery provides ample runtime for a fish finder battery setup without weighing down the boat.
  • Small Electronics: Perfect for powering LED lighting strips or charging phones during camping trips.

Extended Run-Time: 12Ah to 20Ah

If you are powering motors or need gear to run all weekend, you need to step up to the 12Ah or 20Ah models. These pack significantly more energy density while remaining drop-in compatible with standard battery boxes.

  • Mobility & Toys: This is the sweet spot for a ride-on toy battery upgrade (like Power Wheels) or mobility scooters. The consistent voltage of lithium keeps these vehicles running at full speed until the battery is empty, rather than slowing down gradually.
  • Ham Radios: Amateur radio operators prefer the 20Ah model for field days to keep transceivers operational for longer periods.
  • Solar Storage: A 20Ah battery is an excellent starting point for small, portable solar generators used in off-grid setups.

Physical Compatibility: Terminals and Dimensions

Small 12V Battery Terminals and Dimensions Guide

When upgrading your power source, voltage and capacity are only half the battle. If the battery doesn\’t physically fit into your device\’s compartment, the specs don\’t matter. We design our lithium lineup as direct \”drop-in\” replacements, meaning they match the standard physical dimensions of the Sealed Lead Acid (SLA) batteries they replace. However, you must pay close attention to the terminal type and physical measurements to ensure a hassle-free installation.

F1 vs F2 Terminals: Knowing the Difference

The most common frustration for new buyers is ordering the right battery with the wrong connectors. While they look similar, F1 vs F2 terminals have distinct size differences that affect compatibility.

  • F1 Terminals (0.187\” width): These are narrower and typically found on older or lower-capacity batteries (often under 7Ah).
  • F2 Terminals (0.250\” width): These are wider and designed to handle higher current loads.

Our entire range of 12V batteries—from the 12V 7Ah battery replacement up to the 20Ah models—utilizes standard F2 terminals. This ensures a robust connection capable of handling the higher efficiency and power output of lithium chemistry. If your device currently uses F1 connectors, you may need simple adapters, but for most modern fish finders, ride-on toys, and alarm systems, F2 is the preferred standard.

Check Your Group Sizes

Before you buy, grab a tape measure. While \”Group Sizes\” standardize battery dimensions across the industry, slight variations can occur between brands. Since lithium packs are significantly lighter than lead-acid, the weight won\’t be an issue, but the dimensions must match your battery box.

Key Sizing Tips:

  • Measure Twice: Check the Length, Width, and Height of your current battery.
  • Check Clearance: Ensure there is room for the terminals and wiring harness.
  • Secure Fit: Since our LiFePO4 batteries are about 1/3 the weight of traditional lead-acid batteries, you may need to tighten your hold-down brackets or add foam spacing if the fit is loose in a vibration-heavy environment like a kayak or scooter.

Charging and Maintenance for Beginners

Switching from traditional lead-acid to modern lithium technology requires a slight adjustment in how you handle power management. While our LiFePO4 batteries are designed to be user-friendly, following the right charging and storage protocols ensures you get the full 2,000+ cycle life out of your investment.

The Charger Myth: Lead-Acid vs. LiFePO4 Chargers

A common misconception is that any 12V charger works perfectly for all 12V batteries. While you can often use a standard lead-acid charger to bulk charge a deep cycle battery, it is not optimal. Lead-acid chargers typically run at lower voltages and may have \”desulfation\” modes that send high-voltage spikes, which can trigger the Battery Management System (BMS) to shut down for protection.

For the best results, we recommend using a dedicated lithium iron phosphate charger. These chargers are programmed with the correct voltage curves (typically 14.4V – 14.6V) to ensure the battery cells are balanced and charged to 100% capacity.

Storage Tips and Self-Discharge Rates

One of the biggest advantages of LiFePO4 chemistry is its low self-discharge rate. Unlike Sealed Lead Acid (SLA) batteries, which can lose a significant amount of power while sitting on a shelf and suffer from sulfation, our lithium batteries hold their charge for months with minimal loss.

Quick Storage Guidelines:

  • State of Charge: Store the battery at around 50% to 80% capacity if you aren\’t using it for a long time.
  • Environment: Keep the battery in a cool, dry place.
  • Orientation: Because there is no liquid acid to spill, these units are versatile. In fact, many users wonder if LiFePO4 batteries can be mounted on their side, and the answer is yes, making them perfect for tight spaces in kayaks or scooters.

Temperature Rules for Charging

Temperature plays a critical role in battery health. Our built-in BMS provides protection against high temperatures, but you must be mindful of the cold.

  • Charging: Do not charge lithium batteries when the temperature is below freezing (32°F / 0°C). Doing so can permanently damage the internal cells.
  • Discharging: You can safely use (discharge) the battery in colder temperatures, but efficiency may drop slightly compared to mild weather.

By sticking to these simple rules, you ensure your power source remains reliable for years, rather than just a few seasons.

Common Applications for Small 12V Batteries

Small-format 12V batteries are the unsung heroes of modern electronics. While they look like simple black boxes, upgrading to a deep cycle battery with LiFePO4 chemistry changes the game for specific applications. Here is where we see the biggest impact when switching from heavy lead-acid to lightweight lithium.

Outdoor Hobbies: Kayaks and Camping

For outdoor enthusiasts, weight is everything. A fish finder battery needs to be light enough to toss into a kayak hatch without weighing down the vessel. Our 12V 10Ah or 12Ah models are perfect here. They provide consistent voltage for sonar and GPS units all day long.

  • Kayak Electronics: A 12V 10Ah LiFePO4 weighs roughly one-third of an equivalent SLA. That means less drag on the water and more room for tackle.
  • Ham Radios: Operators need a clean, portable power source for field days. The flat discharge curve of lithium ensures the radio transmits at full power until the battery is empty.
  • Camping Power: Small solar setups often utilize the 20Ah model to run LED lights and charge phones overnight without the bulk of a car battery.

Home Security and UPS Backups

Most home alarm systems and gate openers rely on a backup battery to function during outages. Traditionally, these use cheap lead-acid units that degrade quickly.

  • Alarm Panels: The 12V 7Ah is the standard size for almost all home security boxes. It acts as a reliable UPS backup battery, keeping sensors active when the grid goes down.
  • Gate Openers: These systems require consistent power delivery. Our built-in BMS handles the load while ensuring the battery provides worry-free operation for years, rather than months.

Mobility and Ride-On Toys

We frequently see parents looking for a ride-on toy battery upgrade for Power Wheels or electric scooters. Switching to lithium is a massive performance booster for these devices.

  • Longer Playtime: Because you can use 100% of the capacity (unlike the 50% limit of lead-acid), kids get significantly more runtime per charge.
  • Mobility Scooters: For mobility aids, the weight reduction makes the scooter easier to transport, and the 2,000+ cycle life means you won\’t be replacing the battery every season.

FAQ: Quick Answers for New Users

Can I Link Two Small Batteries Together?

Yes, you can connect multiple batteries to meet your specific power needs, provided they are identical in brand, voltage, and capacity. There are two main ways to do this:

  • Series Connection: Connecting the positive terminal of one battery to the negative of the other increases the voltage (e.g., two 12V batteries become 24V) but keeps the Amp hour rating (Ah) the same.
  • Parallel Connection: Connecting positive to positive and negative to negative keeps the voltage at 12V but doubles your capacity for a longer runtime.

Understanding the physics behind these connections is crucial for safety. The principles for increasing capacity are similar to connecting batteries in parallel, ensuring you get the most out of your portable power source without overloading the system.

How Do I Recycle My Old Battery?

Never throw a battery in your household trash. Traditional Sealed Lead Acid (SLA) batteries contain toxic lead and corrosive sulfuric acid that are hazardous to the environment. While our LiFePO4 batteries are eco-friendly and contain no heavy metals or acid, they still need to be processed correctly. Most auto parts stores and municipal recycling centers in the US accept both lead-acid and lithium batteries for free.

Is Lithium Safe Indoors?

Absolutely. Safety is often a concern due to news stories about lithium fires, but those usually involve different chemistries like Lithium Cobalt Oxide. Our batteries use LiFePO4 (Lithium Iron Phosphate), which is chemically stable and incombustible.

Furthermore, every Nuranu battery includes a built-in Battery Management System (BMS). This \”brain\” constantly monitors the battery to prevent overcharging, short circuits, and overheating. Because they don\’t off-gas like lead-acid batteries, they are perfectly safe for indoor applications like UPS backup batteries, home security systems, and medical mobility devices. You can read more about the safety profile of this chemistry in our guide on LiFePO4 vs. Lithium Ion differences.