Das Balancieren von 18650-Akkus klingt vielleicht kompliziert, aber es ist eigentlich ziemlich einfach, sobald man die Grundlagen versteht.
Hier ist die Sache:
Wenn du mehrere 18650-Zellen miteinander verbindest (besonders in Reihe), müssen sie ausgeglichen werden. Andernfalls leidest du unter reduzierter Kapazität, kürzerer Lebensdauer und potenziellen Sicherheitsproblemen.
In diesem Leitfaden, als Profi Hersteller von 18650-Akkupacks, ich werde dir genau zeigen wie man 18650-Batterien ausgleicht mit bewährten Methoden, die tatsächlich funktionieren.
Lass uns eintauchen.
Was sind 18650-Batterien (und warum sie ausgleichen)?
Zuerst das Wichtigste.
18650-Akkus sind Lithium-Ionen-Zellen, die 18 mm x 65 mm messen. Sie sind die Arbeitstiere hinter allem, von Laptops bis hin zu Elektrofahrzeugen.
Aber hier wird es interessant:
Wenn Sie mehrere Zellen in Serie verbinden, um ein Batteriepacks zu erstellen, kann jede Zelle leicht unterschiedliche Eigenschaften haben. Sogar Zellen aus derselben Charge.
Diese Unterschiede summieren sich im Laufe der Zeit.
Zum Beispiel könnte eine Zelle bis zu 4,15 V laden, während eine andere 4,25 V erreicht. Dieser Unterschied von 0,1 V? Es ist genug, um ernsthafte Probleme zu verursachen.
Ohne ordnungsgemäßes Balancieren wirst du erleben:
- Verminderte Kapazität (Ihr Pack verhält sich wie seine schwächste Zelle)
- Vorzeitiges Altern (einige Zellen verschleißen schneller als andere)
- Sicherheitsrisiken (überladene Zellen können thermisches Durchgehen verursachen)
Deshalb ist das Zellenausgleichsverfahren bei jedem ernsthaften Akku-Pack-Bau unverzichtbar.
Die zwei wichtigsten Ausgleichsmethoden, die tatsächlich funktionieren
Wenn es um das Balancieren von Akkus geht, hast du zwei Hauptoptionen: passiv und aktiv.
Lass mich jede Methode erklären.
Passiver Ausgleich: Einfach, aber effektiv
Passives Balancieren ist wie der Honda Civic unter den Balanciermethoden. Es ist zuverlässig, erschwinglich und erledigt die Arbeit.
So funktioniert es:
Während des Ladens überwacht ein Batteriemanagementsystem die Spannung jeder Zelle. Wenn eine Zelle einen festgelegten Schwellenwert (meistens um 4,15 V) erreicht, aktiviert das BMS einen kleinen Widerstand über dieser Zelle.
Dieser Widerstand „bremst“ überschüssige Energie in Form von Wärme ab, was die Ladegeschwindigkeit dieser Zelle verlangsamt.
In der Zwischenzeit laden die anderen Zellen weiter, bis sie aufholen.
Vorteile:
- Sehr einfach umzusetzen
- Günstige Komponenten
- Bewährte Zuverlässigkeit
Nachteile:
- Verschwendet Energie in Form von Wärme
- Funktioniert nur während des Ladens
- Langsamer als aktive Methoden
Ich habe festgestellt, dass passives Balancieren bei kleineren Packs (unter 10 Zellen) gut funktioniert, bei denen Effizienz nicht kritisch ist.
Aktiver Ausgleich: Die Hochleistungsoption
Aktiver Ausgleich ist wie Tesla unter den Ausgleichsmethoden. Anspruchsvoller, effizienter, aber auch komplexer.
Anstatt Energie zu verschwenden, übertragen aktive Systeme Ladung von Zellen mit höherer Spannung zu Zellen mit niedrigerer Spannung.
Stell es dir wie Robin Hood für Batterien vor.
Das System verwendet Kondensatoren, Induktivitäten oder sogar winzige DC-DC-Wandler, um Energie zwischen den Zellen zu transportieren. Dies geschieht sowohl beim Laden ALS auch beim Entladen.
Vorteile:
- Hocheffizient (minimaler Energieverlust)
- Funktioniert kontinuierlich
- Schnellerer Ausgleich
- Verlängert die Laufzeit des Akkus
Nachteile:
- Teurer
- Komplexe Schaltung
- Mehr potenzielle Fehlerquellen
Für große Akkus oder unternehmenskritische Anwendungen ist ein aktiver Ausgleich die Investition wert.
So gleichen Sie Ihren 18650-Akku aus: Schritt-für-Schritt
Nun zum Praktischen.
Hier ist genau beschrieben, wie du deine 18650-Akkus ausgleichst, egal ob du ein neues Pack baust oder ein bestehendes wartest.
Schritt 1: Beginnen Sie mit passenden Zellen
Das ist entscheidend:
Bevor Sie überhaupt daran denken, Ihren Akku zusammenzubauen, müssen Sie Ihre Zellen anpassen.
Verwende ein Multimeter, um die Spannung jeder Zelle zu überprüfen. Gruppiere Zellen, die innerhalb von 0,05 V voneinander entfernt sind.
Zum Beispiel:
- Gruppe A: 3,65 V – 3,70 V
- Gruppe B: 3,70 V – 3,75 V
- Gruppe C: 3,75 V – 3,80 V
Profi-Tipp: Wenn du es ernst meinst, investiere in einen Zellentester, der auch den Innenwiderstand misst. Zellen mit ähnlichen Widerstandswerten bleiben länger ausgeglichen.
Schritt 2: Vorabgleich vor der Montage
Hier ist, was die meisten überspringen (und später bereuen):
Laden Sie alle Ihre Zellen genau auf die gleiche Spannung, bevor Sie sie verbinden.
Ich empfehle, für die Lagerung auf 3,7 V zu laden oder auf 4,1 V, wenn du sofort zusammenbaust.
Verwenden Sie ein hochwertiges Einzelzellen-Ladegerät und überprüfen Sie jede Zelle mit Ihrem Multimeter.
Dies gibt Ihrem BMS einen großen Vorsprung.
Schritt 3: Installieren Sie ein hochwertiges BMS
Ein Batteriemanagementsystem ist das Gehirn Ihres Packs. Es kümmert sich um:
- Spannungsüberwachung für jede Zelle
- Überladungsschutz
- Überentladungsschutz
- Lastenausgleich
- Temperaturüberwachung (bei besseren Einheiten)
Wählen Sie bei der Auswahl eines BMS das passende zu Ihrer Konfiguration. Ein 4S-Pack benötigt ein 4S-BMS. Einfach so.
Für die Verbindung:
- Verbinden Sie den Hauptnegativen Anschluss (B-)
- Wickeln Sie jede Balancelinie in der Reihenfolge (B1, B2, B3 usw.)
- Verbinden Sie den Hauptpositiven Anschluss (B+)
- Testen Sie, bevor Sie Ihre Last anschließen
Schritt 4: Überwachen und Warten
Balancieren ist kein „Einrichten und Vergessen“-Vorgang.
Überprüfen Sie Ihre Zellenspannungen monatlich. Wenn Sie feststellen, dass sich Zellen um mehr als 0,1 V unterscheiden, ist es Zeit für Wartung.
Hier ist meine Wartungsroutine:
- Monatliche Spannungsprüfungen
- Vierteljährliche Kapazitätstests
- Jährliches vollständiges Neuausgleichsverfahren
- Ersetzen Sie alle Zellen, die den Ausgleich nicht halten können
Fortgeschrittene Ausgleichstechniken
Sobald Sie die Grundlagen gemeistert haben, können diese fortgeschrittenen Techniken Ihr Batteriekönnen auf die nächste Stufe heben.
Bottom Balancing für maximale Reichweite
Die meisten Menschen führen Top-Balancing durch (Zellen bei voller Ladung ausgleichen).
Aber Bottom Balancing – das Ausgleichen der Zellen beim Entladen – kann Ihnen tatsächlich mehr nutzbare Kapazität bieten.
Hier ist warum:
Wenn Zellen am Boden ausgeglichen sind, wird Ihre schwächste Zelle Ihre Entladung nicht so stark einschränken.
Um Bottom Balancing durchzuführen:
- Entladen Sie alle Zellen individuell auf 3,0 V
- Lassen Sie sie 24 Stunden ruhen
- Feinabstimmung auf 0,01 V
- Bauen Sie Ihren Akku zusammen
Diese Methode funktioniert besonders gut bei Elektrofahrzeugen, bei denen Sie jede Reichweitenmöglichkeit benötigen.
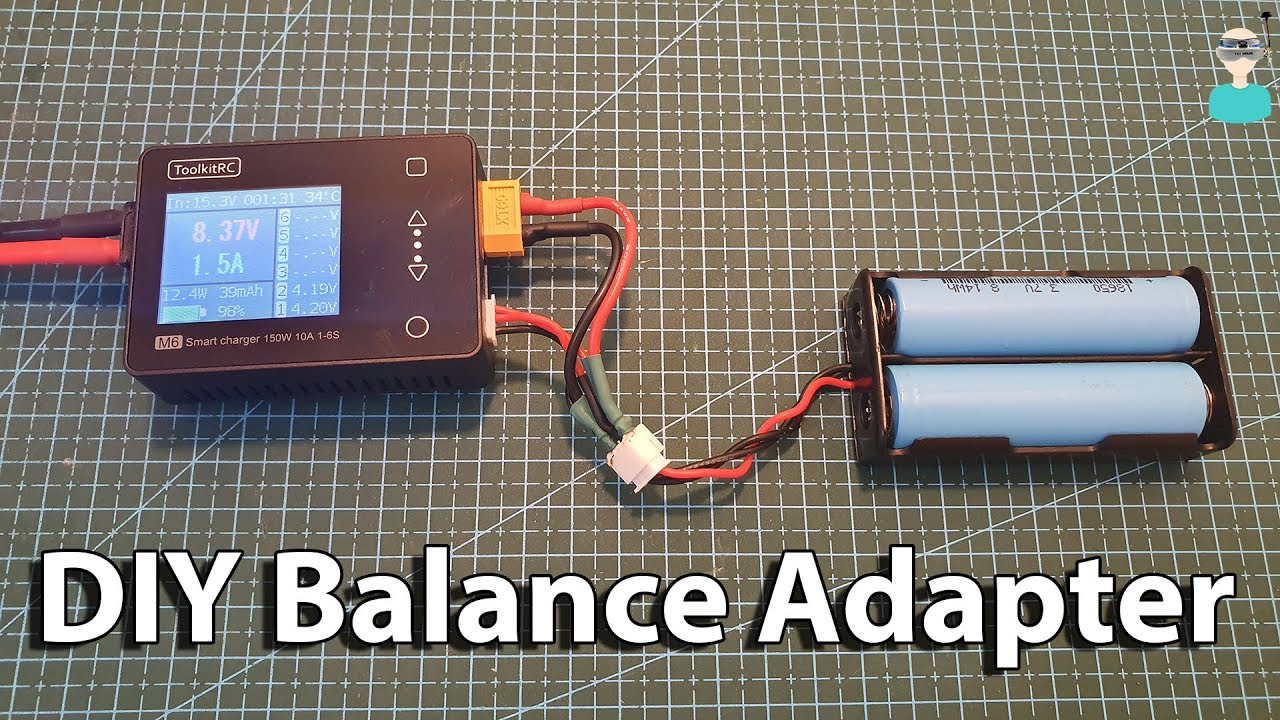
Verwendung von Balancer-Ladegeräten
Für kleinere Packs kann ein Balance-Ladegerät alles automatisch erledigen.
Diese Ladegeräte haben einzelne Anschlüsse für jede Zelle und integrierte Balancierkreise.
Beliebte Optionen sind:
- IMAX B6 (preisgünstig)
- ISDT-Ladegeräte (mehr Funktionen)
- Industrielle Einheiten von Junsi oder Revolectrix
Der Haken? Sie erreichen typischerweise maximal 6S-Konfigurationen.
DIY-Balancierkreise
Fühlst du dich abenteuerlustig?
Du kannst deinen eigenen passiven Balancer nur mit Widerständen und Zener-Dioden bauen.
Grundschaltung:
- 15Ω 2W Widerstand
- 4,2V Zener-Diode
- Kühlkörper für thermisches Management
Dies schafft einen einfachen Shunt-Regler, der Überladung verhindert.
Aber ehrlich gesagt? Es sei denn, Sie machen das zu Bildungszwecken, ist ein kommerzielles BMS zuverlässiger.
Häufige Balancierfehler (Und wie man sie vermeidet)
Ich habe gesehen, dass diese Fehler mehr Batteriprojekte zum Scheitern bringen, als ich zählen kann.
Fehler #1: Alte und neue Zellen mischen
Mische niemals Zellen unterschiedlichen Alters.
Selbst wenn sie die gleiche Spannung messen, haben ältere Zellen einen höheren Innenwiderstand. Sie driftet ständig aus dem Gleichgewicht.
Fehler #2: Temperatur ignorieren
Temperaturunterschiede verursachen Spannungsschwankungen.
Eine Zelle, die 10°C wärmer ist, könnte 0,05 V höher anzeigen. Während des Ausgleichs halten Sie alle Zellen auf derselben Temperatur.
Fehler #3: Übermäßiges Vertrauen in das BMS
Ein BMS ist kein Zauberwerk.
Wenn Ihre Zellen stark mismatched oder beschädigt sind, wird kein Ausgleich sie reparieren können.
Denken Sie an ein BMS wie an eine Autoversicherung—es ist Schutz, kein Freifahrtschein zum rücksichtslosen Fahren.
Fehler #4: Das Einlaufzeitfenster überspringen
Neue Zellen benötigen einige Zyklen, um sich zu stabilisieren.
Führen Sie 3-5 vollständige Lade-/Entladezyklen bei niedriger Stromstärke (0,5C) durch, bevor Sie Ihren Akku stark beanspruchen.
Sicherheitsüberlegungen
Seien wir ehrlich:
Lithium-Ionen-Batterien speichern erhebliche Energie. Respektieren Sie sie.
Immer:
- In einem gut belüfteten Bereich arbeiten
- Halten Sie einen Feuerlöscher der Klasse D in der Nähe bereit
- Verwenden Sie ordnungsgemäße Isolierung an den Anschlüssen
- Überwachen Sie die Temperaturen während der ersten Ladungen
- Lagerung der Packs bei 40-60% Ladung
Nie:
- Zellen kurzschließen (auch nur kurzzeitig)
- Über 4,2V pro Zelle laden
- Unter 2,5V pro Zelle entladen
- Ladevorgang unbeaufsichtigt lassen
- Beschädigte oder aufgeblähte Zellen verwenden
Werkzeuge, die du brauchst
Hier ist mein empfohlener Werkzeugkasten für das Batteriebalancieren:
Wichtig:
- Multimeter (genau bis 0,01V)
- Einzellader
- Geeigneter BMS
- Sicherheitsausrüstung (Brille, Handschuhe)
Schön zu haben:
- Zellkapazitätstester
- IR-Messgerät
- Balancierteil
- Spot-Schweißgerät
- Wärmebildkamera
Das Wichtigste beim Batteriebalancieren
Hier ist die Sache:
Richtiges Balancieren ist der Unterschied zwischen einem Batteriepacks, das Jahre hält, und einem, das in Monaten versagt.
Beginnen Sie mit qualitativ passenden Zellen. Verwenden Sie ein anständiges BMS. Überwachen Sie regelmäßig.
Es ist wirklich so einfach.
Ob Sie passives oder aktives Balancieren wählen, hängt von Ihren spezifischen Bedürfnissen ab. Für die meisten DIY-Projekte funktioniert passives Balancieren durch ein BMS großartig.
Aber für größere Packs oder gewerbliche Anwendungen? Die Effizienzgewinne des aktiven Ausgleichs rechtfertigen die erhöhte Komplexität.
Denken Sie daran: wie man 18650-Batterien ausgleicht Es geht nicht nur um den technischen Prozess—es geht darum, gute Gewohnheiten zu entwickeln und die Technologie zu respektieren.
Machen Sie es richtig, und Ihre Batteriepacks werden zuverlässig Strom liefern, Jahre lang.