Step 1: Power Source and Connection Sanity Check
Before we start unscrewing battery compartments or ordering expensive parts, I always recommend starting with the simplest explanations. You would be surprised how often the solution to “How do I fix my vacuum cleaner not charging?” is just a loose cable or a tripped breaker. Let’s rule out the external factors first with a quick sanity check.
Electrical Outlet Testing
First, we need to confirm that electricity is actually flowing to the wall socket. It is common for a GFCI outlet to trip or for a wall switch to accidentally cut power to the plug without you realizing it.
- The Lamp Test: Unplug your vacuum charger and plug a lamp or your phone charger into the same socket.
- The Verdict: If the lamp doesn’t turn on, the issue isn’t your Van4NU vacuum—it’s your home’s electrical circuit.
Inspect the Power Adapter
Next, take a close look at the charger itself. Power cords take a lot of abuse, especially if they get run over by the vacuum or chewed on by curious pets.
- Check for Damage: Look closely for fraying, exposed wires, or severe kinks in the cable insulation.
- Safety First: If you see copper wire or deep chew marks, do not plug it in. A damaged adapter is a fire hazard and needs immediate replacement.
The Connection Fit
Finally, ensure the physical connection is solid. Over time, charging ports can get loose, or the vacuum might not be sitting perfectly in its cradle.
- Docking Stations: Make sure the vacuum is seated firmly. Sometimes it just needs a little wiggle to settle onto the pins correctly.
- Direct Plugs: If you plug the cable directly into the vacuum, push it in until you feel a distinct click or resistance. A loose connection prevents the steady flow of current needed for a full charge.
Step 2: Inspecting the Charging Dock and Contact Points
If you are dealing with robot vacuum docking station issues or a cordless stick vacuum that refuses to power up, the problem often lies physically between the machine and the base. Since these devices live on the floor, they are constantly exposed to dust, pet hair, and debris that can coat the metal charging plates, effectively cutting off the power supply.
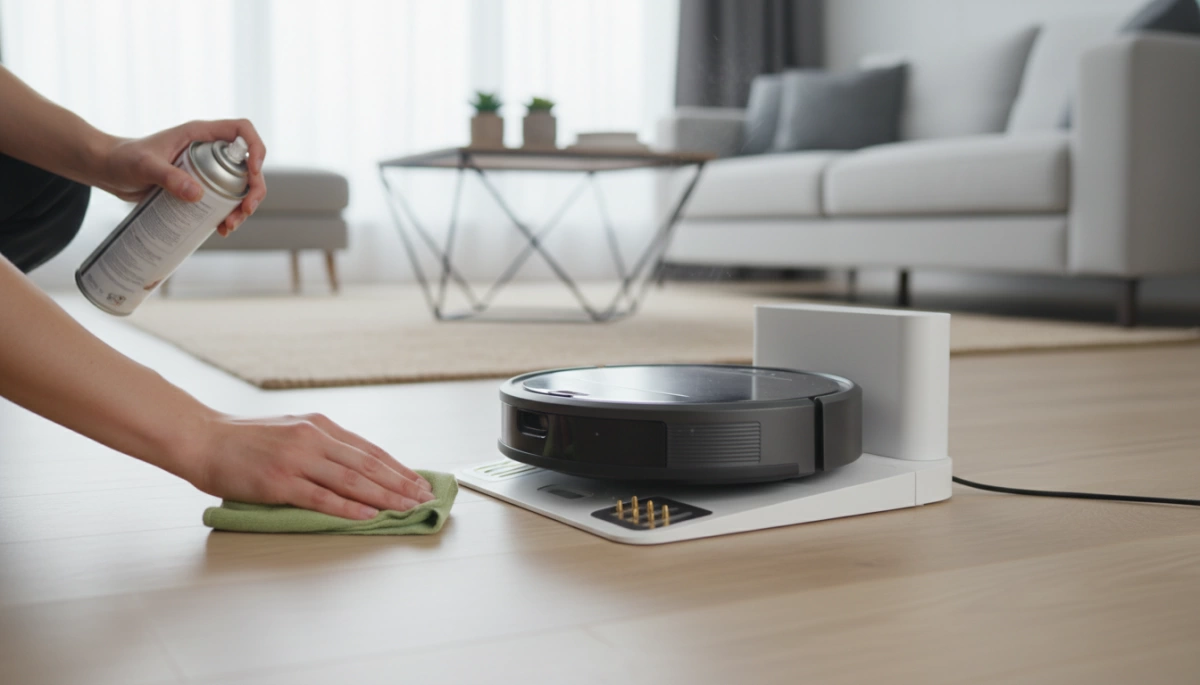
Dealing with Dirty Contacts
Over time, a thin layer of dust or invisible oxidation builds up on the metal plates, breaking the electrical circuit. This prevents the current from flowing into the unit. To fix this, you need to clean charging contact points thoroughly to restore the connection.
How to clean them safely:
- Materials: Use a dry microfiber cloth or a cotton swab.
- Solvent: Apply a small dab of high-percentage rubbing alcohol (isopropyl alcohol) to the cloth or swab. Never spray liquid directly onto the vacuum or dock electronics.
- Action: Gently wipe the metal contact points on both the charging station and the bottom (or back) of the vacuum cleaner until they shine.
- Dry: Let the contacts air dry completely for a few minutes before reconnecting.
Ensuring a clean, solid connection is vital for efficiently charging your lithium-ion or LiPo battery and preventing intermittent power cycles that can harm the cell.
Check for Alignment Issues
Sometimes the hardware is fine, but the fit is wrong. Stick vacuums usually have a specific “click-in” mechanism; if you don’t hear that audible click, the pins aren’t touching. For robot vacuums, which often rely on gravity to sit on their charging pads, verify that the base is on a hard, flat surface. Placing the dock on a thick carpet can sometimes tilt the base, preventing the robot from aligning correctly with the charging nodes.
Step 3: Assessing the Battery Health
If the power source and dock are working perfectly, the issue usually lies with the power cell itself. Batteries are consumable components, meaning they don’t last forever.
The Lifespan Reality
Most modern machines rely on Lithium-ion battery life cycles. Generally, these batteries maintain peak performance for about 2 to 4 years, depending on how often you clean. If your vacuum is older than that and barely holds a charge, the battery chemistry has likely degraded naturally. When a handheld vacuum is not holding a charge, it is often just a sign of age rather than a mechanical failure.
Visual Inspection and Safety
Before you attempt any fixes, take a close look at the battery pack.
- Swelling: If the plastic casing looks bulged or warped, the battery is damaged and dangerous.
- Leakage: Look for any fluid or sticky residue.
- Corrosion: Check for green or white crust on the metal terminals.
Safety Warning: If you see swelling or leakage, do not attempt to charge the device. It is a fire hazard and needs immediate disposal at a recycling center. If you are comfortable handling the internal components, knowing how to check if an 18650 battery is good can help you verify if specific cells within the pack have failed, but visible physical damage always warrants a full replacement.
The “Reset” Trick
Sometimes the battery management system (BMS) gets out of sync with the actual charge level. You can try a vacuum battery reset procedure to recalibrate it:
- Drain the Power: Turn the vacuum on and let it run until it shuts off completely.
- Cool Down: Let the unit sit for 30 minutes to ensure the battery cells are cool.
- Long Charge: Plug it into the charger and leave it for 12+ hours uninterrupted, even if the “fully charged” light comes on sooner.
Replaceable vs. Built-in Batteries
Identifying your battery type determines the difficulty of the fix.
- Click-in Batteries: These are user-friendly and detach with a simple button press. Cordless vacuum battery replacement for these models takes seconds.
- Built-in Batteries: These are integrated into the handle or motor housing. You will likely need a screwdriver to open the casing and disconnect the internal connector. Always double-check your manual before unscrewing the body to avoid voiding warranties.
Step 4: Checking for Blockages and Overheating (Safety Cut-offs)
Sometimes, the reason your vacuum isn’t charging has nothing to do with a broken component and everything to do with built-in safety features. Modern cordless vacuums are smart; they are designed to protect their internal electronics and battery cells from damage. If you have just finished a heavy cleaning session on “Max” mode, or if the machine is clogged, the system may prevent charging until conditions return to a safe range.
Understanding the Vacuum Overheating Safety Cut-off
Lithium-ion batteries are sensitive to extreme temperatures. If the battery cells are too hot immediately after use, the Battery Management System (BMS) will block the charging current to prevent thermal runaway or permanent degradation. Before you assume the worst and start looking up how to fix a dead 18650 battery, realize that your vacuum might simply be in self-preservation mode. This is a standard vacuum overheating safety cut-off feature found in almost all high-quality brands like Van4NU, Dyson, and Shark.
The Cool Down Period
If your vacuum feels warm to the touch near the handle or battery pack, it likely won’t accept a charge.
- Disconnect the charger: Unplug it immediately.
- Wait it out: Let the machine sit in a cool, dry place for 30 to 60 minutes.
- Retest: Once the unit has returned to room temperature, try plugging it back in.
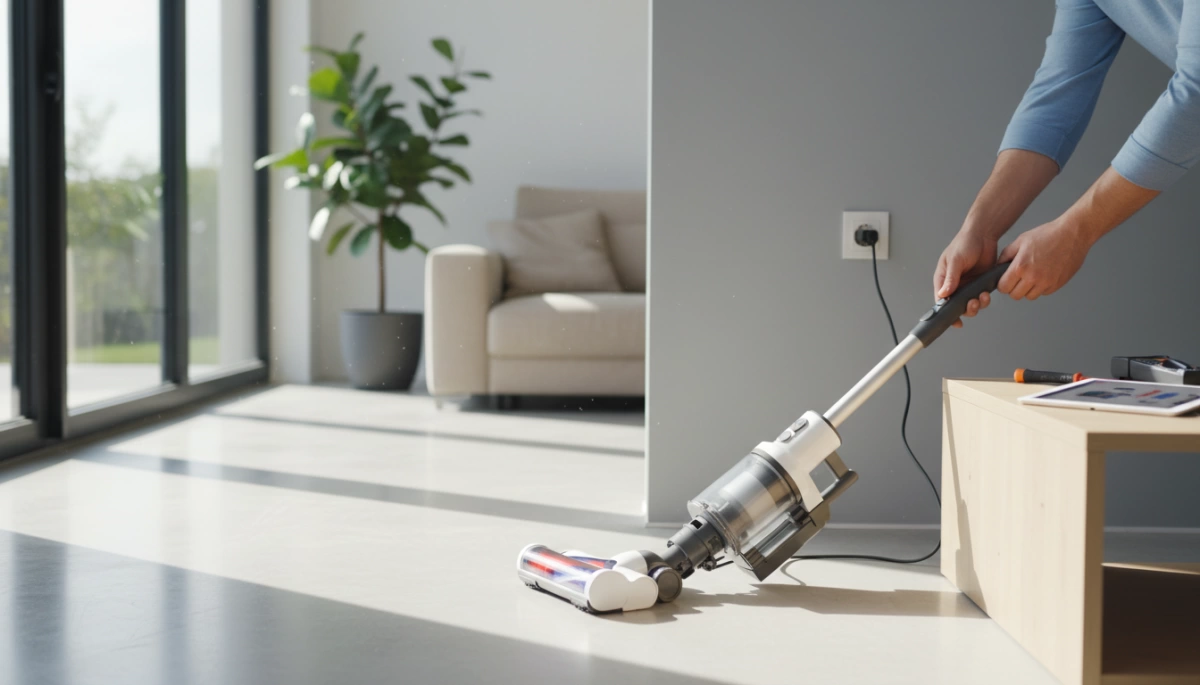
Filter and Airway Check
Overheating is often caused by the motor working overtime to pull air through a blockage. If the airflow is restricted, the vacuum runs hotter than usual, triggering those safety sensors. While you are waiting for the unit to cool down, perform a quick maintenance check:
- Inspect the HEPA Filters: If your filters are caked in dust, wash them (if washable) or replace them. A clogged filter is the number one cause of motor strain.
- Check the Main Tube: Look through the wand to ensure no debris, socks, or pet hair clumps are blocking the airway.
- Clear the Brush Bar: Ensure the roller at the bottom spins freely and isn’t jammed with hair.
By clearing these blockages, you ensure the vacuum runs cooler next time, preventing the safety cut-off from interrupting your charging routine.
Step 5: Advanced Troubleshooting (For the DIY Savvy)
If the basic cleaning and reset tricks didn’t get your machine running, we need to get a bit more technical. This step is for those who are comfortable handling tools and want to definitively rule out hardware failure before spending money on replacements.
Multimeter Test for Charger
Visual inspections can only tell you so much. To know for sure if your charger is delivering the juice, you need to perform a multimeter test for charger output. This confirms whether the problem is the wall adapter or the vacuum itself.
- Check the Label: Look at the “Output” voltage printed on your power adapter (e.g., 24V or 30V).
- Set the Multimeter: Turn the dial to the DC Voltage setting (usually denoted by a V with a straight line).
- Test the Connection: Plug the adapter into the wall. Touch the red probe to the inner center of the plug and the black probe to the outer barrel.
- Analyze Results: If the reading matches the label (or is slightly higher), your charger is fine. If you get a reading of zero or significantly lower than the rated vacuum power adapter voltage, the charger is dead and needs replacing.
Checking Fuses and Internal Components
Unlike UK plugs, standard US plugs typically do not house a user-replaceable fuse. However, the vacuum unit itself often contains an internal fuse on the mainboard to protect the motor and battery from surges.
If you are out of warranty and comfortable opening the casing, look for the main circuit board. You are checking for:
- Blown Fuses: Look for a small glass tube where the internal wire is broken or the glass is blackened.
- Loose Wires: Vibrations can sometimes shake internal connectors loose.
If the charger provides the correct voltage but the unit still refuses to charge, the fault likely lies within the internal battery management system or the battery cells themselves. This is common in complex solutions for vacuum cleaners where safety sensors prevent charging to avoid hazards.
When to Service or Replace Your Van4NU Vacuum
Sometimes, despite your best efforts with cleaning contacts and checking outlets, the vacuum simply won’t charge. At Van4NU, we design our machines for durability, but electrical components and lithium-ion batteries naturally degrade over time. Before you make a final decision, you need to weigh the options of repair versus replacement.
Check Your Warranty Status First
Before you grab a screwdriver to open the casing, stop and check your paperwork. Most Van4NU models come with a specific warranty period that covers internal electrical faults and motor issues. Opening the main housing or tampering with internal wiring often voids this warranty immediately. If you are still within the coverage window, contact our support team. We can often arrange a service or replacement without any out-of-pocket cost to you.
Authentic Spare Parts Availability
If your warranty has expired, the next logical step is sourcing Van4NU vacuum spare parts. Whether you need a cordless vacuum battery replacement or a new power adapter, it is crucial to use authentic parts. Universal or generic parts may not match the specific voltage requirements of our motors, leading to potential overheating or permanent damage.
If you suspect the battery is the culprit but aren’t ready to buy a new one yet, you might want to understand the mechanics of how to revive a lithium-ion battery to see if the cell is just in a sleep mode or truly dead. However, if you see any physical damage or swelling, purchase a replacement immediately for safety.
The Cost vs. Benefit Calculation
When does a repair become too expensive? We recommend using the 50% Rule:
- Calculate Repair Costs: Add up the cost of the replacement parts (battery, charger, or motor) and any shipping fees.
- Compare to New Unit: Look at the current price of a new Van4NU model.
- The Verdict: If the repair cost is more than 50% of the price of a new unit, it is generally smarter to upgrade.
Newer models often come with improved battery management systems and stronger suction, offering better long-term value than patching up an aging machine.
Frequently Asked Questions (FAQs)
I hear these questions all the time from customers trying to figure out why their gear isn’t cooperating. Here are the quick answers to the most common charging issues.
Why is my vacuum light blinking red while charging?
A blinking red light on vacuum indicators is almost always a distress signal. It rarely means the machine is just “thinking.”
- Overheating: If you threw the vacuum on the charger immediately after a long run on “Max” mode, the vacuum overheating safety cut-off might be active. The battery is simply too hot to accept a charge safely.
- Battery Failure: If the unit has been cool for an hour and still blinks red, the battery cells might be dead or damaged.
- Connection Error: Check for debris. Sometimes a handheld vacuum not holding charge is just the result of a bad connection at the terminal.
Can I use a universal charger for my vacuum?
I generally advise against grabbing a cheap universal vacuum charger off the shelf unless you know exactly what you are doing. Vacuums are picky about voltage and amperage.
- Check the Voltage: You must match the vacuum power adapter voltage exactly. If your vacuum needs 26V and you feed it 19V, it won’t charge. If you feed it 30V, you could fry the motherboard.
- Connector Fit: Even if the voltage matches, universal plugs often fit loosely, leading to poor contact and heat buildup. Stick to the manufacturer’s original charger whenever possible.
How long should a vacuum battery last per run?
Lithium-ion battery life varies wildly depending on the suction mode you use.
- Eco/Low Mode: You should get 40–60 minutes of runtime.
- Max/Boost Mode: This drains power fast, usually lasting only 6–15 minutes.
If your runtime has dropped significantly (e.g., lasting only 2 minutes after a full charge), the battery is likely degraded. Understanding the chemistry helps; for instance, seeing how modern tech performs in a Gel vs. Lithium battery showdown explains why we rely on Lithium for these high-drain devices despite the eventual wear and tear.