คู่มืออัปเกรดแบตเตอรี่ลิเธียมสำหรับรถกอล์ฟปี 2025 ฉบับสมบูรณ์
แบตเตอรี่ลิเธียมสำหรับรถกอล์ฟ การอัปเกรดกำลังเป็นที่นิยมอย่างมากในตอนนี้ และเป็นเพราะเหตุผลที่ดี
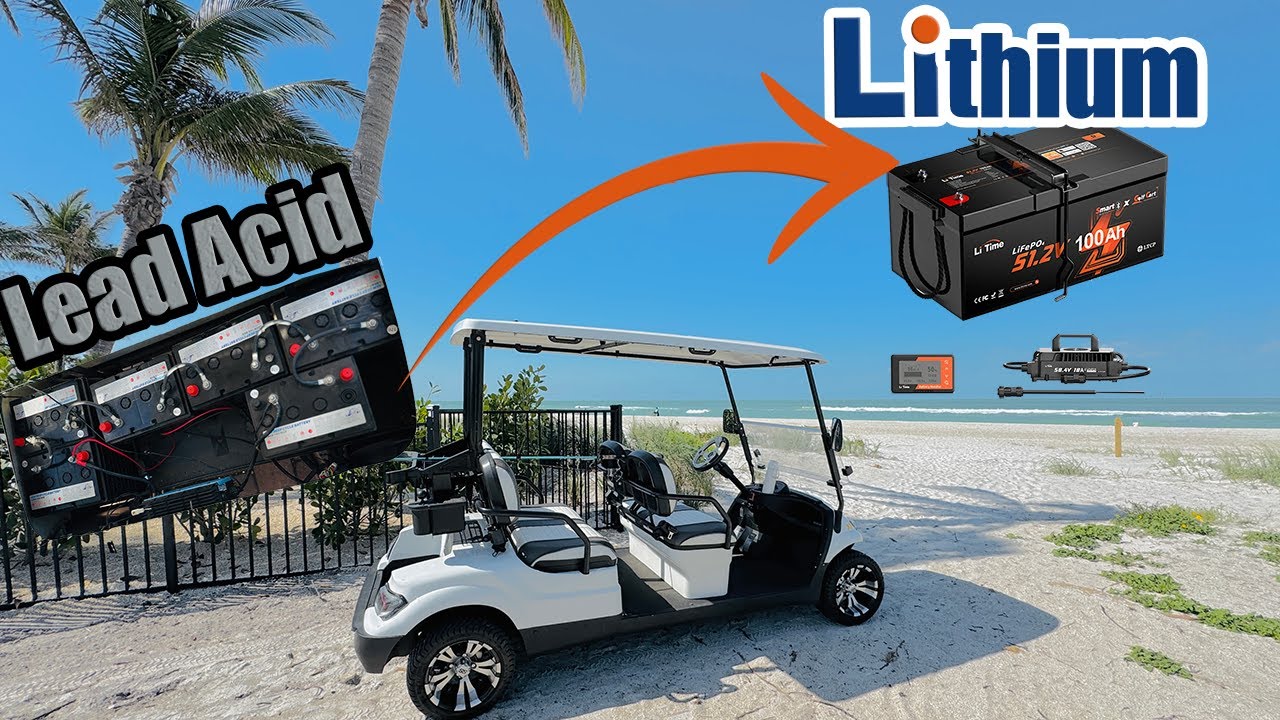
เมื่อไม่นานมานี้ฉันได้ช่วยเพื่อนเปลี่ยนจากแบตเตอรี่ตะกั่วกรดเป็นลิเธียม ความแตกต่าง? เห็นได้ชัดเจนมาก
รถของเขาจากที่เคยลำบากขึ้นเนินก็กลายเป็นขับง่ายราวกับบนพื้นราบ นอกจากนี้ เขายังไม่แตะต้องเครื่องมือบำรุงรักษาแบตเตอรี่เลยเป็นเวลา 6 เดือน
นี่คือเรื่อง:
เจ้าของรถกอล์ฟส่วนใหญ่มักไม่รู้ว่าพวกเขากำลังปล่อยประสิทธิภาพที่ดีออกไปด้วยแบตเตอรี่แบบเก่า
ดังนั้นในคู่มือนี้ ในฐานะผู้เชี่ยวชาญ ผู้ผลิตชุดแบตเตอรี่ลิเธียมฉันจะแสดงให้คุณเห็นอย่างชัดเจนว่าทำไมแบตเตอรี่ลิเธียมถึงเหนือกว่าแบตเตอรี่ตะกั่วกรด และวิธีเลือกแบตเตอรี่ที่เหมาะสมที่สุดสำหรับรถของคุณ
มาเริ่มกันเลย
ทำไมแบตเตอรี่ลิเธียมถึงครองตลาดรถกอล์ฟ
นี่คือสถิติที่ทำให้ฉันประหลาดใจ:
ยอดขายแบตเตอรี่ลิเธียมสำหรับรถกอล์ฟพุ่งขึ้น 471 เท่าในปีที่ผ่านมา และคาดว่าจะเพิ่มเป็นสองเท่าภายในปี 2027
ทำไมถึงมีการเปลี่ยนแปลงครั้งใหญ่ขนาดนี้?
ง่ายมาก: แบตเตอรี่โ phosphates เหล็ก (LiFePO4) แก้ปัญหาเกือบทุกอย่างที่แบตเตอรี่ตะกั่วกรดมี
ข้อได้เปรียบด้านน้ำหนักเปลี่ยนทุกอย่าง
แบตเตอรี่ตะกั่วกรดมีน้ำหนักมาก
ประมาณ 300-400 ปอนด์ สำหรับระบบ 48V ทั่วไป
ลิเธียม? ลองประมาณ 90-120 ปอนด์
นั่นคือการลดน้ำหนัก 70% ซึ่งหมายความว่า:
- รถเข็นของคุณเร่งความเร็วได้เร็วขึ้น
- เนินเขากลายเป็นเรื่องง่ายมากขึ้น
- ลดการสึกหรอของยางและช่วงล่างของคุณ
- การควบคุมโดยรวมดีขึ้น
ฉันเคยเห็นรถเข็นเพิ่มความเร็ว 3-5 ไมล์ต่อชั่วโมงเพียงแค่จากการประหยัดน้ำหนักเท่านั้น
พวกมันใช้งานได้เกือบตลอดไป
ดูตัวเลขเหล่านี้:
- แบตเตอรี่ตะกั่วกรด: รอบชาร์จ 500-1,000 ครั้ง
- แบตเตอรี่ลิเธียม: รอบชาร์จ 2,000-5,000 ครั้ง
แปลว่าอะไร? แบตเตอรี่ลิเธียมของคุณสามารถใช้งานได้นาน 8-10 ปี แบตเตอรี่ตะกั่วกรด? คุณโชคดีถ้าได้ 3-5 ปี
และนี่คือจุดสำคัญ:
แบตเตอรี่ลิเธียมรักษาประสิทธิภาพไว้ได้ตลอดเวลา แบตเตอรี่ตะกั่วกรดเริ่มเสื่อมตั้งแต่วันแรก
ไม่ต้องบำรุงรักษาเลย
ยังจำได้ไหมว่าตรวจระดับน้ำ? ทำความสะอาดคราบสนิม? จัดการกับการรั่วไหลของกรด?
ใช่แล้ว ลืมเรื่องเหล่านั้นไปได้เลย
แบตเตอรี่ลิเธียมต้องการการบำรุงรักษาเพียงศูนย์เท่านั้น ติดตั้งแล้วลืมได้เลย
เจ้าของรีสอร์ทคนหนึ่งที่ฉันคุยด้วยประหยัดเวลาในการบำรุงรักษาแบตเตอรี่ได้ 15 ชั่วโมงต่อเดือน หลังจากเปลี่ยนยานพาหนะเป็นลิเธียม
วิธีเลือกแบตเตอรี่ลิเธียมที่เหมาะสมสำหรับรถกอล์ฟ
ไม่ใช่แบตเตอรี่ลิเธียมทุกก้อนที่ถูกสร้างมาเท่ากัน
นี่คือสิ่งที่ควรมองหาอย่างชัดเจน:
ขั้นตอนที่ 1: เลือกแรงดันไฟฟ้าที่ตรงกัน
อันนี้สำคัญมาก
รถกอล์ฟส่วนใหญ่ใช้ระบบไฟฟ้าหรือ:
- ระบบ 36V (รุ่นเก่า)
- ระบบ 48V (เป็นที่นิยมมากที่สุด)
- ระบบ 72V (สมรรถนะสูง)
การติดตั้งแรงดันไฟฟ้าที่ไม่ถูกต้องจะทำให้อิเล็กทรอนิกส์ของรถเสียหาย ควรตรวจสอบการตั้งค่าปัจจุบันของคุณก่อน
คำแนะนำจากมืออาชีพ: มองหาสติ๊กเกอร์ใต้เบาะนั่งหรือเช็คคู่มือเจ้าของรถ
ขั้นตอนที่ 2: เลือกความจุที่เหมาะสม (แอมป์ชั่วโมง)
ความจุเป็นตัวกำหนดระยะทางของคุณ นี่คือคำแนะนำของฉันตามการใช้งาน:
ใช้งานเบา (9-18 หลุม, พื้นราบ)
- ความจุ 60-80Ah
- ระยะทาง: 20-30 ไมล์
ใช้งานปกติ (36 หลุม, มีเนินเขาบ้าง)
- ความจุ 100-105Ah
- ระยะทาง: 35-50 ไมล์
ใช้งานหนัก (ทั้งวัน, สนามเนินเขา)
- ความจุ 150Ah+
- ระยะทาง: 50-70+ ไมล์
คนส่วนใหญ่เลือกใช้ 100Ah สำหรับระบบ 48V นี่คือจุดที่สมดุลระหว่างระยะทางและราคา
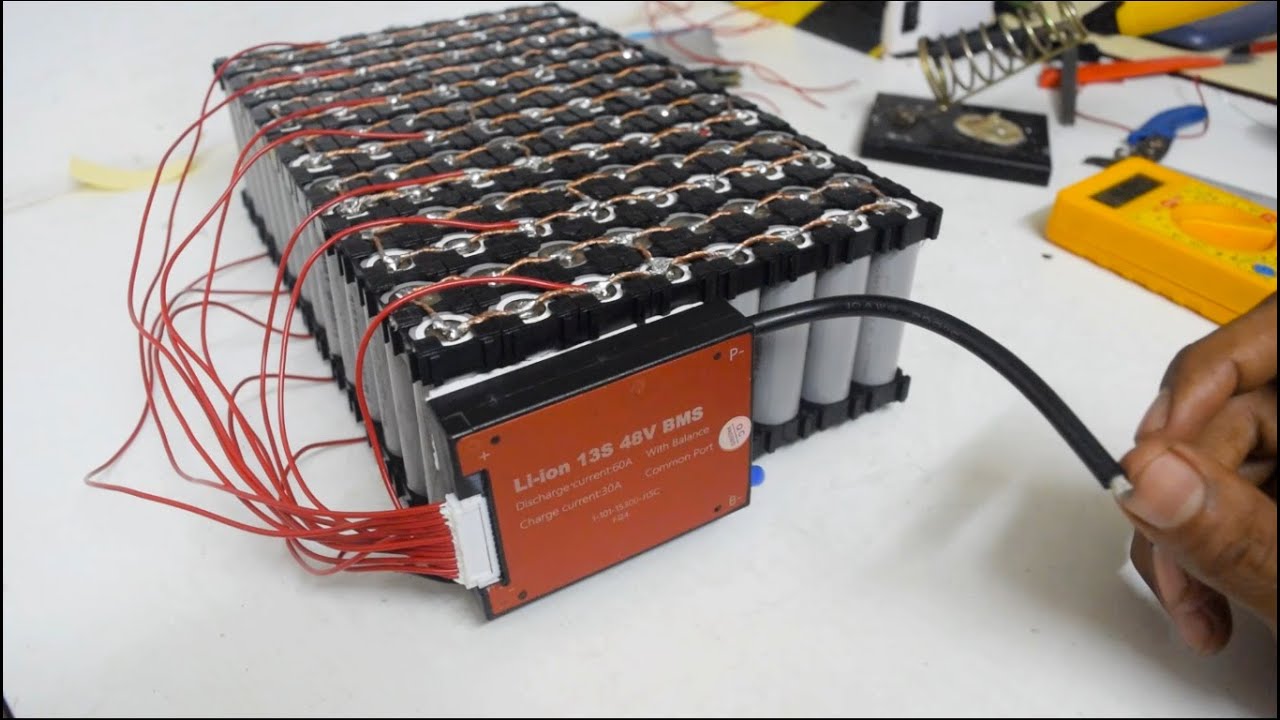
ขั้นตอนที่ 3: ตรวจสอบระบบจัดการแบตเตอรี่ (BMS)
The ระบบบริหารจัดการแบตเตอรี่ (BMS) เหมือนสมองของแบตเตอรี่ของคุณ ระบบที่ดีจะป้องกัน:
- การชาร์จเกิน
- การปล่อยไฟเกิน
- วงจรลัด
- อุณหภูมิที่เกินขีดจำกัด
อย่าประหยัดเกินไปในส่วนนี้ BMS คุณภาพดีสามารถช่วยปกป้องแบตเตอรี่ (และรถเข็นของคุณ) จากความเสียหาย
ตัวเลขสมรรถนะจริงที่สำคัญ
ให้ฉันแบ่งปันข้อมูลทดสอบจริงจากปี 2025:
รถ EZ-GO RXV มาตรฐานพร้อมแบตเตอรี่ตะกั่วกรด:
- ความเร็วสูงสุด: 19.2 ไมล์ต่อชั่วโมง
- ระยะทาง: 28 ไมล์
- ความสามารถปีนเขา: ปานกลาง
รถเข็นเดียวกับแบตเตอรี่ลิเธียม 105Ah:
- ความเร็วสูงสุด: 22.1 ไมล์ต่อชั่วโมง
- ระยะทาง: 48 ไมล์
- ความสามารถปีนเขา: ยอดเยี่ยม
นั่นไม่ใช่คำโฆษณาเท่านั้น ตัวเลขเหล่านี้เป็นตัวเลขในโลกจริง
การติดตั้ง: ง่ายกว่าที่คุณคิด
ฉันรู้ว่าคุณกำลังคิดว่า:
“นี่ดูซับซ้อน”
แต่ความจริงคือ: การแปลงเป็นลิเธียมส่วนใหญ่ใช้เวลา 1-2 ชั่วโมง สูงสุด
กระบวนการพื้นฐาน
- ถอดแบตเตอรี่เก่าออก (ใส่ถุงมือ – มันหนักและอาจรั่วไหลได้)
- ทำความสะอาดถาดแบตเตอรี่ (กำจัดสนิมหรือคราบสกปรก)
- ใส่แพ็คลิเธียมเข้าไป (ส่วนใหญ่ถูกออกแบบให้พอดีอย่างลงตัว)
- เชื่อมต่อสายเคเบิล (สีแดงต่อบวก สีดำต่อลบ)
- ติดตั้งเครื่องชาร์จใหม่ (ลิเธียมต้องการโปรไฟล์การชาร์จที่แตกต่างกัน)
- ทดสอบทุกอย่าง (แรงดันควรอ่านประมาณ 51.2V สำหรับชุดแบตเตอรี่ 48V เต็ม)
แค่นั้นแหละ จริงๆ
หลายแบรนด์เช่น Allied Lithium และ Eco Battery ยังมีวิดีโอสอนทีละขั้นตอน
คำถามเรื่องเงิน: คุ้มค่าหรือไม่?
มาคุยเรื่องเงินและสตางค์กัน
ค่าใช้จ่ายล่วงหน้า:
- ชุดแบตเตอรี่ตะกั่วกรด: $800-1,500
- ชุดลิเธียม: $2,000-3,500
ดูเหมือนแพงใช่ไหม?
แต่ลองดูสิ:
ในระยะเวลา 10 ปี คุณจะซื้อแบตเตอรี่ตะกั่วกรด 2-3 ครั้ง พร้อมอุปกรณ์บำรุงรักษา และค่าไฟฟ้าสิ้นเปลือง (ลิเธียมชาร์จไฟได้มีประสิทธิภาพมากกว่า 40%)
เมื่อคำนวณดูแล้ว ลิเธียมจะประหยัดเงินจริงๆ หลังจากประมาณ 5 ปี
ตัวอย่างจริงจากสนามกอล์ฟในประเทศไทย:
พวกเขาเปลี่ยนรถกอล์ฟ 50 คันเป็นลิเธียมในปี 2023 การลงทุนเริ่มต้น: $125,000
การประหยัดในปี 2025:
- หลีกเลี่ยงการเปลี่ยนแบตเตอรี่: $40,000
- ค่าแรงบำรุงรักษา: $36,000
- ค่าไฟฟ้า: $8,000
พวกเขาได้เปรียบแล้ว $84,000 โดยมีอายุแบตเตอรี่เหลืออีกมากกว่า 5 ปี
ตัวเลือกแบตเตอรี่ลิเธียมไอออนชั้นนำสำหรับรถกอล์ฟ 2025
อิงจากการวิจัยและความคิดเห็นของผู้ใช้ นี่คือจุดเด่น:
ดีที่สุดโดยรวม: Eco Battery 48V 105Ah
- อายุการใช้งาน 5,000 รอบ
- การตรวจสอบผ่านบลูทูธ
- พร้อมใช้งานทันที
- ราคา: $2,800-3,200
คุ้มค่าที่สุด: Bolt Energy 48V 105Ah
- ประสิทธิภาพยอดเยี่ยม
- รับประกัน 10 ปี
- น้ำหนักเพียง 55 ปอนด์
- ราคา: $2,500-2,900
ดีที่สุดสำหรับรถกอล์ฟดัดแปลง: Allied Lithium
- อัตราการปล่อยไฟสูง
- การกำหนดค่าที่ปรับแต่งได้
- ความน่าเชื่อถือที่พิสูจน์แล้ว
- ราคา: $2,200-2,700
ข้อผิดพลาดทั่วไปที่ควรหลีกเลี่ยง
ฉันเคยเห็นคนทำผิดพลาดในการอัปเกรดลิเธียม นี่คือสิ่งที่ไม่ควรทำ:
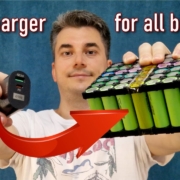
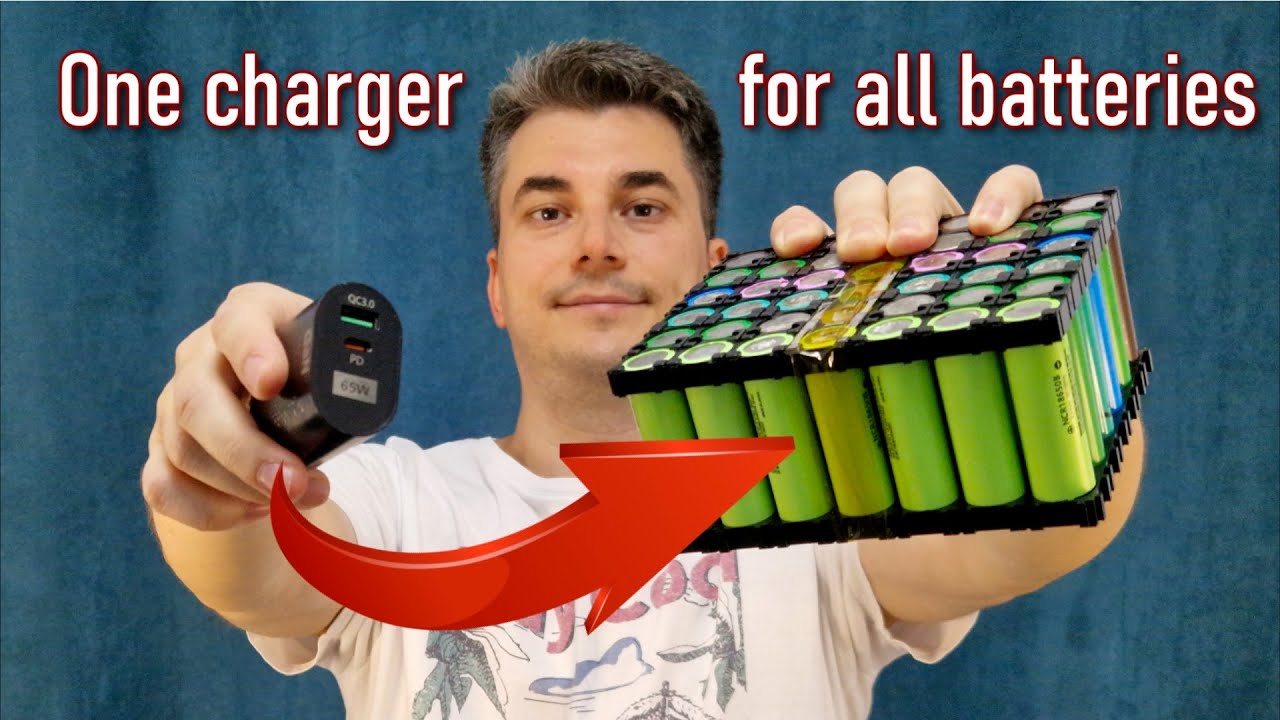
ข้อผิดพลาด #1: ใช้ที่ชาร์จผิดประเภท
เครื่องชาร์จแบตเตอรี่ตะกั่วกรดจะทำลายแบตเตอรี่ลิเธียม ควรใช้เครื่องชาร์จที่ออกแบบสำหรับลิเธียมโดยเฉพาะเสมอ
ความผิดพลาด #2: การผสมประเภทแบตเตอรี่
อย่าผสมแบตเตอรี่ลิเธียมกับตะกั่วกรดเลย มันอันตรายและจะทำลายทั้งสองแบตเตอรี่
ความผิดพลาด #3: ไม่สนใจขีดจำกัดอุณหภูมิ
อากาศหนาวจัด (ต่ำกว่า 0°F) อาจลดความจุชั่วคราว ควรเก็บรถเข็นของคุณในที่อุ่นขึ้นถ้าเป็นไปได้
ความผิดพลาด #4: ซื้อแบรนด์ไม่มีชื่อ
ควรเลือกบริษัทที่มีชื่อเสียง การใช้ BMS ที่ไม่ดีอาจทำให้เกิดไฟไหม้ได้จริงๆ
อนาคตได้มาถึงแล้ว
ผู้ผลิตรายใหญ่เริ่มให้ความสนใจ
Club Car ตอนนี้มีตัวเลือกแบตเตอรี่ลิเธียมเป็นอุปกรณ์มาตรฐาน Yamaha ก็ทำเช่นเดียวกัน แม้แต่ EZ-GO ก็เข้าร่วมในปี 2024
นั่นบอกทุกอย่างเกี่ยวกับทิศทางของอุตสาหกรรมนี้
เคล็ดลับบำรุงรักษาอย่างรวดเร็ว
แม้ว่าแบตเตอรี่ลิเธียมจะดูแลรักษาง่าย แต่ควรปฏิบัติตามเคล็ดลับเหล่านี้เพื่ออายุการใช้งานสูงสุด:
- ชาร์จหลังใช้งานแต่ละครั้ง (การชาร์จบางส่วนก็ได้)
- เก็บไว้ที่ระดับชาร์จ 50-60% หากไม่ได้ใช้งานเป็นเวลาหลายเดือน
- รักษาการเชื่อมต่อให้สะอาดและแน่นหนา
- อัปเดตเฟิร์มแวร์ BMS หากมีให้
- หลีกเลี่ยงการปล่อยให้แบตเตอรี่หมดสนิทเป็นเวลานาน
อาจใช้เวลาประมาณ 10 นาทีต่อปี
ผลกระทบต่อสิ่งแวดล้อมที่สำคัญจริงๆ
นี่คือสิ่งที่เจ๋ง:
แบตเตอรี่ลิเธียมเป็นมิตรกับสิ่งแวดล้อมมากกว่ากรดตะกั่วอย่างมาก ไม่มีสารตะกั่วที่เป็นพิษ ไม่มีการรั่วไหลของกรด และสามารถรีไซเคิลได้ 95%
ยิ่งไปกว่านั้น เนื่องจากใช้งานได้นาน 3 เท่า คุณจึงสร้างของเสียได้น้อยลงมาก
สนามกอล์ฟแห่งหนึ่งคำนวณว่าจะป้องกันของเสียกรดตะกั่วได้ถึง 12,000 ปอนด์ในทศวรรษหน้าโดยเปลี่ยนมาใช้ลิเธียม
การตัดสินใจของคุณ
สรุปแล้ว?
ถ้าคุณใช้รถเข็นของคุณเป็นประจำและวางแผนที่จะเก็บไว้มากกว่า 3 ปี ลิเธียมก็สมเหตุสมผล
ผลการปรับปรุงประสิทธิภาพเพียงอย่างเดียวก็คุ้มค่าแล้ว รวมถึงการประหยัดในการบำรุงรักษาและอายุการใช้งานที่ยาวนานขึ้น? มันเป็นเรื่องง่ายที่จะตัดสินใจ
เหตุผลเดียวที่ควรอยู่กับกรดตะกั่วคือ:
- คุณใช้งรถเข็นของคุณน้อยมาก
- งบประมาณตอนนี้จำกัดมาก
- คุณจะขายเร็ว ๆ นี้
ถ้าไม่ใช่อย่างนั้น? เปลี่ยนมาใช้เลย
ความคิดสุดท้าย
แบตเตอรี่ลิเธียมสำหรับรถกอล์ฟ การเปลี่ยนแปลงเป็นหนึ่งในการอัปเกรดที่สมเหตุสมผลที่สุด
ประสิทธิภาพดีกว่า ง่ายขึ้น ค่าใช้จ่ายระยะยาวต่ำลง
ฉันยังไม่เคยพบใครที่เสียใจที่เปลี่ยนมาใช้ แต่ฉันพบหลายคนที่เสียดายที่ไม่ได้ทำมันเร็วกว่านี้
เทคโนโลยีได้รับการพิสูจน์แล้ว ราคาเป็นเหตุผลได้ และประโยชน์ก็เห็นได้ทันที
คุณรออะไรอยู่?