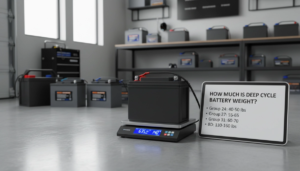
The Science: Why Batteries Fail Under Load
We have all seen it happen: a battery shows a perfect \”float\” voltage on a standard multimeter, yet the moment the backup system engages, the power collapses. This phenomenon occurs because Open Circuit Voltage (OCV) is a static measurement that tells us very little about the battery\’s ability to do actual work. At Nuranu, we emphasize that the only way to verify true reliability is by applying a load.
Internal Resistance (IR) and Voltage Sag
The primary culprit behind load failure is Internal Resistance (IR). As batteries age, their internal impedance rises. According to Ohm’s Law ($V = I times R$), as current ($I$) is drawn from the battery, voltage drops across this internal resistance.
If the IR is high, the Voltage Sag under load becomes severe. The terminal voltage can drop below the critical cut-off point immediately, triggering a system shutdown even if the battery technically holds a charge. Our Intelligent Battery Discharge Testers are designed to capture this specific behavior, identifying batteries that are \”voltage rich\” but \”power poor.\”
Chemical vs. Physical Health Issues
When we analyze test data, failures generally stem from two categories:
- Chemical Degradation: In VRLA and flooded lead-acid batteries, sulfation on the plates or electrolyte dry-out increases resistance. In Lithium-ion systems, electrode degradation reduces capacity.
- Physical Faults: Loose inter-cell connections, corroded terminals, or broken internal welds create \”hot spots.\” These physical issues cause massive resistance spikes that are easily detected by our Wireless Cell Monitoring modules during a discharge cycle.
AC-IR vs. DC-IR Differences
Understanding the type of resistance we are measuring is vital for accurate State of Health (SOH) analysis.
| Feature | AC-IR (Impedance) | DC-IR (Resistance) |
|---|---|---|
| Measurement Method | Injecting a small AC signal (1kHz). | Measuring voltage drop under high current load. |
| Primary Use | Quick, non-invasive health check. | Definitive capacity and power verification. |
| Accuracy | Good for trending, susceptible to noise. | Highly accurate reflection of real-world performance. |
| Nuranu Application | Preliminary screening. | Core function of DC Load Banks. |
We rely on DC-IR data derived from actual load testing because it simulates the exact stress the battery will face during a power outage, providing the only undeniable proof of capacity.
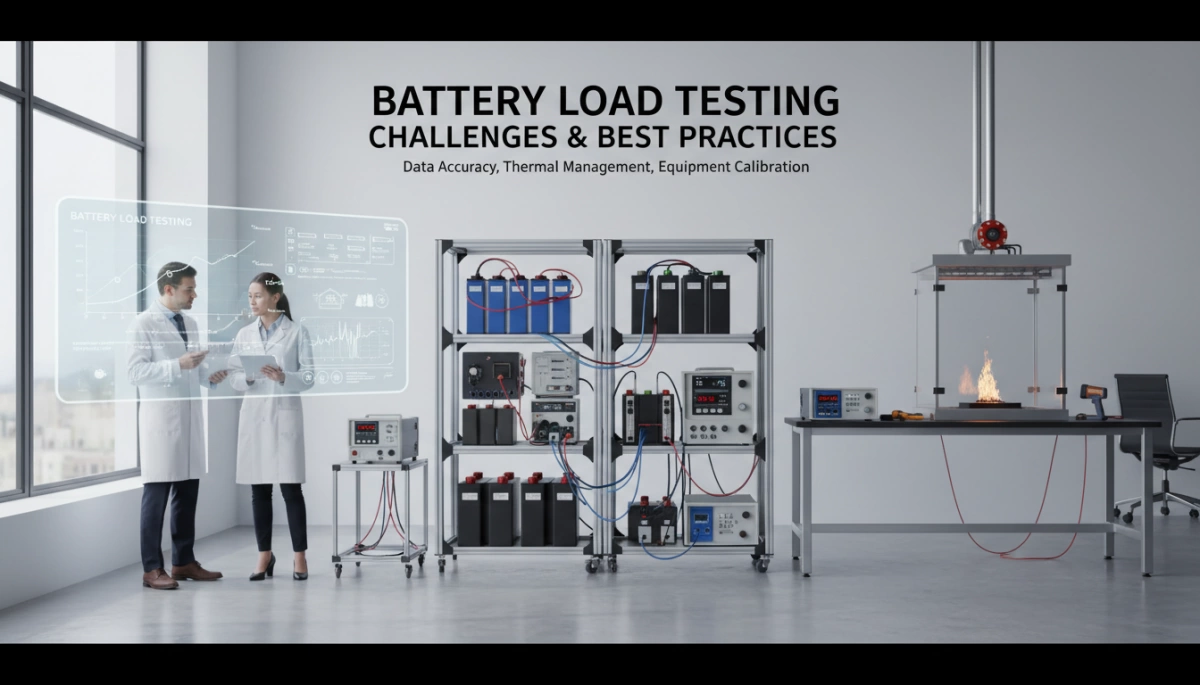
Advanced Load Testing Methods

To get a true picture of a battery\’s health, we have to move beyond simple voltage checks and apply rigorous, controlled stress. At Nuranu, we utilize intelligent discharge technologies that go far beyond old-school resistive banks. By controlling how the energy is drawn, we can simulate exact operating conditions and uncover weak cells that would otherwise pass a static test.
Constant Current (CC) Discharge Techniques
This is the industry gold standard for determining actual Amp-hour (Ah) Capacity. In a Constant Current Discharge test, our equipment automatically adjusts the resistance to maintain a steady amperage draw—regardless of the battery\’s dropping voltage.
- Why we use it: It is the only way to verify if a battery meets its manufacturer\’s Ah rating.
- How it works: If you have a 100Ah battery, we might program a 10A draw for 10 hours. If the voltage hits the cutoff before time is up, the capacity is degraded.
- Nuranu Advantage: Our testers use wireless modules to monitor individual cell voltages in real-time during this process, ensuring no single cell drops below safe limits while the string is under load.
Constant Power (CP) Mode for UPS and EVs
Backup systems and electric vehicles don\’t act like simple resistors. As their voltage drops, they draw more current to maintain the same power output (Watts). We use CP Mode to simulate this behavior accurately.
- Application: Critical for data centers and telecom UPS systems.
- The Stress Test: This mode puts maximum thermal and chemical stress on the battery near the end of the discharge cycle, revealing connection issues or internal resistance spikes that a CC test might miss.
- Safety Note: Whether you are testing standard VRLA strings or verifying if LiFePO4 batteries need to be vented during high-wattage discharge, using a programmable DC Electronic Load ensures the test stops exactly at the safety threshold.
Constant Resistance (CR) and Dynamic Loading
While less common for capacity certification, Constant Resistance (CR) mode is useful for simulating passive loads like emergency lighting or heating elements. For more complex scenarios, we employ Dynamic and Step Loading. This allows us to program a specific profile—such as a high-current spike followed by a low-draw plateau—to mimic the actual duty cycle of a forklift or a renewable energy storage system. This \”real-world\” simulation is vital for predicting how a battery bank will perform when it really counts.
Equipment Selection: Choosing the Right Tool
Getting accurate data for your Battery Load Test Guide: Methods, Equipment and Results starts with selecting the hardware that matches your specific application. You can\’t fix what you can\’t measure, and using the wrong tester can lead to misdiagnosing a healthy battery as dead—or worse, trusting a bad one.
Analog Carbon Pile Testers
These are the old-school workhorses often found in auto shops. They work by compressing carbon discs to create a massive physical electrical load, converting the battery\’s energy into heat.
- Best for: High-current cranking tests (CCA) on lead-acid starter batteries.
- Pros: Extremely durable, simple to operate, and provides a real-world stress test.
- Cons: They get very hot, lack digital precision, and rely on the operator to manually time the load duration.
Handheld Digital Conductance Analyzers
If you need speed and safety, digital analyzers are the modern standard. Instead of draining the battery with a heavy load, these devices send a small AC signal through the terminals to measure conductance and estimate Internal Resistance (IR). This correlates to the battery\’s ability to deliver current. They are perfect for quick fleet maintenance checks because they don\’t deplete the battery\’s State of Charge.
Programmable DC Electronic Loads
For professional diagnostics, especially with deep cycle or lithium chemistries, a DC Electronic Load is the gold standard. These units allow you to program exact discharge profiles (like Constant Current or Constant Power) to simulate specific devices. This precision is critical when you are plotting a full Discharge Curve to verify capacity. For instance, if you are determining how to revive a dead 18650 battery and need to verify if the cell is actually holding a charge after the repair, a programmable load will give you the definitive data that a simple multimeter cannot.
Importance of 4-Terminal Sensing (Kelvin Connection)
Precision testing falls apart if your connections are bad. Standard two-wire setups measure the resistance of the test leads plus the battery, which skews your results when dealing with milliohms.
- The Solution: Use a Kelvin Connection (4-terminal sensing).
- How it works: One pair of wires carries the current, while a separate pair measures the voltage.
- The Result: This eliminates the voltage drop across the test leads, giving you a pure reading of the battery\’s voltage right at the terminals. If you are measuring State of Health (SOH) or low-resistance lithium cells, 4-terminal sensing is non-negotiable.
Step-by-Step Professional Load Test Procedure

Executing a proper load test isn\’t just about hooking up wires; it requires a systematic approach to ensure safety and data accuracy. We design our Intelligent Battery Discharge Testers to automate much of this, but the setup remains critical for valid results.
Preparation, Safety, and SoC Checks
Before initiating any discharge, safety is priority number one. Ensure the battery bank is isolated from the live system if required and verify that all terminals are clean and tight. Loose connections create heat and skew results. If you are managing complex banks, understanding the risks of wiring batteries in parallel danger is essential to prevent short circuits or imbalances during the test.
- Visual Inspection: Check for casing cracks or leaks.
- State of Charge (SoC): Ensure the battery is fully charged (100% SoC) and has rested for a few hours to stabilize the Open Circuit Voltage (OCV).
- Sensor Installation: Attach our wireless cell monitoring modules to individual cells (2V, 6V, or 12V) to track specific performance within the string.
Setting C-Rate and Cut-off Voltage Parameters
On the tester\’s interface, you must define the \”stop conditions.\” This prevents damaging the battery by draining it too far. Our equipment allows you to set automatic shutdowns based on voltage, capacity, or time.
| Parameter | Description | Typical Setting |
|---|---|---|
| Discharge Current (C-Rate) | The constant load applied. | Often 0.1C or 0.2C (e.g., 10A for a 100Ah battery). |
| Cut-off Voltage | The voltage floor where the test stops. | ~1.75V per cell (e.g., 42V for a 48V system). |
| Duration | Max time for the test to run. | Based on rated capacity (e.g., 5 hours or 10 hours). |
Execution: Monitoring Voltage Sag
Once you hit \”Start,\” the load bank applies the resistance using safe PTC ceramic elements. Immediately observe the Voltage Sag. A healthy battery will show a slight initial drop and then stabilize. If the voltage plummets instantly, the Internal Resistance (IR) is likely too high, indicating a bad block or connection.
Observing the Discharge Curve
As the test progresses, our integrated software logs data to generate the Discharge Curve. You are looking for a steady plateau.
- Healthy: Voltage remains steady for the majority of the duration.
- Weak: Voltage drops gradually but faster than the manufacturer\’s spec.
- Failed: Sudden \”knee\” drop in voltage well before the expected time.
Using the wireless modules, you can identify if a single cell is dragging down the entire bank\’s voltage, allowing for targeted replacement rather than scrapping the whole system.
Analyzing Results: Pass, Fail, or Degraded?

Once the Intelligent Battery Discharge Tester completes its cycle, the focus shifts from execution to interpretation. We don\’t just look for a simple \”pass\” or \”fail\” light; we analyze the data logged by our PC management software to determine the true State of Health (SOH). Accurate analysis prevents premature replacement of good units and ensures critical backup systems aren\’t relying on \”zombie\” batteries that fail under real stress.
The 9.6V Rule for 12V Lead Acid
For standard 12V lead-acid blocks, the 9.6V rule is the industry benchmark during a high-rate load test. If the voltage drops below 9.6V while under a load equivalent to half the CCA rating for 15 seconds, the battery is generally considered defective. However, our intelligent testers go beyond simple voltage checks by monitoring the entire discharge curve to differentiate between a surface charge issue and actual plate degradation.
Calculating Actual Amp-hour Capacity
The most reliable metric for industrial applications is the actual Amp-hour (Ah) Capacity. By running a Constant Current (CC) discharge test, our equipment measures exactly how much energy the battery delivers before hitting the cutoff voltage.
- 100% – 90% Capacity: Excellent condition.
- 89% – 80% Capacity: Serviceable, but requires monitoring.
- Below 80% Capacity: Industry standard for replacement.
Interpreting Steep Drops and Plateaus
Visualizing the Discharge Curve via our PC software reveals issues that a multimeter misses.
- Steep Initial Drop: Indicates high Internal Resistance (IR) or bad connections.
- Mid-Test Plateau: Normal operation where voltage stabilizes.
- Premature Drop-off: Signals lost capacity or a weak cell within the string.
Using our wireless cell monitoring modules, we can pinpoint exactly which 2V, 6V, or 12V cell is causing the drop. This granular data is essential when determining how to tell if a lithium-ion battery is bad or if a specific lead-acid jar needs swapping.
Comparing Results Against Manufacturer Datasheets
Finally, we validate the test results against the manufacturer\’s specific discharge tables. A battery might pass a generic load test but fail to meet the specific runtime requirements of your data center or telecom site. By comparing the time-to-cutoff against the datasheet, we verify if the battery system can truly support the critical load for the required duration.
Common Pitfalls in Load Testing
I’ve seen perfectly good batteries tossed in the recycling bin simply because the testing procedure was flawed. Even the most expensive equipment can’t compensate for user error. To ensure your Battery Load Test Guide results are accurate, you need to avoid these three major mistakes that skew State of Health (SOH) data.
Testing Batteries with Low State of Charge
You cannot perform a valid load test on a battery that isn\’t fully charged. This is the number one error in the field. If a battery is only at 50% capacity, the Open Circuit Voltage (OCV) might look okay, but the voltage will collapse immediately under load, mimicking a failed cell.
- The Rule: Always charge the battery to 100% and let it rest (surface charge dissipation) before testing.
- The Risk: Testing a discharged battery leads to false negatives. Understanding what constitutes a good 18650 battery or lead-acid unit means knowing that performance relies heavily on starting with a full tank of electrons.
Ignoring Ambient Temperature Effects
Batteries are chemical devices, and chemistry is slaves to temperature. In the US, testing a battery in a freezing garage in Minnesota will give vastly different results than testing the same unit in a hot Arizona workshop.
- Cold Temperatures: Slow down the chemical reaction, artificially increasing Internal Resistance (IR) and reducing capacity. A good battery might fail a load test simply because it is cold.
- High Temperatures: Temporarily boost performance but degrade long-term health.
- Solution: ideally, bring the battery to room temperature (around 77°F / 25°C) before testing to get a standardized result.
Overlooking Bad Connections and Contact Resistance
Your test results are only as good as the physical connection between the tester and the battery terminals. Corrosion, dirt, or loose clamps introduce extra resistance that the tester reads as Internal Resistance (IR) inside the battery.
- Voltage Sag: Poor contact causes a massive voltage sag at the terminals as soon as current flows.
- The Fix: Always clean lead posts and terminals with a wire brush.
- Connection Type: Ensure your clamps are biting into clean metal. If you are building or testing custom packs, knowing how to properly assemble a battery pack ensures that your interconnects aren\’t the source of the resistance.
Frequently Asked Questions (FAQs)
Load Testing vs. Multimeter Voltage Check
We often see technicians relying solely on a multimeter, but that only gives you half the story. A multimeter measures Open Circuit Voltage (OCV), which is essentially a surface reading. A battery can show a healthy 12.6V or higher while sitting idle but fail instantly once a real load is applied.
Load testing is the only way to verify the battery\’s ability to deliver current. It simulates an actual power outage or operational demand to reveal internal issues like high resistance or broken inter-cell connectors that a simple voltage check will miss.
How Often Should Industrial Batteries Be Tested?
For critical backup systems in telecom, data centers, and utilities, sticking to a schedule is non-negotiable. Based on IEEE standards and general best practices:
- New Systems: Perform an acceptance test upon installation to establish a baseline.
- Operating Systems: Conduct a discharge test annually.
- Aging Systems: Once the battery capacity drops below 90% or the system reaches 85% of its service life, increase testing frequency to every six months or quarterly.
Using our intelligent discharge testers with wireless monitoring simplifies this process, allowing for frequent checks without the massive logistical headache of manual logging.
Can You Load Test a Frozen Battery?
Absolutely not. Never attempt to load test or charge a frozen battery. When the electrolyte in a lead-acid battery freezes, the case can crack, and the internal plates may warp. Applying a heavy load current to a frozen battery creates a severe safety hazard, including the risk of explosion. Always bring the battery to room temperature and inspect the casing for physical damage before attempting any diagnostics.
Difference Between CCA and Amp-hour Capacity
It is crucial to use the right metric for your specific application. Cold Cranking Amps (CCA) measures the burst of energy a battery can deliver at 0°F for 30 seconds—this is vital for starting engines. Amp-hour (Ah) Capacity, on the other hand, measures how much energy a battery can store and deliver over a longer period.
Ah capacity is the standard for deep-cycle applications, including UPS systems, solar storage, and lithium formats like those described in what is a 18650 battery.
| Feature | Cold Cranking Amps (CCA) | Amp-hour Capacity (Ah) |
|---|---|---|
| Primary Use | Engine Starting (Automotive) | Deep Cycle (Solar, UPS, Telecom) |
| Duration | Short Burst (30 Seconds) | Long Duration (Hours to Days) |
| Key Factor | High Current Delivery | Total Energy Storage |
| Test Method | High-Rate Discharge | Constant Current/Power Discharge |