Ever turned your key only to hear a dreaded click?
You might think your battery is dead, but often, the real culprit is a poor connection hiding in plain sight.
As experts in heavy-duty power solutions at Nuranu, we know that neglected battery terminals and posts can leave you stranded, whether you’re in a daily driver or an off-grid rig.
In this guide, you’re going to learn exactly how to identify different battery terminal types, from standard SAE battery terminals to specialized marine battery terminals.
We’ll cut through the noise on battery terminal maintenance and show you the professional way to handle battery post cleaning and remove car battery terminal corrosion for good.
Ready to ensure your engine starts every time?
Let’s dive in.
Battery Posts vs. Terminals: What’s the Difference?
At Nuranu, we often see confusion regarding the anatomy of a power connection, but understanding the distinction is critical for safety and performance. While the terms are often used interchangeably, they refer to two distinct parts of the electrical interface.
- The Battery Post: This is the physical contact point built directly onto the battery casing itself. On traditional units, this is often a lead stub, but on our modern LiFePO4 and custom lithium packs, these may appear as threaded inserts, recessed contacts, or spot-welded tabs. It is the source of the power.
- The Battery Terminal: Also known as the cable connector, this is the clamp, ring, or lug attached to the end of your device’s wiring. It connects the load (your EV, golf cart, or instrument) to the power source.
Getting this terminology right is the first step in maintenance. A loose or corroded connection between the battery post and the terminal creates electrical resistance. This resistance leads to voltage drops and heat buildup, which can compromise the efficiency of even the most advanced Battery Management Systems (BMS). Whether you are dealing with a standard lead post or a high-tech lithium interface, a clean, tight marriage between these two components is non-negotiable for reliable power.
Common Battery Post Types

Identifying the correct hardware is the first step in any maintenance or replacement project. While we specialize in advanced lithium technology, understanding the standard battery terminal types used across the industry is essential for ensuring compatibility, especially when upgrading legacy systems. Different applications require specific post geometries to handle vibration, current load, and space constraints.
Here are the most prevalent standards you will encounter:
- SAE Battery Terminals (Top Post): This is the standard for most American and European vehicles. The posts are tapered lead cones located on top of the battery. Crucially, the positive post is slightly larger in diameter than the negative post to prevent reverse polarity mistakes.
- JIS Terminals (Pencil Post): Common in older Japanese vehicles, these look like SAE posts but are significantly thinner. Warning: Never try to force an SAE clamp onto a JIS post or shim a JIS clamp onto an SAE post; it results in poor contact and dangerous arcing.
- Side Post Battery Terminals: Often found on General Motors vehicles, these feature internal threads on the side of the casing rather than protruding posts. This design reduces the risk of accidental short circuits across the top of the battery but can be harder to inspect for corrosion.
- Marine Battery Terminals (Threaded Stud): These utilize a threaded stud (usually 5/16″ or 3/8″) with a wing nut. This setup allows for quick, tool-free connections and is ideal for securing multiple accessory wires on boats or RVs.
When we engineer a drop-in 12V lithium battery replacement, we often replicate these standard form factors. This ensures that whether you are running a golf cart, a solar setup, or an industrial machine, the new technology integrates seamlessly with your existing cables.
Battery Terminal Materials
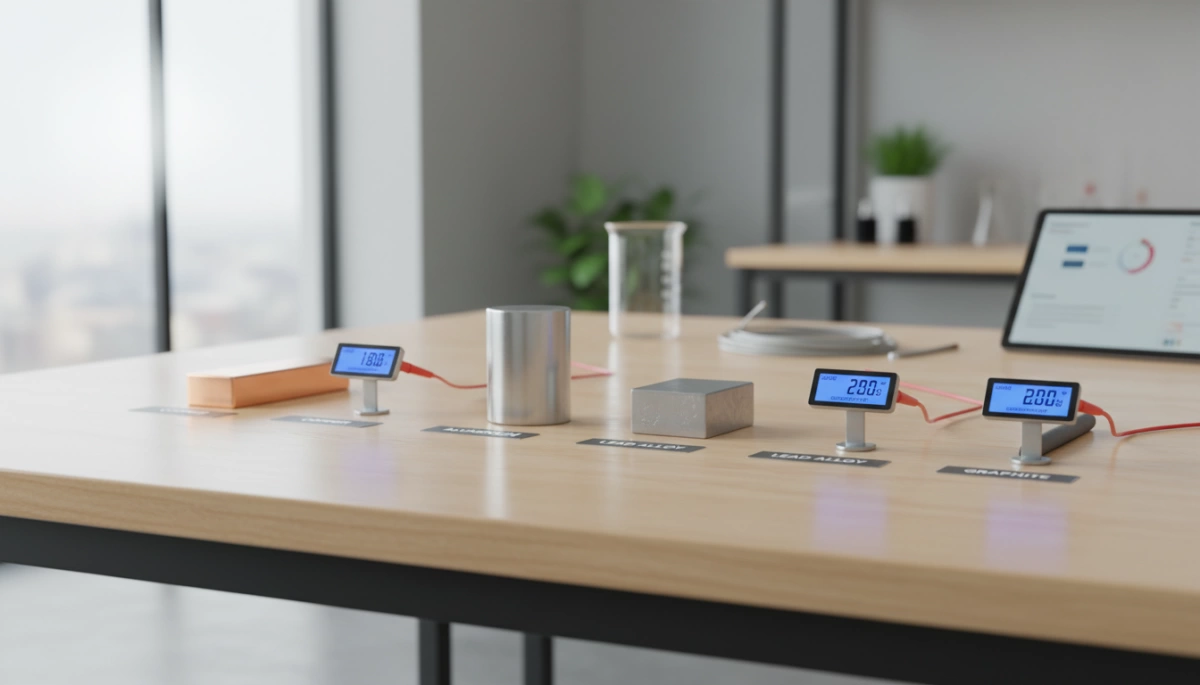
When we engineer power solutions, the metal used at the connection point is just as critical as the cells inside the pack. Choosing the right material determines how efficiently energy moves from the battery to your device. While traditional setups often rely on standard lead, modern high-efficiency systems—especially those utilizing 36V lithium battery technology—demand materials that minimize resistance and heat buildup.
Here is how the most common materials stack up:
- Lead Terminals: These are the industry standard for starting batteries. Lead is soft and malleable, allowing the clamp to “squish” onto the post for a tight mechanical seal. However, lead has lower electrical conductivity compared to other metals and is structurally weak. We are increasingly moving toward lead-free battery terminals in advanced applications to avoid toxicity and improve performance.
- Brass Terminals: Brass is significantly harder than lead and offers better conductivity. It resists corrosion well, making it a popular choice for marine environments. However, brass is an alloy, so while it is an upgrade over lead, it still doesn’t match the raw flow rate of pure copper.
- Tin-Plated Copper Terminals: This is the gold standard for heavy-duty battery connectors and high-performance lithium packs. Copper provides superior electrical conductivity, ensuring minimal voltage drop. The tin plating is essential because it acts as a shield against oxidation, preventing the copper from turning green and losing connection quality.
For anyone running sensitive electronics or high-drain motors, upgrading to tin-plated copper terminals is one of the easiest ways to ensure your system delivers all the power it’s capable of producing.
Battery Terminal Corrosion: The Silent Killer
That crusty white, blue, or green substance forming on your battery posts isn’t just an eyesore—it is a major performance barrier. We often see car battery terminal corrosion occur when hydrogen gas vents from traditional lead-acid batteries and reacts with the metal connectors. This chemical reaction creates a layer of lead sulfate or copper sulfate, which acts as an electrical insulator rather than a conductor.
When this buildup goes unchecked, it forces your system to work harder to push current through the resistance. This creates a voltage drop that can prevent a vehicle from starting or cause electronic devices to flicker. While our Nuranu LiFePO4 technology eliminates the acid venting issues typical of lead-acid units, keeping contacts clean is still vital for longevity. Neglecting connection hygiene is a quick way to shorten how long lithium-ion batteries last or prematurely kill a lead-acid unit.
Impact of Corrosion on Performance
If you ignore the buildup, the consequences go beyond a bad connection:
- High Resistance: The “blue powder” blocks the flow of electricity, reducing the power available to your motor or device.
- Overheating: Resistance generates heat at the terminal, which can melt plastic casing or damage the post.
- Charging Failures: The alternator or charger cannot push energy back into the battery effectively, leaving you with a dead cell.
Battery corrosion removal isn’t just cosmetic; it is a critical maintenance step to ensure your battery delivers the amps it was rated for.
Tools for Battery Maintenance
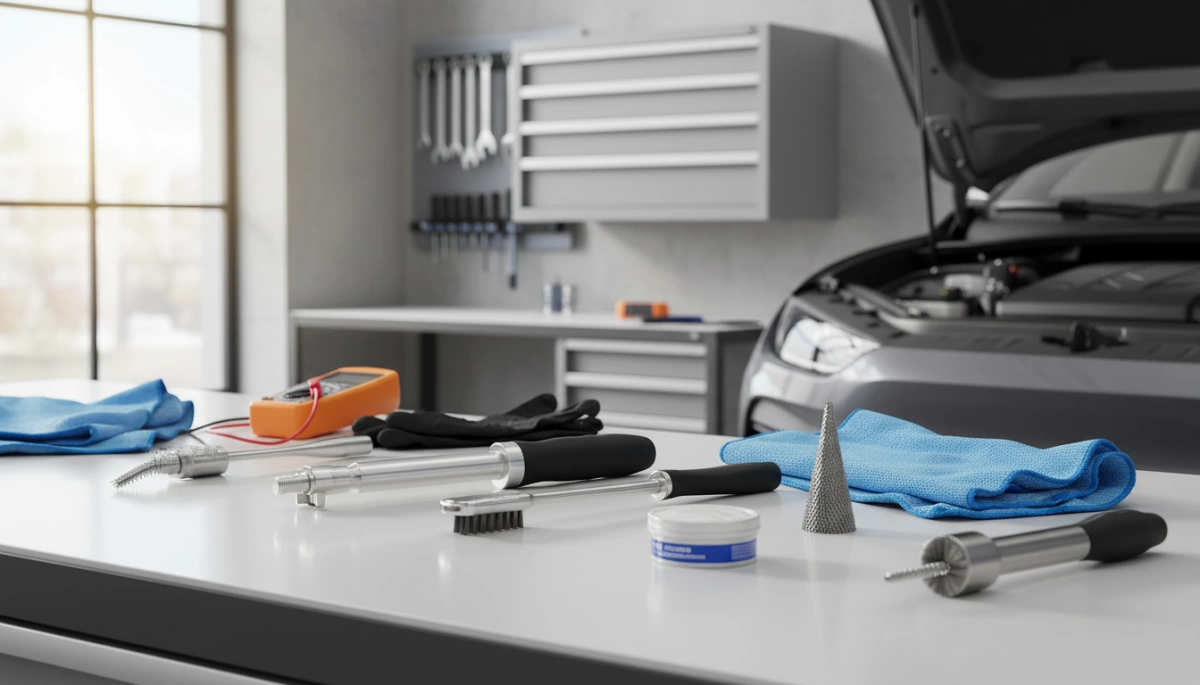
Before you start scrubbing away corrosion, you need to gather the right kit. Using the wrong tool can strip a lead post or damage the delicate plating on a lithium contact. At Nuranu, we emphasize safety and precision, whether you are working on a golf cart or a custom industrial pack.
Here is the essential gear for effective battery terminal maintenance:
- Personal Protective Equipment (PPE): Never skip this. Safety glasses and acid-resistant rubber gloves are mandatory to protect against accidental splashes or sparks.
- Terminal Cleaning Brushes: For standard SAE posts, use a dedicated wire terminal brush with both male and female ends. For smaller electronics or recessed contacts, a fiberglass scratch pen or 1000+ grit sandpaper provides better control.
- Socket Set and Wrenches: You need a reliable socket set (typically 10mm or 13mm for automotive) to loosen clamps without rounding off the nuts. Always use insulated tools if working on high-voltage systems.
- Chemical Cleaners: Keep 91% Isopropyl alcohol on hand for general degreasing. For neutralizing acid on older lead-acid types, a baking soda paste works best.
- Finishing Supplies: Have a microfiber cloth for drying and dielectric grease to seal the connection after cleaning.
If you are maintaining sensitive equipment, such as a 11.1V lithium battery for smart medical monitors, avoid heavy wire brushes. Instead, use cotton swabs and alcohol to ensure the contacts remain conductive without damaging the surface.
How to Clean Battery Terminals
To restore full power flow, you need to strip away oxidation and grime effectively. Whether you are dealing with a standard lead-acid unit or maintaining the contacts on a Nuranu lithium pack, the goal is a clean, tight, metal-to-metal connection. Always wear safety glasses and rubber gloves before starting; battery acid and corrosion dust are hazardous materials you don’t want on your skin.
Step 1: Disconnect Safely
Start by disconnecting the battery cables to isolate the power. Always remove the negative (black) cable first, followed by the positive (red) cable. This sequence prevents accidental short circuits if your wrench touches the chassis or a metal frame while you are loosening the positive terminal.
Step 2: Neutralize and Apply Solvent
The cleaning agent you choose depends entirely on the battery chemistry:
- For Lead-Acid Corrosion: If you see white, blue, or green crust, you need baking soda battery corrosion removal. Mix one tablespoon of baking soda with a cup of warm water. Apply this solution to the posts and clamps; it will fizz aggressively as it neutralizes the acidic buildup.
- For Lithium/Electronics: Do not use water or baking soda paste on our lithium packs. Instead, use 91% (or higher) isopropyl alcohol on a cotton swab or cloth. This cuts through dirt and oils without introducing moisture that could damage the BMS.
Step 3: Scrub the Posts
For heavy buildup, use a wire brush or a specialized terminal cleaning tool to scrub the posts and the inside of the cable clamps until the metal shines brightly. For smaller contacts or spot-welded strips common in custom packs, a fiberglass pen or 1000-grit sandpaper works best to clean battery posts without removing excessive material. If the terminals remain deeply pitted or loose after scrubbing, you may need to investigate further to see https://nuranu.com/how-do-i-know-if-my-lithium-ion-battery-is-bad/ before attempting to use it again.
Step 4: Rinse, Dry, and Reconnect
If you used the baking soda method, rinse carefully with a small amount of water and dry immediately with a microfiber cloth. Ensure all components are 100% dry before reassembly. Reconnect the positive cable first, then the negative. Performing thorough battery corrosion removal is a critical step before putting equipment away for the season, which aligns with best practices on https://nuranu.com/how-to-store-lifepo4-batteries/.
Preventing Future Corrosion
Once you have scrubbed the terminals clean, the job isn’t finished until you seal the metal. Leaving bare metal exposed to the elements just invites oxidation and rust to return immediately. At Nuranu, we emphasize that proper shielding is the key to maintaining a “zero maintenance” experience, even with high-end lithium systems.
Dielectric Grease and Protective Sprays
The most reliable way to stop corrosion in its tracks is by blocking oxygen and moisture. Dielectric grease battery terminals are the industry standard for this. Since this grease is non-conductive, it prevents stray current and arcing while creating an airtight seal over the connection.
- Silicone Dielectric Grease: Apply a thin layer to the posts and the inner surface of the clamps before tightening. It repels water and withstands high temperatures.
- Anti-Corrosion Battery Spray: These sprays dry into a protective film. They are excellent for coating the entire assembly after everything is tightened down.
Anti-Corrosion Washers and Maintenance
For top-post setups, chemically treated felt washers are a simple, effective upgrade. Usually color-coded (red for positive, green for negative), these washers sit at the base of the post to neutralize vapors and block moisture wicking.
While navigating the pros and cons of Lithium Iron Phosphate (LFP) batteries reveals that our lithium packs don’t leak acid like old lead-acid units, external environmental corrosion can still occur on the metal contacts. If you are figuring out how to connect batteries in series to increase voltage, remember that every added connection point requires protection. A quick inspection every few months ensures your power delivery stays efficient and safe.
Replacing Damaged Terminals
Sometimes, no amount of scrubbing or baking soda paste can save a connection. Knowing when to stop cleaning and start replacing is a critical part of battery terminal maintenance. If the metal structure of the terminal or post is compromised, you are dealing with a safety hazard, not just a dirty contact. Continued use of a damaged terminal increases resistance, which generates heat and can lead to dangerous failures, especially in high-capacity lithium systems.
Signs It’s Time to Replace
Inspect your connections closely after cleaning. If you spot any of these red flags, swap out the part immediately:
- Deep Pitting: If corrosion has eaten away significant metal, the contact area is reduced, limiting current flow.
- Cracks or Fractures: Overtightening often cracks lead or brass clamps. A cracked terminal cannot maintain the tension needed for a secure connection.
- Stripped Threads: If you can’t tighten the bolt to the manufacturer’s torque spec, the connection will vibrate loose.
- Heat Damage: Look for melted insulation or discoloration on the cable near the post. This indicates extreme heat caused by high resistance. Damage often occurs when mixing different battery types or ages creates uneven loads, leading to overheating at the connection points.
A Note on Custom Lithium Packs
For standard lead-acid clamps, replacement is a simple DIY job. However, with our custom lithium-ion and LiFePO4 packs, terminal damage often requires a different approach. Since many of our terminals are integrated with spot-welded nickel strips or connected directly to a BMS, you should not attempt to splice or solder these yourself without the right equipment. If a terminal on a sealed lithium pack is damaged, it usually requires professional service to ensure the internal BMS and cells remain safe.
FAQs About Battery Terminals
We field questions daily about keeping connections reliable, from massive industrial banks to the custom lithium packs we manufacture. Here are the quick answers to the most common maintenance myths and specs.
Can I Use Coke to Clean Battery Terminals?
Technically, yes, but we don’t recommend it. The phosphoric acid in soda will eat away at battery terminal corrosion, but the high sugar content leaves a sticky residue. This residue attracts dirt and grime, which eventually leads to more resistance and heat buildup. You are much better off using a baking soda and water mix or a dedicated battery corrosion removal spray that evaporates cleanly.
Is Vinegar Good for Cleaning Posts?
It depends on the chemistry. Vinegar is acidic, so it works well to neutralize alkaline leaks (like from household batteries). However, for standard lead-acid buildup, you need a base like baking soda to neutralize the acid. For our lithium-ion and LiFePO4 packs, we strictly advise using 91%+ Isopropyl alcohol to clean battery posts. It removes oxidation and oils without introducing water or reactive chemicals into the BMS or casing.
How Tight Should Terminals Be?
“Snug” is the technical term we use. You want the connection tight enough that the terminal cannot be moved by hand, ensuring maximum conductivity. However, cranking them down too hard can strip the soft lead threads on starter batteries or crack the casing on rigid packs. If you have tightened your connections but still face power cutouts with smaller cells, the issue might not be the terminal itself; knowing how to reset an 18650 battery can often resolve these “dead” battery scenarios without replacing hardware.
Quick Maintenance Rules
- Torque Specs: usually 10–15 ft-lbs for automotive side posts; hand-tight plus a quarter turn for wing nuts.
- Grease: Always apply dielectric grease battery terminals after tightening, not before, to seal out moisture.
- Safety: Never clean terminals while the battery is under load or charging.