Environmental Hazards of Lithium Mining Explained

Environmental Hazards of Lithium Mining: A Data-Driven Analysis

As we navigate the global shift toward renewable energy and electric vehicles, we must address the underlying environmental costs of the materials powering this transition. At Nuranu, we prioritize data-driven insights to understand the baseline environmental footprints of the two primary lithium extraction methods: brine evaporation and hard-rock mining.

Analyzing Brine Extraction vs. Hard-Rock Mining

The environmental impact of lithium depends heavily on the extraction technique used. We categorize these into two distinct operations, each presenting unique ecological challenges.

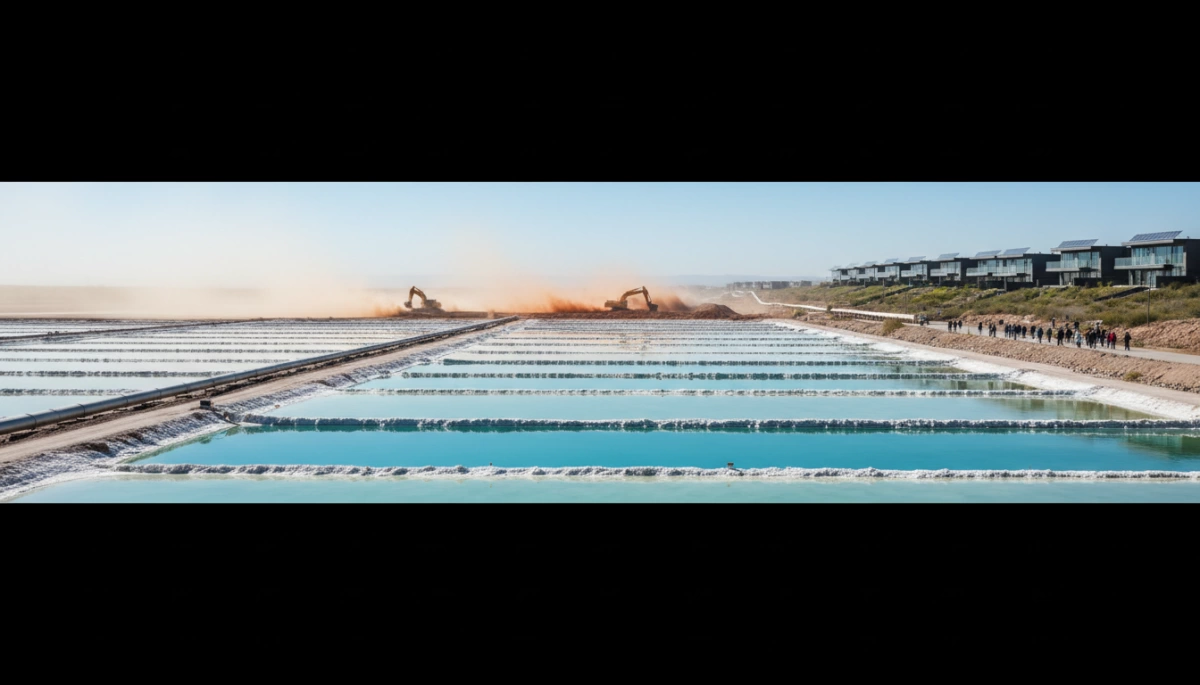
  • Brine Evaporation Ponds: This process involves pumping mineral-rich saline water from underground aquifers into massive surface ponds. Over 12 to 18 months, solar evaporation concentrates the lithium. While energy-efficient, the water intensity of this method is its primary hazard.
  • Hard-Rock (Spodumene) Mining: Traditional open-pit mining targets pegmatite formations. This requires heavy machinery for ore extraction, crushing, and chemical roasting. While it has a smaller water footprint than brine, the carbon emissions and physical land disruption are significantly higher.

Comparing Environmental Baselines

We analyze the trade-offs between these methods to provide a clear picture of their physical and ecological footprints:

  • Resource Consumption: Brine operations are localized in arid regions where water is a “non-renewable” resource, leading to extreme groundwater depletion.
  • Energy and Emissions: Hard-rock mining requires intensive thermal processing, resulting in a carbon footprint up to three times higher than brine-based extraction.
  • Land Alteration: Both methods cause significant habitat fragmentation, but hard-rock mining leaves behind vast tailings (waste piles) and open pits that permanently alter the topography.

By evaluating these extraction techniques through a strategic lens, we identify the high-risk areas where “green” technology intersects with local environmental degradation. Understanding these baselines is the first step toward implementing sustainable lithium sourcing and responsible mineral development.

Water Consumption and Depletion Risks

The most immediate environmental hazard of lithium mining is the massive strain it places on local water supplies. In the Lithium Triangle of South America, the brine extraction process requires approximately 500,000 gallons of water to produce just one ton of lithium. This high-intensity consumption creates a permanent deficit in some of the driest regions on Earth.

Groundwater Depletion and Local Scarcity

The massive scale of groundwater depletion mining alters the hydrological balance of entire basins. When mineral-rich brine is pumped to the surface for evaporation, it creates a vacuum that draws fresh water from surrounding aquifers into the salty deposit areas, effectively “salting” the remaining drinking water.

  • Aquifer Lowering: Water tables drop significantly, making it impossible for local communities to access traditional wells.
  • Drinking Water Scarcity: As fresh water migrates to fill mined voids, potable water becomes a rare and expensive commodity for indigenous populations.
  • Agricultural Impact: Farming and herding operations collapse as soil moisture disappears, leading to localized desertification.

Understanding these resource constraints is a critical part of the factors to consider when designing and manufacturing 18650 lithium batteries for the global market. We must balance the demand for energy storage with the reality of water scarcity lithium challenges to ensure a truly sustainable transition. Addressing these risks isn’t just an ethical choice; it is a strategic necessity for long-term supply chain stability.

Chemical Pollution and Toxic Waste Hazards

Environmental Hazards of Lithium Mining

When evaluating what are the environmental hazards of lithium mining, the release of toxic chemicals during processing is a top-tier concern. Extracting lithium from hard rock (spodumene) or concentrated brine requires a chemical-heavy refinement process that poses immediate risks to local ecosystems and public health.

Toxic Chemical Leaks and Processing Risks

The path from raw ore to a high-performance 7.4V 18650 lithium battery pack for solar street lights involves intensive chemical treatments that must be strictly managed to prevent environmental disasters.

  • Acid Leaching: Refineries use massive volumes of sulfuric acid and hydrochloric acid to separate lithium from ore. Any breach in containment leads to catastrophic leaks that strip soil nutrients and poison land.
  • Tailings Management: Hard-rock mining produces “tailings”—crushed rock waste that often carries heavy metals and chemical residue. If tailings dams fail, toxic slurry can bury entire habitats.
  • River Contamination: Chemical runoff from processing plants can drastically alter the pH of nearby water bodies. This leads to massive fish kills and destroys the primary water source for downstream communities.

We emphasize that soil toxicity and groundwater contamination near poorly regulated mining sites are not just short-term issues; they are long-term liabilities that require data-driven mitigation and transparent supply chain practices. Protecting the environment while powering the future requires a relentless focus on reducing these chemical footprints.

Biodiversity Loss and Land Degradation

Lithium Mining Environmental Impacts

Physical landscape alteration is a significant factor when assessing what are the environmental hazards of lithium mining. Our analysis shows that large-scale extraction operations lead to severe habitat fragmentation, disrupting the natural corridors that local wildlife depends on for survival.

Salt Flat Ecosystem Damage

In the high-altitude regions of South America, the construction of massive brine pools causes irreversible salt flat ecosystem damage. This industrial expansion directly conflicts with the survival of endemic species.

  • Threat to Migratory Birds: Andean flamingo populations are declining as their specialized nesting and feeding grounds are replaced by industrial infrastructure.
  • Vegetation Loss: Alterations in soil salinity and moisture levels kill off native flora, which is essential for stabilizing the fragile desert ground.

Soil Erosion and Desertification

Hard-rock mining involves intensive land clearing and earth-moving, which triggers long-term soil erosion. This degradation often renders the land permanently unsuitable for local farming or herding. As we evaluate the shift toward sustainable energy, it is clear that choosing between an LFP lithium battery vs. NMC battery involves weighing the raw material demand that drives this biodiversity loss mining. Without strict land management, these mining sites eventually face total desertification, leaving a lasting scar on the local environment.

Carbon Footprint and Air Quality Impacts

Environmental Hazards of Lithium Mining

While lithium is essential for the green transition, the processing stage carries a significant carbon footprint. The energy required to extract and refine lithium—especially from hard-rock sources—results in substantial greenhouse gas emissions.

  • High Energy Requirements: Hard-rock lithium mining is particularly energy-intensive, often requiring 15 tonnes of CO2 for every single tonne of lithium produced.
  • CO2 Emissions: Even brine-based extraction, which is less carbon-heavy than open-pit mining, still relies on industrial machinery and transport systems that contribute to the global emission total.
  • Particulate Matter: Beyond carbon, mining operations release massive amounts of dust and particulate matter into the air. This significantly degrades air quality for local communities and nearby ecosystems.

We track these data points because understanding the full lifecycle of a battery is the only way to ensure true sustainability. The environmental hazards of lithium mining aren’t just about what stays in the ground; they include what we release into the atmosphere during production. Strategies like transitioning to renewable energy sources for mine sites and optimizing processing efficiency are critical for reducing these impacts.

Social Costs and Community Impact

The environmental hazards of lithium mining extend far beyond the soil and water; they directly threaten the livelihoods of local communities. In the “Lithium Triangle”—covering parts of Argentina, Bolivia, and Chile—indigenous populations face the brunt of industrial expansion. We view these disruptions not just as ecological statistics, but as critical risks to the long-term stability of the global supply chain.

Disruption of Local Livelihoods

The heavy reliance on brine evaporation leads to significant groundwater depletion mining risks. For communities in the Atacama and Salar de Uyuni, this water loss is catastrophic:

  • Agricultural Failure: Traditional farming and livestock herding, particularly for quinoa and llamas, are failing as local aquifers dry up.
  • Indigenous Rights: Massive mining operations often infringe on ancestral lands without adequate consultation or benefit-sharing.
  • Salt flat ecosystem damage: The degradation of these unique landscapes ruins tourism and cultural heritage sites essential to the local economy.

Maintaining a balance between the green transition and responsible mineral development is essential for any ambitious brand. While we offer high-performance lithium-ion battery packs for solar street lighting, we recognize that the industry must move toward ethical sourcing to mitigate these community impacts. Growth is only sustainable when it respects the people at the source of the supply chain.

Sustainable Solutions for Lithium Sourcing

Transitioning to a green economy requires addressing a critical question: what are the environmental hazards of lithium mining and how do we solve them? We are seeing a strategic shift toward technologies that minimize the footprint of extraction and move toward a circular model.

Direct Lithium Extraction (DLE) Benefits

Direct Lithium Extraction (DLE) represents a major pivot from traditional brine evaporation. This data-led technology offers a more efficient way to secure raw materials without the massive land requirements of salt flats.

  • Water Conservation: DLE systems often reinject brine back into aquifers, preserving local water tables.
  • Production Speed: Processes lithium in hours rather than the 18-24 months required for evaporation.
  • Reduced Footprint: Eliminates the need for vast evaporation ponds, protecting local biodiversity.

Battery Recycling and the Circular Loop

Closing the loop is essential for long-term growth and supply chain stability. By scaling battery recycling lithium programs, we can recover up to 95% of critical minerals from spent cells. This reduces the pressure on primary mining sites and lowers the overall carbon footprint of energy storage. Whether comparing high-capacity 32650 LiFePO4 vs 18650 cells or larger EV packs, effective recycling ensures these materials stay in the economy and out of landfills.

Responsible Mineral Development and ESG Standards

Applying strict ESG standards for responsible mineral development is no longer optional for ambitious brands. We focus on transparency and data-driven reporting to ensure that lithium sourcing meets modern environmental expectations.

  • Carbon Transparency: Tracking CO2 emissions from extraction to assembly.
  • Community Engagement: Ensuring indigenous rights and local water access are protected.
  • Certification: Utilizing third-party audits to verify sustainable lithium sourcing practices.

By prioritizing these pathways, the industry can mitigate the impact of extraction while meeting the surging global demand for clean energy storage. Contact our team to explore data-led insights into sustainable tech and growth strategies.

Wiring Batteries in Parallel Danger Safety Guide for LiFePO4

Are you planning to expand your off-grid power but worried about the Wiring Batteries in Parallel Danger? Increasing your capacity sounds simple, but a single mistake in a battery bank setup can lead to thermal runaway, melted cables, or even a total system fire.

Whether you’re upgrading an RV, outfitting a boat, or building a solar array, you need more than just a basic connection. You need safety protocols that protect your investment and your home.

In this comprehensive guide, you’ll learn the exact risks of parallel wiring, from voltage mismatch to imbalanced currents, and how to set up your LiFePO4 batteries for maximum longevity. We’ve been perfecting power solutions since 2012, and we’re sharing the best practices to keep your system running safely.

Let’s dive right in.

Wiring Batteries in Parallel Danger: A Comprehensive Safety Guide

Understanding Parallel Battery Connections

When I design power systems for RVs or off-grid cabins, I focus on two ways to hook up batteries: parallel and series. To avoid the specific risks associated with wiring batteries in parallel danger, you first need to understand what this configuration actually does to your power bank.

In a parallel configuration, you connect the positive terminal of one battery to the positive terminal of the next, and do the same with the negatives. This increases your total capacity (Amp-hours) while the voltage stays the same. If you have two 12V 100Ah Nuranu LiFePO4 batteries in parallel, you get a 12V 200Ah bank.

Parallel vs. Series: Quick Comparison

Feature Parallel Connection Series Connection
Wiring Method Positive to Positive / Negative to Negative Positive to Negative
Voltage (V) Stays the Same (e.g., 12V) Increases (e.g., 12V + 12V = 24V)
Capacity (Ah) Increases (e.g., 100Ah + 100Ah = 200Ah) Stays the Same (e.g., 100Ah)
Main Benefit Longer Runtime (Increased Scale) Higher Power Efficiency for Large Inverters

Why Choose Parallel for Low-Voltage Systems?

Parallel wiring is the go-to choice for most 12V and 24V mobile systems. It provides several key advantages for users who need reliable, long-term energy storage:

  • Greater Runtime: By stacking Amp-hours, you can run your lights, refrigerators, and electronics for days without needing a recharge.
  • System Scalability: It allows you to expand your energy reservoir as your power needs grow, provided you follow strict safety protocols.
  • Redundancy: In a parallel bank, if one battery requires maintenance, the others can often continue to provide power to your critical loads.
  • Low-Voltage Safety: Keeping the system at 12V or 24V reduces the risk of high-voltage arcing compared to high-voltage series strings.

While the benefits of increased runtime are clear, the danger of wiring batteries in parallel arises during the installation phase. If the batteries aren’t matched perfectly in voltage and state of charge, you risk massive current surges that can damage your equipment or compromise the Integrated BMS found in high-performance LiFePO4 units.

The Critical Risks of Parallel Battery Connections

Wiring batteries in parallel is a common way to increase your system’s capacity, but it introduces significant parallel battery connection risks if handled incorrectly. Because you are dealing with high energy density, mistakes can lead to hardware destruction or fire.

Voltage Mismatch and State of Charge (SoC) Imbalance

Connecting batteries with different charge levels is one of the most common voltage mismatch hazards. If one battery is at 13.6V and the other is at 12.0V, the higher-voltage battery will dump current into the lower-voltage one at an extremely high rate. This “current rush” can exceed the battery’s maximum charge rating, causing the terminals to spark or the internal components to fail. Proper state of charge matching is required before any physical connection is made to ensure the batteries are balanced.

Mixing Battery Types, Ages, or Capacities

A healthy battery bank requires uniformity. Mixing different chemistries, such as lead-acid with lithium, is dangerous because they have different charging profiles and internal resistances. Even mixing old and new LiFePO4 batteries causes a battery bank imbalance. Older cells have higher internal resistance, which forces the newer batteries to shoulder the entire load, leading to premature wear and potential overheating of the fresh units.

Current Imbalance from Uneven Wiring

Electricity always follows the path of least resistance. If you use cables of different lengths or gauges between your batteries, the current will not be distributed equally. This uneven cable lengths danger means the battery with the shortest path will work significantly harder than the others. Over time, this specific battery will overheat and fail, potentially triggering a chain reaction across the rest of the bank.

Overheating and Thermal Runaway

High-performance systems generate heat, and in a parallel configuration, that heat can compound quickly. While we prioritize the fact that LiFePO4 batteries are safe due to their stable chemistry, a massive short circuit in a high-amp bank can still lead to thermal runaway prevention failure. Without a smart BMS or proper fusing, a single cell failure can cause the entire bank to vent or catch fire.

Common Parallel Hazards at a Glance:

  • Short Circuits: High-energy discharge that can instantly vaporize metal tools or wires.
  • Melting Insulation: Occurs when the cable gauge for battery bank setups is too thin for the total combined amperage.
  • Overcurrent Surges: Rapid current flow that can bypass internal safety resets if not fused externally.
  • Arcing: Occurs when connecting batteries with a significant voltage delta, potentially damaging the battery posts.

Essential Safety Rules to Prevent Wiring Batteries in Parallel Danger

Battery Wiring in Parallel Safety Guide

Before you start connecting your bank, you must follow these non-negotiable safety protocols. Most issues with wiring batteries in parallel danger stem from skipping these preparation steps. To keep your system stable and safe, we require these four rules:

  • Use Identical Batteries Only: Never mix brands, capacities (Ah), or chemistries. Your batteries should ideally be from the same production batch. Mixing a new battery with an old one causes the older unit to resist charging, forcing the new one to do all the work. Understanding how long LiFePO4 batteries last will help you see why starting with a fresh, matched set protects your long-term investment.
  • State of Charge Matching: You must synchronize the voltage of every unit before they are linked. We recommend charging each battery individually to 100% first. If you connect a fully charged battery to a depleted one, a massive “current rush” occurs. This voltage mismatch hazard can trigger the BMS to shut down or, in extreme cases, damage the internal terminals.
  • Correct Cable Gauge for Battery Bank: Your wiring must be rated for the total maximum current of the entire bank, not just a single battery. Using undersized wires leads to resistance, heat buildup, and melted insulation. We advocate for high-quality, thick-gauge copper cables to ensure even power distribution.
  • Install Overcurrent Protection Fuses: Never wire a system without fuses or circuit breakers between the batteries and the load. This is your primary defense against short circuits.

A common mistake is trying to save money by combining different cell types. We’ve detailed the technical risks of this in our guide on whether you can mix 18650 batteries, and the same principles of internal resistance and balance apply to larger LiFePO4 banks.

Pre-Connection Safety Checklist

Requirement Action Step
Voltage Check Ensure all units are within 0.1V of each other.
Visual Inspection Check for casing cracks or terminal corrosion.
Torque Specs Use a torque wrench to ensure tight, secure terminal connections.
Environment Ensure the area is dry and ventilated to prevent heat trapping.

By strictly adhering to these rules, you eliminate the most common causes of system failure and ensure your LiFePO4 setup operates at peak efficiency without safety compromises.

Best Practices for Safe Parallel Wiring

To minimize the wiring batteries in parallel danger, you must ensure that current flows equally through every unit in your bank. If the resistance is uneven, one battery will discharge faster and work harder, leading to premature failure and safety risks. Following these industry-standard methods ensures your LiFePO4 parallel wiring safety remains intact.

Diagonal Wiring for Small Banks

For systems involving two or three batteries, we recommend diagonal battery wiring. Instead of connecting your main positive and negative cables to the same battery, connect the positive lead to the first battery in the group and the negative lead to the last. This technique forces the electrical current to pass through an equal length of cable for each battery, preventing a battery bank imbalance.

Busbar Parallel Connections for Large Setups

When your energy needs grow beyond three batteries, standard cabling becomes inefficient. We use busbar parallel connections to maintain system integrity. A solid copper busbar provides a central, low-resistance point for all connections. This ensures that the cable gauge for battery bank requirements is met and that every battery “sees” the exact same voltage and load.

The Role of the Integrated BMS and Monitoring

A high-quality battery management system (BMS) is your most important safety feature. In our Nuranu LiFePO4 units, the BMS automatically balances cells and protects against over-current during parallel operation. However, you should still use external monitoring tools:

  • Smart Shunts: Use a shunt to monitor the total State of Charge (SoC) of the entire bank.
  • Voltage Meters: Regularly check individual battery voltages to ensure they stay synchronized.
  • Terminal Inspection: Before securing connections, always identify the positive and negative electrodes correctly to prevent a dead short.

Essential Wiring Checklist

  • Equal Lengths: All interconnecting cables must be the exact same length and gauge.
  • Clean Contacts: Ensure all terminals are free of corrosion and torqued to the manufacturer’s specifications.
  • Overcurrent Protection: Install overcurrent protection fuses between the battery bank and your inverter to prevent thermal events.

Why Nuranu LiFePO4 Batteries Excel in Parallel Configurations

Safe Parallel Wiring of Nuranu LiFePO4 Batteries

Since 2012, we have specialized in high-performance energy storage. We understand that managing the Wiring Batteries in Parallel Danger: A Comprehensive Safety Guide starts with the internal hardware. Our LiFePO4 systems are engineered to handle the specific stresses of parallel expansion, ensuring your power bank remains stable and efficient.

Integrated Smart BMS Technology

The Battery Management System (BMS) is the brain of our battery. In a parallel setup, it actively monitors the voltage and temperature of each unit. If it detects a voltage mismatch hazard or an over-current situation, the BMS triggers an immediate shutdown of that specific unit. This prevents the “current rush” effect and significantly reduces lithium battery fire risks.

Superior Cell Consistency

We use only Grade A LiFePO4 cells in our manufacturing process. High-quality cells are critical because they maintain nearly identical internal resistance across multiple units. When designing and manufacturing lithium batteries, we prioritize this consistency to prevent battery bank imbalance, where one battery works harder than the others and fails prematurely.

Built for Harsh Environments

  • IP-Rated Waterproofing: Our rugged casings prevent moisture from causing internal shorts, a common concern in marine and RV applications.
  • Thermal Stability: The LiFePO4 chemistry we use is inherently safer and more stable than traditional lithium-ion, making it ideal for high-capacity parallel banks.
  • Optimized Scaling: Nuranu batteries are designed for synchronized protection, supporting parallel expansion up to 4 units while maintaining total system safety.

Reliability You Can Trust

Our focus on safety and longevity ensures that your investment provides a 10+ year service life. By using advanced protection protocols, we eliminate the guesswork and technical risks typically associated with LiFePO4 parallel wiring safety.

Common Mistakes to Avoid in Parallel Wiring

Wiring Batteries in Parallel Safety Hazards

Even with the best equipment, simple installation errors can amplify parallel battery connection risks. I have seen many setups fail prematurely because of these avoidable oversights:

  • Daisy-Chaining High-Amperage Systems: Connecting batteries one after another in a simple line is a recipe for disaster. This creates high resistance at the end of the chain, causing a severe battery bank imbalance where the first battery wears out much faster than the rest.
  • Ignoring Overcurrent Protection: Skipping the fuses is a massive safety gamble. Without overcurrent protection fuses on each parallel branch, a single internal short can trigger a chain reaction, making thermal runaway prevention nearly impossible.
  • Mismatched Cable Lengths: Current always follows the path of least resistance. The uneven cable lengths danger means that even a few extra inches of wire on one battery will cause it to underperform, while others are overworked.
  • Connecting During Active Charging: Never add a battery to your bank while the system is under load or being charged. This can cause massive arcing and sudden voltage spikes that damage sensitive electronics.

To maintain LiFePO4 parallel wiring safety, your wiring must be as consistent as your cells. If you are upgrading your power storage, using a high-quality LiFePO4 battery is a great start, but your wiring discipline is what keeps the system running for years without failure. Always use identical cable gauges and double-check every connection before flipping the switch.

Frequently Asked Questions About Parallel Battery Safety

Navigating the complexities of Wiring Batteries in Parallel Danger: A Comprehensive Safety Guide often leads to specific technical questions. Below are the most common concerns we address to ensure your power system remains stable and efficient.

Can I parallel batteries with different capacities?

No. You should never mix batteries of different Amp-hour (Ah) ratings. Connecting a 100Ah battery to a 200Ah battery causes the smaller unit to work significantly harder, leading to faster degradation and battery bank imbalance. To maintain safety, always use batteries of the same capacity, brand, and age.

How many batteries can I safely connect in parallel?

For our LiFePO4 systems, we generally recommend a maximum of four units in parallel. Exceeding this limit increases the risk of current imbalance from uneven wiring and makes it harder for the battery management system (BMS) to synchronize protection across the entire bank. If you need more capacity, it is often safer to move to a higher-capacity individual unit.

What happens if one battery in the bank fails?

If one battery fails or experiences a cell collapse, the other batteries in the parallel configuration will immediately dump their current into the faulty unit. This creates a high-heat scenario. However, our integrated BMS acts as a fail-safe, disconnecting the compromised unit before it can trigger a thermal event. Regular maintenance, such as knowing how to charge the 26650 LiFePO4 battery or larger blocks correctly, helps prevent these failures.

Is a parallel configuration safer than a series setup?

Parallel wiring is often viewed as safer for DIY users because it keeps the system at a lower, safer-to-touch voltage (like 12V or 24V). However, the LiFePO4 parallel wiring safety concerns shift toward high amperage. While series setups face high-voltage arcing risks, parallel setups face higher risks of melting cables and short circuit in parallel batteries due to the massive combined current potential.

Should I use a fuse for every battery in the bank?

Yes. We strongly recommend individual fusing for each battery branch before they meet at a common busbar. This ensures that if one battery develops a short, the fuse will blow and isolate that specific unit, protecting the rest of your investment from catastrophic damage.

Interpreting dQ dV Graphs for Lithium Ion Battery Analysis

Are you tired of squinting at flat voltage-capacity (V-Q) curves trying to figure out why your cells are losing performance?

Standard cycling data often hides the most critical electrochemical shifts occurring inside the cell. That’s where interpreting dQ/dV graphs—or differential capacity analysis—becomes a game-changer. By transforming subtle voltage plateaus into sharp, identifiable peaks, this technique allows you to “see” inside the battery without opening it.

In this guide, you’re going to learn exactly how to use dQ/dV plots to pinpoint phase transitions, track battery degradation mechanisms, and quantify loss of lithium inventory (LLI) versus loss of active material (LAM).

If you are looking to turn noisy cycling data into precise battery health diagnostics, this deep dive is for you.

Let’s dive right in.

Differential Capacity Analysis Basics

Interpreting dQ/dV graphs for battery analysis allows us to look beyond standard charge/discharge curves. While a typical voltage profile often appears as a smooth slope, Differential Capacity Analysis (dQ/dV) acts as a magnifying glass, transforming subtle voltage plateaus into clear, identifiable peaks. These peaks represent the electrochemical phase transitions occurring within the electrodes.

At Nuranu, we process raw cycler data to generate these incremental capacity curves instantly. By plotting the change in capacity (dQ) over the change in voltage (dV), we can pinpoint exactly where lithium-ion intercalation is happening and, more importantly, how those processes shift as a cell ages.

dQ/dV vs. dV/dQ: Choosing the Right Curve

Both curves are essential tools in our diagnostic toolkit, but they serve different primary functions. Choosing the right derivative depends on the specific degradation mechanism we are trying to isolate.

Analysis Type Derivative Best Use Case Visual Feature
dQ/dV $dQ/dV$ Identifying Phase Transitions Distinct Peaks
dV/dQ $dV/dQ$ Analyzing Ohmic Resistance Sharp Spikes/Valleys
  • dQ/dV Analysis: We use this to track Loss of Lithium Inventory (LLI) and Loss of Active Material (LAM). It is the gold standard for visualizing electrode staging.
  • dV/dQ Analysis: This is often referred to as “Differential Voltage” analysis. It is particularly effective for identifying shifts in the physical structure of the electrode and changes in internal resistance.

The Math Behind Derivative Cycling Data

The fundamental challenge with derivative data is the “noise” inherent in raw hardware files. Mathematically, dQ/dV is the slope of the capacity-voltage curve. In a perfect environment:

  1. Raw Data: We pull high-resolution voltage and capacity timestamps.
  2. The Derivative: We calculate the rate of change ($ΔQ / ΔV$).
  3. The Smoothing: Because raw data from testers like Arbin or BioLogic can be “noisy,” we apply automated smoothing algorithms to ensure the peaks are clean and interpretable without distorting the underlying chemistry.

By converting flat voltage plateaus into peak-based signatures, we provide engineers with a precise map of battery health, making it easier to diagnose battery degradation mechanisms before they lead to catastrophic failure.

Generating Accurate dQ/dV Graphs for Battery Analysis

Generating high-fidelity plots is the first step toward interpreting dq dv graphs for battery analysis. To see the subtle phase changes in an incremental capacity curve, low-rate Constant Current (CC) cycling is a non-negotiable requirement. If the C-rate is too high, the voltage plateaus blur together, and the “peaks” that define the battery’s internal state disappear.

Optimized Protocols for Clean Data

To get the resolution needed for professional differential capacity analysis, follow these technical guidelines:

  • C-Rates: Use C/10, C/20, or even lower. Higher rates introduce overpotential that shifts and flattens peaks.
  • Voltage Sampling: Ensure your cycler is set to record data at small voltage intervals (delta-V) rather than just fixed time intervals.
  • Thermal Stability: Maintain a consistent temperature. Fluctuations can cause “fake” peaks or shifts that mimic degradation.

Noise Reduction in Cycling Data

Raw data from hardware like Arbin, Neware, or BioLogic is often too noisy for direct derivative calculations. Without effective noise reduction in cycling data, your dQ/dV curves will look jagged and unreadable. While many engineers struggle with manual Savitzky-Golay filters in Excel or custom Python scripts, we have automated this entire process.

We designed the Nuranu platform to ingest raw files (.res, .csv, .mpr) and instantly output smooth, high-resolution curves. This allows you to focus on the chemistry—such as determining how long do lithium-ion batteries last—rather than fighting with data cleaning. Our cloud-based tools ensure that your dQ/dV and dV/dQ plots are consistent across different battery testers and chemistries, providing a single source of truth for your R&D or production data.

Key Features of dQ/dV Graphs

When we perform differential capacity analysis, we are essentially looking for the “fingerprint” of the battery’s internal chemistry. In a standard voltage-capacity plot, phase changes often look like flat plateaus that are hard to distinguish. In a dQ/dV graph, these plateaus are transformed into clear peaks, making interpreting dq dv graphs for battery analysis much more effective for identifying specific electrochemical events.

Identifying Peaks and Electrode Phase Transitions

Each peak on the graph represents a specific phase transition in electrodes. These peaks tell us exactly at what voltage the battery is doing the most work.

  • Graphite Anode Staging: You can see the distinct stages of lithium inserting into the graphite layers.
  • NMC Cathode Reactions: Peaks at higher voltage ranges typically correspond to specific redox reactions within the cathode material.
  • Voltage Plateau Analysis: By looking at the peak’s position, we can confirm if the battery is operating within its designed electrochemical windows.

Comparing Charge and Discharge Curves

Comparing the charge and discharge curves is the fastest way to check for efficiency and reversibility. In a perfect cell, these peaks would be mirror images. However, real-world factors cause shifts:

  • Polarization: A horizontal shift between the charge peak and the discharge peak indicates internal resistance.
  • Hysteresis: Significant gaps between peaks suggest energy loss during the cycle.
  • Reversibility: Missing peaks on the discharge side can signal that certain chemical reactions are not fully reversible, which is a key step when you identify 18650 battery health and performance levels.
dQ/dV Feature What It Signals
Peak Position (V) The specific potential of a chemical phase change.
Peak Height The rate of capacity change; higher peaks mean more active material is reacting.
Peak Area Total capacity associated with a specific phase transition.
Peak Symmetry How well the battery handles the chemical transition during both charge and discharge.

By using the Nuranu platform, we remove the guesswork from these features. Our tools automatically align these peaks and filter the noise, allowing you to focus on the chemistry rather than the data cleaning. This level of detail is essential for high-quality R&D and ensures that subtle changes in graphite anode staging or cathode stability are never missed.

Interpreting Peak Changes for Battery Health

When interpreting dq dv graphs for battery analysis, we focus on three primary markers: peak position, height, and area. These shifts serve as the “biometrics” of a cell, revealing internal degradation that standard voltage curves miss.

Peak Position and Internal Resistance

A horizontal shift in peak position along the voltage axis is a primary indicator of increased internal resistance. When peaks move to higher voltages during charging (or lower during discharge), it signifies growing polarization within the cell. We use these shifts to identify kinetic limitations before they lead to significant power loss.

Loss of Active Material (LAM)

We link the reduction in peak intensity directly to the structural health of the electrodes:

  • Height Reduction: A shrinking peak height typically signals Loss of Active Material (LAM), meaning portions of the electrode are no longer electrochemically active.
  • Structural Decay: For NMC and LFP chemistries, LAM often indicates particle cracking or loss of electrical contact within the electrode matrix.

Loss of Lithium Inventory (LLI)

The total area under a specific peak represents the capacity exchanged during a phase transition. A reduction in this area is the hallmark of Loss of Lithium Inventory (LLI). This often happens as lithium becomes trapped in the Solid Electrolyte Interphase (SEI) layer. For engineers evaluating a lithium ion battery pack, tracking LLI area is the most accurate way to quantify capacity fade over hundreds of cycles.

Chemistry Signatures: NMC vs. LFP

  • NMC Cathodes: These exhibit broad, distinct peaks that correspond to various nickel-rich phase transitions. Tracking these helps us monitor cathode-specific aging.
  • LFP Cathodes: Because LFP has a famously flat voltage plateau, its dQ/dV peaks are extremely sharp and narrow. Even a minor peak shifting in dQ/dV for LFP cells can indicate significant changes in the battery state of health (SOH).
  • Graphite Anodes: The peaks reflect graphite anode staging, allowing us to see exactly which stage of lithiation is being impacted by degradation.

Diagnosing Degradation Mechanisms with dQ/dV

Battery dQ/dV Analysis for Aging and Degradation

Effective battery R&D requires knowing exactly why a cell is losing capacity. Interpreting dQ/dV graphs for battery analysis allows us to pinpoint specific battery degradation mechanisms that are invisible on a standard voltage-capacity curve. By breaking down the voltage plateaus into distinct peaks, we can identify chemical shifts with high precision.

Distinguishing LLI vs. LAM in Aging Cells

We use dQ/dV to separate the two primary modes of lithium-ion battery aging:

  • Loss of Lithium Inventory (LLI): Often caused by side reactions like SEI growth, LLI results in a relative shift (slippage) between the anode and cathode equilibrium potentials. This is seen as a horizontal shift in peak positions.
  • Loss of Active Material (LAM): This occurs when electrode material becomes isolated or structurally degraded. On a dQ/dV plot, this manifests as a reduction in peak intensity and area, indicating the material can no longer contribute to the total capacity.

Tracking SEI Growth and Lithium Plating

The signature of a dQ/dV curve provides a direct window into the internal state of the cell without destructive physical analysis:

  • SEI Layer Evolution: Consistent peak area reduction over time typically indicates the consumption of lithium ions into the solid electrolyte interphase.
  • Lithium Plating Detection: Unusual peak shapes or “shoulders” during the beginning of discharge can signal that lithium has plated onto the anode surface rather than intercalating properly.

Environmental Impact on Battery Signatures

Temperature and cycling protocols significantly alter degradation pathways. High-temperature cycling often accelerates LLI due to electrolyte breakdown, while low-temperature charging increases the risk of plating.

By centralizing your data in Nuranu, you can instantly compare these signatures across different test conditions. Understanding how to correct use of 18650 lithium batteries is vital for longevity, and dQ/dV analysis provides the quantitative proof of whether your usage patterns are effectively protecting the cell’s chemistry.

  • Automated Alignment: Nuranu’s platform automates the tracking of these peaks across thousands of cycles.
  • Scalable Diagnostics: Transition from raw data to degradation identification in seconds, regardless of whether the data came from Arbin, Neware, or BioLogic hardware.

Solving Challenges in dQ/dV Interpretation

Automated dQ/dV Peak Analysis for Batteries

Raw battery data is notoriously messy. When you calculate the derivative for differential capacity analysis, any small bit of voltage noise is magnified, turning potentially useful peaks into unreadable “grass.” For engineers, the struggle is moving from raw, jagged data to a clean curve that actually reveals the battery state of health (SOH).

Overcoming Noise and Data Volume

Handling high-volume datasets from multiple cyclers often leads to a bottleneck. Manual noise reduction in cycling data using basic filters or Excel moving averages is usually insufficient for precision work. We focus on advanced smoothing algorithms that preserve peak height and position while stripping away the digital artifacts that obscure real chemical signals.

Why Manual Inspection Fails

Relying on a technician to manually eyeball peak shifts is a recipe for inconsistency. As a lithium-ion battery ages, the subtle changes in its electrochemical signature are too small for the naked eye to track reliably across hundreds of cycles.

Challenge Impact on Analysis Automated Solution
Signal Noise Distorts peak height and area High-fidelity digital smoothing
Data Silos Inconsistent formats between Arbin/BioLogic Centralized cloud ingestion
Human Error Subjective peak identification Algorithmic peak tracking
Processing Time Hours spent in Python or Excel Instantaneous curve generation

The Value of Automated Peak Tracking

Effective interpreting dq dv graphs for battery analysis requires speed and scale. By automating the alignment and tracking of peaks, you can instantly see where phase transitions are shifting or disappearing. This eliminates the guesswork in identifying degradation, allowing your team to focus on the chemistry rather than the data cleaning. Automated tools ensure that every peak—from graphite staging to cathode delithiation—is captured with mathematical certainty.

Automating Battery Analysis with Nuranu

Automated Battery dq/dv Analysis Integration

We established Nuranu in 2012 to bridge the gap between complex raw cycler data and actionable engineering insights. Our cloud-based platform is specifically designed to handle the heavy lifting of interpreting dq dv graphs for battery analysis, transforming hours of manual data cleaning into seconds of automated visualization. Whether you are using Arbin, BioLogic, Neware, or Maccor hardware, our platform ingests raw files directly to deliver precise electrochemical diagnostics.

Streamlined R&D Workflows

By centralizing your data in a single hub, we eliminate the friction caused by inconsistent file formats and noisy signals. Our platform automates the most critical components of differential capacity analysis:

  • Automated LLI/LAM Reporting: Get instant metrics on Loss of Lithium Inventory (LLI) and Loss of Active Material (LAM) without the need for manual Excel formulas or custom scripts.
  • Peak Alignment and Tracking: Our algorithms automatically identify and track dQ/dV peaks interpretation and shifts across thousands of cycles to monitor lithium-ion battery aging.
  • Hardware Agnostic Integration: We support direct ingestion of .res, .mpr, .csv, and .txt files, ensuring a consistent analysis workflow across your entire laboratory.
  • Instant Scaling: Our cloud-native architecture is built to process high-volume R&D data, making it easy to compare lithium-ion battery performance across different chemistry batches.

We focus on speeding up the R&D cycle so your team can focus on innovation rather than data processing. By automating the generation of the incremental capacity curve, we ensure that your team can identify battery degradation mechanisms the moment they appear in the cycling data.

Practical Tips for Better Battery Diagnostics

To get the most out of interpreting dq dv graphs for battery analysis, we recommend treating them as one piece of a larger diagnostic puzzle. Relying solely on a single data point can lead to incomplete s about a cell’s internal state.

Enhancing dQ/dV with EIS and GITT

While dQ/dV is excellent for identifying thermodynamic shifts and phase transitions, combining it with other electrochemical diagnostics provides a complete picture of battery health:

  • EIS (Electrochemical Impedance Spectroscopy): Use this to measure internal resistance and kinetic limitations that dQ/dV might miss.
  • GITT (Galvanostatic Intermittent Titration Technique): Pair this with differential capacity to study diffusion coefficients across different states of charge.

Avoiding Common Interpretation Pitfalls

The most frequent mistake in battery analysis is ignoring the impact of external variables on the curve shape and peak position:

  • Temperature Sensitivity: Ensure testing environments are strictly thermal-controlled. Even a small temperature shift can cause peak shifting in dQ/dV that looks like degradation but is actually just a change in kinetics.
  • C-Rate Consistency: Comparing a curve at C/10 to one at C/20 will yield different peak resolutions. Always use consistent protocols for longitudinal studies.
  • Data Noise: Raw data from cyclers often requires smoothing. Our platform handles this automatically so you don’t mistake hardware noise for chemical signatures.

Testing Parameters for Second-Life Assessment

When evaluating used cells, such as a salvaged 21700 lithium-ion battery, the goal is to determine the remaining battery state of health (SOH) accurately.

  • Ultra-low C-rates: Use C/25 or lower to clearly identify if the capacity loss is due to Loss of Lithium Inventory (LLI) or Loss of Active Material (LAM).
  • Baseline Comparison: Compare the peak area of the aged cell against a “golden” fresh cell profile to quantify capacity loss instantly.
  • Anode Inspection: Focus on the graphite anode staging peaks to ensure the electrode hasn’t suffered significant structural damage before clearing a pack for second-life storage applications.
how long charge 18650 battery

How Long to Charge an 18650 Battery (The Complete Guide)

Wondering how long it takes to charge an 18650 battery? In this complete guide, I’ll walk you through everything you need to know.

As a professional 18650 battery manufacturer, from charge times for your first 18650 battery to tips for daily charging, I wrote this article has you covered. Let’s dig in.

how long charge 18650 battery

An Overview of 18650 Batteries

An 18650 battery is a rechargeable lithium-ion battery that gets its odd name from its size.

Specifically:

  • 18mm diameter
  • 65mm height
  • The “18650” part refers to those measurements

These batteries are lightweight, have high capacity, and can last through hundreds or even thousands of charge cycles.

Their versatility makes 18650s ideal for powering everything from laptops and power tools to flashlights and vaporizers.

Now let’s look at how long these trusty batteries take to charge.

How Long to Charge an 18650 Battery the First Time

Ideally, lithium-ion batteries arrive at about 30-50% charge from the manufacturer. This lets them hold a charge in storage without degrading.

So when you first get your hands on a new 18650 battery, the initial charge only needs to “top it off”, not charge from empty.

Expect your first 18650 battery charge to take 1-2 hours.

I’d recommend charging to full, using it until it runs down, then doing one more full charge cycle.

This helps calibrate the battery gauge for accuracy going forward.

Daily Charging – How Long Should an 18650 Battery Take?

Once your battery’s broken in, daily charging time depends on:

1. Battery Capacity

18650 batteries come in capacities ranging from 1500mAh to 3500mAh.

Higher capacity = longer charge times.

For example:

  • 1500mAh battery = ~1 hour to charge
  • 2200mAh battery = ~1.5 hours
  • 3500mAh battery = ~3 hours

Of course, real-world charge times depend on the charger too…

2. Charger Power

Faster charging depletes the lifetime of lithium-ion batteries.

Most experts recommend charging 18650 cells at:

  • 0.5A or lower (for longest lifetime)
  • 0.5C to 1C for quicker charges

For example:

  • 2200mAh battery
    • 0.5A = 4-5 hours
    • 1.1A (0.5C) = 2 hours
    • 2.2A (1C) = 1 hour

Tip: If your charger supports it, charge at a lower current when you can (like overnight) to extend overall battery lifespan.

Getting the Most Life from Your Batteries

Here are my top tips for maximizing the lifetime of 18650 batteries:

  • Avoid “topping off” charges – Let batteries discharge significantly before charging again. This helps avoid losing capacity.
  • Store batteries at 40-60% charge – Storing batteries fully charged strains them over time.
  • Use an external charger – Built-in “quick charging” shortens lifespan. External chargers charge gently for longest life.
  • Keep cool & dry – Heat and moisture speed chemical aging.

Following those four simple battery care tips will help your 18650s last for years of reliable service.

Now over to you – how long do your 18650 batteries normally take to charge? I’d love to hear your real-world experience in the comments!

How to Wake a sleeping Lithium ion Battery pack?

How to Wake a sleeping Lithium ion Battery pack?

Are you having difficulty getting your lithium-ion battery pack to power up? If so, you’ve come to the right place. This article will provide you with a step-by-step guide on how to wake a sleeping lithium-ion battery pack. In a few simple steps, you’ll be able to have your device up and running in no time! We’ll discuss why some battery packs may enter a sleeping state and provide tips for recharging them.

How to Wake a sleeping Lithium ion Battery pack?

How to wake a sleeping Lithium-ion Battery pack?

To begin, connect the battery pack to a charger and leave it for a few hours. This gives the battery enough time to draw enough power from the charger to wake up. If this fails, you may need to slightly deplete the battery pack by attaching it to a load such as an LED light or motor. This should provide enough current draw for the battery to wake up and resume operation. Finally, if none of these solutions work, you may need to replace your lithium-ion battery pack completely. Make sure you buy one compatible with your device to avoid problems later.

Understanding Lithium-ion Battery Pack Sleep Mode

What is the sleep mode in Lithium-ion Battery Pack?

Sleep mode is an essential feature of lithium-ion battery packs that helps extend the cell’s life and protect it from damage. It reduces charge or discharge current when the battery is not used for a certain period. The sleep mode allows the battery to rest, which reduces strain on its components and lengthens its lifespan.

When a lithium-ion cell enters sleep mode, it decreases its internal resistance and stops working altogether. This happens when no current flows into or out of the cell over a certain threshold period. This means that if you don’t use your device for a while, the cell will enter sleep mode and prevent further damage to itself due to overcharging or undercharging.

Causes of Lithium-ion Battery Pack Sleep Mode

There are several potential causes of lithium-ion battery pack sleep mode issues ranging from low charge and extreme temperatures to improper charging practices and defective hardware components inside the device.

Consequences of leaving Lithium-ion Battery Pack in Sleep Mode

Leaving a Li-ion Battery Pack in Sleep Mode can lead to several consequences that may affect the performance and lifespan of the device. First, when a lithium-ion battery is left in sleep mode for an extended period, it will eventually discharge itself until all cells are entirely depleted. This discharge process can reduce the total amount of charge cycles available on the battery over its entire lifetime.

In addition, leaving a Li-ion battery pack in sleep mode can cause physical damage to the cells due to lack of airflow or chemical oxidation, resulting in reduced efficiency and capacity loss over time. It also increases internal pressure as decomposition gases build up within the cells, significantly reducing overall cycle life expectancy.

Finally, suppose a user doesn’t recharge their Li-ion battery pack often enough while in sleep mode. In that case, they risk irreversibly damaging their device due to the complete depletion of electrolytes within the cells.

Methods of Waking a Sleeping Lithium-ion Battery Pack

Fortunately, four methods are available for waking a sleeping lithium-ion battery pack, using the device, a charger, a multimeter, or a load tester.

Using the Device

It is possible to wake up a sleeping lithium-ion battery pack using the device in two ways.

The first approach involves simply plugging the device into a power source, such as a wall outlet or a USB port. This will start charging the battery, which should wake it up.

The second option is to power on the device while it is still unplugged. This will suck power from the battery, presumably waking it up. You can use your device usually when the battery has been woken up.

Using a Charger

A charger is an excellent technique to wake up a sleeping lithium-ion battery pack. The charger will provide the appropriate voltage and current to activate and recharge the battery. To accomplish this, you must first identify the optimal charging profile for your unique battery type. Once you’ve identified the suitable profile, connect the charger to the battery and let it charge until it reaches total capacity.

It is critical to remember that overcharging a lithium-ion battery can result in harm, so disconnect the charger after it has achieved total capacity. Furthermore, ensure that you are using the correct charger for your battery type; specific chargers may be too powerful for particular batteries, causing them to overheat or even catch fire.

Using a Multimeter

You can wake up a sleeping lithium-ion battery pack by using a multimeter. This can be done by connecting the positive and negative leads of the multimeter to the positive and negative terminals of the battery pack. Once connected, you should set your multimeter to measure voltage and then take a reading. If the voltage is below 3 volts, your battery has likely gone into sleep mode. To wake it up, you need to charge it for at least 10 minutes using an appropriate charger.

Once the charging process is complete, remove the charger from the battery pack and recheck its voltage with your multimeter. If it reads higher than 3 volts, your battery has successfully woken up from sleep mode. However, if it still reads below 3 volts after charging, you may need to repeat this process multiple times until the battery wakes up completely.

Using a Load Tester

Waking a lithium-ion battery pack using a load tester is relatively simple. First, you’ll want to connect the load tester to the battery pack. Then, set the current on the load tester to a safe level for your battery pack, which will not cause any damage. Once you have done this, please turn on the load tester and let it run for about ten minutes.

During this time, you should see an increase in voltage as well as an increase in capacity. If you do not see any changes after ten minutes, then it’s likely that your battery pack is already damaged and needs to be replaced. However, if you see improvements in voltage and capacity after ten minutes of running the load tester, your battery pack should be good to go!

Steps for Waking a Sleeping Lithium-ion Battery Pack

Step 1: Identifying the Type of Lithium-ion Battery Pack

First, identify what type of lithium-ion battery pack you have. This can be done by looking at the manufacturer’s specifications or consulting a professional.

Step 2: Selecting the Appropriate Method of Waking the Battery Pack

Two main methods of waking a sleeping lithium-ion battery pack are trickle charging and pulse charging.

Trickle charging involves connecting the battery pack to an external power source and applying a low current for an extended period. This is a good option if you want to avoid any sudden changes in voltage that could damage the cells in your battery pack.

Pulse charging involves connecting the battery pack to an external power source and applying a series of short bursts of high current. This is more effective at bringing a sleeping battery back to life than trickle charging, but it can be risky since it can cause significant stress on your cells if done incorrectly. It’s best used when you quickly wake up a deeply discharged battery, such as when trying to jump-start your car or get your laptop running again.

Step 3: Preparing the Equipment

Preparing before attempting to wake a sleeping lithium-ion battery pack is essential. The right tools and equipment can make the process much more straightforward and safer. Here is the essential equipment you’ll need: a charger, a multimeter, and a load tester.

The charger should match your battery pack’s voltage, amperage rating, and connector type. A multimeter will measure the battery’s charge level and resistance during charging. Lastly, a load tester will be used to assess how much current the battery can draw without being damaged or overcharged. It is essential to use all of this equipment to ensure safe operation when waking up the battery pack from its sleep state.

Step 4: Waking the Sleeping Lithium-ion Battery Pack

Using a charger: First, connect the charger to an appropriate power source and then make sure that the correct voltage setting is selected for your specific battery pack. Next, securely attach the charger’s output cables to your battery pack’s terminals. Then press the “charge” button on the charger and allow it several minutes before trying to turn on your device again. If you follow these steps correctly, your sleeping lithium-ion battery should be recharged and ready for use in no time!

Using a multimeter: First, make sure that the multimeter is set to measure DC voltage. Then, connect the red lead of the multimeter to the positive terminal of the battery pack and the black lead to the negative terminal. The multimeter should display the voltage of the battery pack. If it does not, your battery pack may be too discharged to be woken up with a multimeter.

If your multimeter does read a voltage, you can try applying an external voltage across the terminals of your battery pack. Connect one lead of a power supply or battery charger to each terminal and set it for around 3 volts more than your multimeter reads for the current-voltage on your battery pack. This should wake up any cells in your lithium-ion battery that are asleep due to deep discharge.

Using a Load Tester: You’ll need to connect the load tester to the battery pack’s terminals. Then, set the load tester to the appropriate voltage for your battery pack. Next, please turn on the load tester and let it run for about 10 minutes or until it reaches its maximum current limit. Finally, disconnect the load tester and check that the battery pack is charged.

It’s important to note that this method should only be used as a last resort if other methods of charging your battery pack have failed. Additionally, since this method involves introducing an external power source into your battery pack, it’s essential to make sure that you’re using a high-quality load tester explicitly designed for lithium-ion batteries. This will help ensure that your battery pack remains safe and functioning correctly.

How to Prevent a Lithium-ion Battery pack from Falling Asleep?

The best way to prevent a lithium-ion battery pack from falling asleep is to keep it regularly charged. Lithium-ion batteries naturally tend to lose their charge over time, so it’s essential to recharge them often. It’s also helpful to avoid storing the battery in extreme temperatures, as that can cause the battery to discharge quickly. Finally, if you’re not using your device for an extended period, it’s best to remove the battery and store it in a cool, dry place until you need it again. This will help ensure your battery stays healthy and holds its charge for extended periods.

Conclusion

Waking up a sleeping lithium-ion battery pack is relatively simple. Ensure that all the necessary steps are taken to avoid any potential damage to the battery before attempting to wake it up. Use a voltage stabilizer if available, or charge the battery with a low-voltage current while monitoring the process. If this doesn’t work, discharging the battery further will likely be sufficient to wake it up.

What cause the lithium-ion battery swelling

What cause the lithium-ion battery swelling?

The lithium-ion battery has become an essential part of our lives, powering the devices that keep us connected and informed. Unfortunately, due to their complex design, lithium-ion batteries can sometimes suffer from swelling or bulging. This phenomenon can be hazardous, damaging the device and even causing a fire. This article will discuss what causes lithium-ion batteries to swell and how they can be prevented.

What cause the lithium-ion battery swelling

What Cause Lithium Battery Swelling?

Lithium-ion batteries swell due to several key factors: the age of the battery, exposure to high temperatures, overcharging, and defective or low quality. 

The age of the battery

The age of a lithium-ion battery can affect its performance, with the battery potentially swelling as it begins to degrade over time. Lithium-ion batteries are used in many standard devices, such as cell phones and computers, so it is essential to understand why this may happen.

Generally speaking, the cause for lithium-ion battery swelling is due to the accumulation of gas that builds up inside the battery over time. As the battery ages and cycles through charging and discharging, dendrites are formed, which can cause short circuits within the battery’s cells. This causes an increase in pressure within the cells resulting in them expanding or ‘swelling.’ This often results in poor performance or permanent damage to your device if left unresolved.

Exposure to high temperatures

Lithium-ion batteries can be prone to swelling if exposed to high temperatures. The phenomenon is known among engineers as a ‘thermal runaway.’ When a lithium-ion battery is exposed to heat above its rated limit of 60 degrees Celsius (140F), its electrolyte decomposes and releases gasses. This causes an increase in pressure and volume within the cell, which results in the tell-tale swelling that many of us have seen first-hand. Furthermore, as this process continues over time, it can lead to other thermal runaway events that result in short circuits or potentially even fire or explosions.

Overcharging

When a lithium-ion battery is charged beyond its capacity, it can cause the cell membranes to become unstable and increase pressure inside the cells leading to swelling. This can occur when using chargers with an improper voltage output or when a device is left plugged in too long. In addition to increasing size, overcharging can also decrease battery performance and possibly damage other components around the swollen area, like protective casing or circuit boards.

The Defective or low quality

Defective or low-quality lithium-ion batteries are prone to swelling because the battery cells have been poorly manufactured. This means they cannot contain and manage the energy produced when charging correctly. As a result, the cells will expand as more power is being put into them until they eventually rupture and swell up.

How to Prevent Lithium Battery Swelling?

Swelling or bloating lithium batteries is a serious issue as it can negatively affect the device, alter its performance, or even cause it to malfunction. Fortunately, there are several steps you can take to prevent this from happening.

Avoid excessive charge and discharge.

First and foremost, it is essential to charge them appropriately. Lithium batteries should always be plugged in if they have already reached their maximum capacity. Doing so will increase the battery’s internal pressure and lead to swelling. Additionally, users should avoid deep discharging a lithium-ion battery, Lithium batteries should be charged and discharged between 40-80%. The deep discharge will also strain it and result in swelling or other damage.

Use and preserve the battery at room temperature.

Second, keep your lithium battery at an optimal temperature. Temperature extremes can cause the battery to swell, so keep it between 0-45 degrees Celsius. And always store your device in a cool place away from direct sunlight or freezing temperatures.

Use high-quality chargers

Avoid using third-party chargers for your lithium battery as these may not be compatible with your device and could lead to overcharging or discharging the battery. Using only official chargers will help you maintain optimal lithium battery performance and reduce the risk of swelling.

Don’t leave your device plugged in.

You should avoid leaving your device plugged in for extended periods. Overcharging a lithium battery can cause it to swell and potentially damage your device’s internal components. To prevent this from happening, unplug your device once it’s fully charged and only plug it in again when you need to recharge. 

What Should I Do With Swollen Lithium-Ion Batteries?

There are several essential steps to take if you have a swollen lithium-ion battery. 

First and foremost, do not charge or use a device that has a swollen battery. Swelling indicates either a defect in the battery or an issue with how it is managed and charged. Using a malfunctioning battery could lead to further problems or even fire hazards. 

Secondly, remove the battery if possible and contact the manufacturer or retailer where you purchased your device. To determine what steps they recommend in terms of warranty coverage or replacement options for your swollen lithium-ion battery. 

Thirdly, safely dispose of your old lithium-ion battery by taking it to an authorized recycling center or another disposal facility for hazardous materials such as lithium batteries. Please do not put them into regular trash, as this poses environmental and safety risks for others who come into contact with it. 

Lastly, replace your lithium-ion battery with a new one from a reputable source if you intend to continue using the device powered by the swollen battery. Make sure its specifications match those of your original device’s power source so there won’t be any compatibility issues when using it again. 

Conclusion

The swelling of lithium-ion batteries is a serious concern that needs to be addressed. To avoid battery swelling, it is crucial to consider the safety guidelines associated with using and storing lithium-ion batteries. High temperatures, overcharging, and incorrect charging are all contributing factors that can cause battery swelling. Additionally, understanding the weak points of lithium-ion batteries and following manufacturers’ recommendations can help prevent battery swelling in the future.

LFP Vs NMC Batteries

LFP(Lithium) battery Vs NMC battery: difference and which is better

LFP(Lithium) battery Vs NMC battery: The world of battery technology is ever-evolving, and it can be challenging to keep up with the changes. Lithium Ferro Phosphate (LFP) and Nickel Manganese Cobalt (NMC) are two popular batteries. This article will explore the differences between these two types of batteries and provide a comprehensive comparison to help you decide which is best for your needs.

LFP Vs NMC Batteries

What is an NMC battery?

An NMC battery is a lithium-ion battery composed of a cathode combination of nickel, manganese, and cobalt. This type of battery is known to provide more watt-hours of capacity than Lithium Iron Phosphate (LFP). NMC batteries can be used in various applications, including consumer electronics and electric vehicles. They provide a longer life cycle than other batteries and can be recharged quickly and safely. NMC batteries are becoming increasingly popular due to their high performance and reliability.

NMC Vs LFP

What is LFP?

A Lithium Iron Phosphate (LFP) battery is a lithium-ion battery used in various applications. It is composed of lithium iron phosphate, an environmentally friendly compound. These batteries can charge and discharge at high speeds, making them ideal for applications requiring a lot of power. Due to their chemistry, they are also more stable and safer than other lithium batteries. This makes them an attractive option for electric vehicles, solar energy storage, and consumer electronics applications. LFP batteries offer many advantages over traditional lead-acid batteries, making them an attractive option for various applications.

LFP Vs NMC: What are the difference?

LFP batteries and NMC batteries are two types of lithium-ion batteries that use different cathode materials. LFP batteries use lithium phosphate, while NMC batteries use lithium, manganese, and cobalt. Compared to NMCs, LFPs are more efficient and perform better when the state of charge is low, but NMCs can endure colder temperatures. However, LFP batteries hit thermal runaway at a much higher temperature than NMC batteries, reaching 518° F (270° C) versus 410° F (210° C). NMC batteries tend to be slightly cheaper than LFP batteries due to their economies of scale. The choice of battery type depends on the application and the user’s needs.

Comparision among different cells

LFP Vs NMC: Price

LFP batteries are known for their high energy density, no thermal runaway, low self-discharge, and superior charging performance in cold temperatures. At the same time, the initial CAPEX of LFP batteries is usually priced more competitively than NMCS. NMC batteries have more watt-hours of capacity when the same mass is used. As such, NMC batteries may be a better choice when the range is a priority, as LFP batteries still need to match the range of higher nickel NMCs.

LFP Vs NMC: Energy density

LFP batteries have a lower energy density than NMC batteries, but they still perform well. The cathode material in LFP batteries is Lithium Iron Phosphate, which gives them moderately to extended life span and good acceleration performance. However, NMC batteries have an even higher energy density, around 100-150 Wh/Kg. They reach thermal runaway at 410° F (210° C), while LFP batteries get there at 518° F (270° C). Despite the lower energy density, LFP batteries are superior to NMC batteries in energy storage.

LFP Vs NMC: Temperature tolerance

LFPs have suffered from poor charging performance at shallow temperatures. On the other hand, NMC batteries have a relatively balanced temperature tolerance. They can generally work in average low and high temperatures but hit thermal runaway at 410° F (210° C). More than 100° F lower than LFP batteries, which hit thermal runaway at 518° F (270° C). That is to say, LFP batteries have better high-temperature resistance than NMC batteries

LFP Vs NMC: Security

Regarding safety, Lithium Iron Phosphate (LFP) batteries are generally superior to Nickel Manganese Cobalt Oxide (NMC) batteries. This is because LFP cells have a unique combination of lithium iron phosphate, which is more stable than nickel and cobalt-based cathodes. Additionally, LFP batteries have a much higher thermal runaway temperature of 518° F (270° C) compared to NMC batteries which reach 410° F (210° C). Both battery types utilize graphite. However, LFP batteries are better in energy density and self-discharge. All in all, LFP batteries are the go-to choice for secure and reliable power sources.

LFP Vs NMC: Cycle time

Regarding cycle time, Lithium Iron Phosphate (LFP) batteries have a much longer life than Nickel Metal Hydride (NMC) batteries. Typically, the cycle life of an NMC battery is only about 800 times, whereas, for LFP batteries, it is more than 3000 times. Moreover, with opportunity charging, the useful life of both battery chemistries can range from 3000 to 5000 cycles; therefore, if a user needs a battery with long cycle life. LFP batteries are the better choice as they can provide full power for more than three years before they start to degrade.

LFP Vs NMC: Service life

When it comes to service life, Lithium Iron Phosphate (LFP) batteries have a clear advantage over Nickel-Metal Hydride (NMC) batteries. LFP batteries often come with a six-year warranty; their expected lifetime is at least 3000 cycles(possibly more than ten years of use). On the other hand, NMC batteries usually only last for around 800 cycles and must be replaced every two to three years. LFP batteries offer a much longer service life than NMC batteries.

LFP Performance

LFP Vs NMC: Performance

Regarding performance, LFP batteries are superior to NMC batteries for several reasons, including their higher energy density. This higher energy density means better acceleration performance and improved energy storage. However, one potential downside of LFPs is their lower charging performance at shallow temperatures. NMC batteries tend to be cheaper than LFP ones due to their economies of scale and their use of lithium, manganese, and cobalt oxide as the cathode material. Ultimately, the choice between an LFP and an NMC battery will depend on the specific needs and requirements of the user.

LFP Vs NMC: Value

When it comes to value, the choice between a Lithium Ferro Phosphate (LFP) battery and a Nickel Metal Hydride (NMC) battery depends on your needs. LFP batteries are typically more expensive than NMC batteries. Still, they offer some advantages that make them worth the extra cost. 

The main advantage of an LFP battery is its superior longevity. It can last up to twice as long as an NMC battery, making it an excellent choice for applications that need reliable power over a long period. LFP batteries have better temperature tolerance than NMC batteries, so they are better suited for extreme climates. 

On the other hand, if you’re looking for a more economical option, an NMC battery may be the right choice for you. They are cheaper than LFP batteries and still perform well in most applications. Ultimately, the best value depends on your specific needs and budget.

Which battery wins

When it comes to Lithium-ion batteries, there is no clear winner between Lithium-iron-phosphate (LFP) and Nickel-manganese-cobalt (NMC). Each battery has its advantages and best-suited scenarios. LFP batteries are known for their superior safety features, higher energy density, no thermal runaway, and low self-discharge. Meanwhile, NMC batteries offer a slightly lower cost due to economies of scale and require less space. Ultimately, the choice of battery will depend on the application and the consumer’s specific needs.

LFP Vs NMC: How to choose to right one for you?

When deciding between an LFP and NMC battery, it is essential to consider its intended use. Suppose you need a battery for a long-term application such as solar energy storage. In that case, an LFP battery is likely the best choice due to its longevity and durability. On the other hand, if you need a battery for a short-term application such as powering an RV or boat. Then an NMC battery may be more suitable due to its higher power output and faster charging capabilities. 

In addition to considering your intended application, you should also consider factors such as cost and safety. LFP batteries are typically more expensive than NMC batteries. Still, they offer better safety features and can last up to 10 times longer than NMC batteries. On the other hand, NMC batteries are generally cheaper but require more frequent maintenance and have less reliable safety features. 

Choosing between an LFP and NMC battery depends on your individual needs and budget.

Global Lithium Ion Battery Market

Conclusion:

In conclusion, the Lithium Iron Phosphate (LFP) battery and the Nickel Manganese Cobalt (NMC) battery have advantages and disadvantages. The NMC battery is the best choice if you are pursuing high performance. Still, if you’re looking for longevity and safety, LFP batteries are your better choice. 

When selecting between these batteries, it is essential to weigh various factors, including safety, performance, cost, and capacity. Both types of batteries can be suitable for multiple applications, depending on which features are essential for your specific needs.

Advantages and disadvantages of lifepo4 battery

Advantages and disadvantages of lifepo4 battery

In this article, we will look at the advantages and disadvantages of using LiFePO4 batteries and how they compare to other lithium-ion battery technology.

Advantages and disadvantages of lifepo4 battery

What are the lifepo4 battery advantages and disadvantages?

Lithium Iron Phosphate (LiFePO4) batteries offer many advantages over other types of batteries. First, they have a much longer life span than most other types of batteries. They also have a high energy density and lighter weight, making them easier to transport and use in portable applications. The main disadvantage of LiFePO4 batteries is their cost.

Let’s analyze it in detail:

Advantages of LiFePO4 Battery

Longer lifespan compared to lead-acid batteries

One of the main advantages of lithium iron phosphate batteries is the longer cycle life compared to lead-acid batteries. LiFePO4 batteries have a cycle life of 1,000 to 3,000 cycles, while similarly sized lead-acid batteries range from 250-750 cycles. This means LiFePO4 batteries can be used more frequently and for more extended periods without needing to be replaced. 

Additionally, LiFePO4 batteries deliver a constant power output throughout the discharge cycle. In contrast, lead-acid batteries tend to provide less power over time. This makes LiFePO4 batteries a more reliable option for powering devices that require continuous power delivery.

Higher energy density, making them ideal for space-limited applications

LiFePO4 (lithium iron phosphate) batteries have a higher energy density than other battery types, making them ideal for space-limited applications. The high energy density of LiFePO4 batteries means they can store much more energy in a small space compared to other battery technologies. 

This makes them perfect for electric vehicles, where efficient storage and lightweight components are essential. In addition, LiFePO4 batteries offer excellent performance in extreme temperatures and can handle many charge cycles before needing to be replaced. This makes them great for use in solar applications or areas with frequent power outages, as they often don’t need to be replaced.

Improved performance in cold temperatures

At 0°C, a lead-acid battery would deliver only 20-30% of its rated capacity, while a LiFePO4 battery can still output up to 70%. The chemical reactions inside LiFePO4 batteries are much less affected by cold temperatures than lead-acid batteries. Cold temperatures slow down the chemical reactions inside batteries, hampering their performance and reducing their discharge rate. These batteries can still deliver power even when the temperature drops to 0°C. 

This means that the battery can use some energy to power an external or internal heater, making them ideal for use in colder climates. On the other hand, LiFePO4 batteries also perform better in hot environments, as the increased chemical reactions can result in overperforming.

More excellent safety due to lack of toxic materials

LiFePO4 batteries have excellent safety due to the lack of toxic materials over other battery systems. These are thermally and chemically stable, making them safer than lead-acid batteries. They are incombustible and can withstand high temperatures, resulting in improved discharge and charge characteristics. LiFePO4 batteries also have a higher energy density than lead-acid batteries, allowing them to store more energy per unit of material.

They are better for the environment as they can be recycled.

LiFePO4 batteries are also more cost-efficient than other lithium-ion batteries, making them the preferred choice for portable electronics. Moreover, they are recyclable, helping to reduce the metals in landfill and incinerator facilities.

Disadvantages of LiFePO4 Battery

Higher initial cost

One of the main disadvantages of LiFePO4 batteries is their higher initial cost when compared with traditional lead-acid cells. The price difference between LiFePO4 and lead-acid can be significant; depending on the application, it could add up to several hundred dollars extra for a single battery pack. This additional expense can be challenging to justify in applications with tight budgets or when buying multiple batteries simultaneously. Moreover, installation services can further increase total costs considerably if required.

A limited number of charge cycles before degradation

LiFePO4 batteries have several advantages, including a long cycle life of up to 4000 charge-discharge cycles and excellent chemical stability. However, they have their drawbacks. LiFePO4 batteries can experience degradation if exposed to extreme environmental conditions, such as high temperatures or low charge states. This can reduce their lifespan, limiting the number of charge cycles before degradation or even failure.

Requires a battery management system

LiFePO4 batteries require a battery management system (BMS). This system is designed to monitor and control the cells to ensure their longevity and safety and provide a way for them to be recharged. The installation of a BMS is expensive, and it also requires significant expertise to install correctly. In addition, many systems require that the cells be monitored regularly to maintain optimal performance. Without regular maintenance, premature aging and reduced performance can occur, leading to shorter lifespans for the battery cells.

Less available in the market

Lithium Iron Phosphate (LiFePO4) batteries are less available in the market than other lithium-ion batteries. One main disadvantage is that they have a lower energy density than other lithium-ion batteries, making them unsuitable for wearable devices like watches. Additionally, LiFePO4 cells are hefty and much less energy dense than other li-ion cells, meaning that battery manufacturers may opt for cheaper alternatives.

In conclusion

The lithium iron phosphate (LiFePO4) battery has some advantages, such as a long lifespan, high energy density, improved safety, and good for the environment. However, some drawbacks are associated with this type of battery, including its high initial cost, the limited number of charge cycles before degradation, the requirement for a battery management system, and less availability in the market. Ultimately, it is up to the individual to decide what type of battery best meets their needs and fits their budget.

When deciding whether LiFePO4 batteries are the right choice, it is essential to consider specific needs and budgets. The voltage, cost, safety, and compatibility should all be considered. For example, if someone is looking for a battery for a small home solar system, then LiFePO4 batteries may be the right choice. They are often less expensive and can provide the necessary power requirements. NiMH or Li-ion batteries may be a better option if a higher voltage is needed.

Can LiFePO4 batteries be connected in parallel

Can LiFePO4 batteries be connected in parallel?

The use of LiFePO4 batteries for power storage has become increasingly popular in the last few years due to their high energy density, low cost, and long lifespan. Connecting multiple LiFePO4 batteries in parallel can be a great way to increase the total storage capacity of your system. But before you do so, it is essential to understand how exactly to connect these batteries safely and effectively.

Can LiFePO4 batteries be connected in parallel

Can LiFePO4 batteries be connected in parallel?

Yes, LiFePO4 batteries can be connected in parallel. This is an ideal connection for those who need additional storage capacity or higher voltage from the same battery pack. It is also a great way to extend the life of your battery by adding more cells and balancing their charge with each use.

Parallel connections involve connecting multiple cells of like-voltage to increase the amperage output and total energy capacity. When making such a connection, the key is ensuring that all cells have similar discharge rates. Otherwise, unequal current will flow between them, causing issues such as overcharging or undercharging specific cells leading to reduced service life and possible fire risk.

How can LiFePO4 batteries be connected in parallel?

LiFePO4 batteries, or Lithium Iron Phosphate, can be connected in parallel to increase the capacity of a single battery. This connection is beneficial if you need higher current and voltage output and longer run times. Connecting these batteries in parallel is a simple process that involves combining the positive terminal of one battery with the positive terminal of another and likewise with the negative terminals. This connection can be made using connectors or direct soldering on each cell’s tabs.

Advantages and disadvantages of connecting LiFePO4 batteries in parallel

Benefits of Connecting LiFePO4 Batteries in Parallel: 

1. Increased Current Output: Connecting LiFePO4 batteries in parallel increases the current output by adding up the total ampere-hour capacity of all the connected batteries. This will result in more power being available for electric vehicles, portable devices, and other applications that require a large amount of current to run efficiently.

2. Increased Voltage Stability: Parallel connections increase voltage stability as each battery works together, reducing fluctuations from individual cells. This ensures stable operation even if one or more batteries are damaged or go wrong due to overcharging, short-circuiting, etc.

3. Lower Cost: Connecting multiple batteries can be much cheaper than buying an expensive high-capacity single battery unit as the cost will be distributed across all of them instead of just one team.

Disadvantages of Connecting LiFePO4 Batteries in Parallel: 
1. Higher Risk Of Overcharging: When connecting multiple batteries in parallel, there is an increased risk that they could be overcharged if not monitored closely, as too much current flowing through one cell may cause it to reach dangerously high levels, which lead to degradation or damage.
2. More Complicated Wiring: Complex wiring is required when connecting multiple batteries increases the time it takes to set up and maintain them correctly, resulting in higher labor costs than a single battery system with fewer wires.
3. Balance Issues Between Cells: As each cell within a battery pack has its charging characteristics, parallel connection causes unequal charge distribution between all cells if not appropriately balanced, leading to reduced performance and potential safety risks due to overheating and fire hazards caused by uneven charging levels within cells.

Connecting LiFePO4 batteries in parallel has advantages, including increased capacity and faster charge times. Still, it comes with potential risks, such as imbalanced charging due to a lack of monitoring circuits or active balance systems, which will lead to reduced performance and potential safety risks due to overheating or fire hazards caused by uneven charging levels within cells.

Safety considerations when connecting LiFePO4 batteries in parallel

Importance of matching the batteries in terms of capacity, voltage, and age

Connecting LiFePO4 (Lithium Iron Phosphate) batteries in parallel is a common way to increase capacity and provide extra power for electrical systems. However, due to the chemical properties of these powerful batteries, it’s essential to be aware of specific safety considerations when connecting them in parallel. The most crucial consideration is matching the batteries in capacity, voltage, and age.

Matching Capacity

When connecting LiFePO4 batteries in parallel, it’s essential to ensure that all batteries have roughly the same energy storage capacity to operate safely and efficiently. Suppose one battery has a significantly greater degree than the other. In that case, it will end up doing most of the work while the others will remain idle, leading to unbalanced charge distribution. This could lead to a dangerous situation where one battery ends up discharging too quickly or becomes over-charged due to an imbalance in current flow between them.

Matching Voltage

The voltages on each battery should also be equal so that they don’t draw more current from any one battery than another. Suppose a significant difference exists between two connected LiFepo4 cells’ voltage levels. In that case, this can cause an uneven charging or discharging cycle, which can put undue strain on the system and potentially cause damage or even fire-hazard conditions. Additionally, suppose two different LiFePo4 cells with varying voltage levels are connected. In that case, this can create an overcurrent situation and put additional stress on the components throughout your system.

Matching Age 

Finally, you should also ensure that all of your LiFepO4 cells are roughly the same age before connecting them in parallel. Batteries degrade over time due to usage cycles, so if two cells have been used extensively compared to other newer ones already part of your system setup, then they may not be able to keep up with demands placed upon them by their counterparts – leading again to potential danger situations caused by imbalances or even short-circuiting scenarios occurring due to incompatible cell chemistry.

Potential hazards and how to avoid them

When connecting LiFePO4 batteries in parallel, several safety considerations should be considered. LiFePO4 (Lithium Iron Phosphate)  batteries are commonly used in electric vehicles, power tools, and battery storage systems due to their high energy density, low cost, and long life. However, if these batteries are misconnected or without the appropriate safety measures, they can pose a significant risk of fire and explosion.

Potential hazards include sparks from reverse polarity connections and internal cell heating caused by mismatched cells with different voltages. In addition, when LiFePO4 batteries are connected in parallel, there is an increased risk of overcharging or short-circuiting due to the higher currents that flow through the system.

To ensure the safe operation of your LiFePO4 battery system, it is essential to take certain precautions:

1. Ensure that all batteries have similar capacities and voltages before connecting them in parallel. This will reduce the risks associated with mismatched cells, including current imbalances and heat buildup.

2. Make sure that all cables used for connection are appropriately rated for the type of application being undertaken so that they do not become overloaded or cause sparks due to excessive voltage drop.

3. Use high-quality connectors that offer good conductivity and prevent accidental disconnects. This will help avoid sudden drops in voltage which can damage the battery pack or cause undesired outcomes such as sparking and fire/explosion hazards.

4. Always double-check current ratings before connecting multiple battery packs since this may cause a rise in voltage above recommended levels leading to potential overloads and damage to other components of your system if left unchecked.

5. Finally, always ensure you install an appropriate fuse at each junction point between LiFePO4 batteries connected in parallel to protect against short circuits or other unintended electrical issues that could lead to severe injury or death if left unchecked.

By following these simple guidelines, it is possible to minimize any potential risks associated with running LiFePO4 batteries in parallel while still enjoying their benefits, such as improved capacity, cost savings, and longer life span compared with traditional lead acid battery solutions.

In conclusion

It is possible to connect LiFePO4 batteries in parallel. It is an efficient way to increase energy storage capacity and provide a backup in the event of an individual battery failure. But it is important to note that since LiFePO4 batteries are not identical, a balancing circuit must be installed to work correctly. Furthermore, when connecting the batteries, precautions should be taken to prevent any short circuits or other safety hazards.

Checking LiFePO4 Battery of the car

LiFePO4 Battery Care Guide: How to Look After Your Lithium Batteries

Proper care and maintenance of a LiFePO4 battery are essential to ensure it works safely and efficiently. This guide will provide helpful tips on looking after your lithium batteries so that you can get the most out of your investment. From charging techniques, storage methods, and general advice, this article will provide all the information you need to keep your LiFePO4 battery in good working order.

Checking LiFePO4 Battery of the car

How long does a lifepo4 battery last?

Lithium Iron Phosphate (LiFePO4) batteries are known for their long lifespans. Depending on the type of battery, you can expect to get anywhere from 3-10 years of life out of a LiFePO4 battery. The exact lifespan will depend on the quality and size of the battery, as well as how it is used and maintained. For example, use your battery in an application that requires frequent deep discharges or high temperatures. Your battery’s lifespan will be shorter than used in a less demanding application. To maximize the lifespan of your LiFePO4 battery, make sure to charge and discharge it properly and store it at room temperature when not in use.

Proper storing the LiFePO4 battery

Properly storing your LiFePO4 battery is essential for ensuring it works to its best and lasts a long time. When stored correctly, your LiFePO4 battery will maintain its charge capacity and provide reliable power whenever needed. With that in mind, here are some helpful tips for taking care of your LiFePO4 battery and keeping it in good shape.

Temperature guidelines

Store your LiFePO4 battery at room temperature or slightly below. Keeping the temperature too high can cause damage to the cells over time, so avoid storing your battery in direct sunlight or near heat sources like radiators.

How to store LiFePO4 batteries for the long term?

When storing your LiFePO4 battery for a prolonged period, keep the charge at 40-50%. This reduces cell stress and prevents overcharging or discharging too deeply when not in use. Ensure all connection points are free from oxidation or corrosion, which can lead to voltage drops when charging or discharging.

Additionally, store your battery in a cool, dry place. High temperatures can cause damage to the cells and lead to a shorter lifespan. Finally, check your battery every few months to ensure it’s still in good condition. If you notice any signs of corrosion or damage, replace them immediately.

Tips for storing LiFePO4 batteries in vehicles

1. Avoid Extreme Temperatures: It’s essential to protect LiFePO4 batteries from extreme temperatures, especially during storage. This includes high and low temperatures, as both extremes can damage the battery chemistry. Try to store the battery at a temperature between 10°C (50°F) and 40°C (104°F).

2. Monitor Battery Voltage: Before storing the battery, it’s essential to monitor its voltage and ensure it’s not too low or too high. If the voltage is outside of its specified range, this could indicate that something isn’t quite right with the battery and will require further investigation.

3. Fully Charge the Battery: To ensure that your LiFePO4 battery is ready for storage, you should ensure it is fully charged before placing it into storage. This helps to ensure that the battery maintains good performance levels when you return to use it again after some time in storage.

4. Keep Away from Liquid: Do not store LiFePO4 batteries near liquid sources such as water or oil. This could cause damage to both the electronics inside the battery and its overall safety performance if exposed to these types of liquids over an extended period in storage.

5. Monitor Storage Temperature Regularly: Even though you may have done your best to protect your LiFePO4 batteries from extreme temperatures while they are stored away, it is still important to regularly monitor their temperature with a thermometer or digital temperature loggers if possible so that you can be aware if anything changes while they are in storage and take action accordingly if necessary.

Charging your LiFePO4 batteries correctly

Like all rechargeable batteries, proper care and maintenance must be taken to ensure maximum performance of LiFePO4 battery. This section will provide helpful tips on how to charge and maintain a LiFePO4 battery for optimal performance properly.

How to properly charge LiFePO4 batteries?

Charging LiFePO4 batteries is relatively simple, but it’s essential to do so correctly to ensure the battery is not damaged. The first step is to identify the correct battery charger for your specific battery. Once you’ve selected the proper charger, connect it to the battery and plug it into a wall outlet. Ensure all connections are secure and no bare wires are exposed.

Once connected, set the charger voltage to match your battery’s. Most LiFePO4 batteries will have a charge voltage of 3.6V-3.65V per cell or 14.4V-14.6V for a 12V system. You should also check the manufacturer’s instructions for any other settings required for optimal charging performance.

Finally, monitor the charging process and make sure it stops once total capacity has been reached (usually indicated by a light on the charger).

How to avoid overcharging LiFePO4 batteries?

1. Use an Appropriate Charger – Make sure you use only chargers explicitly designed for LiFePO4 batteries. These chargers have a voltage cutoff feature that will stop charging the battery once it reaches its maximum capacity. If you use any other type of charger, you run the risk of overcharging it and damaging it permanently.

2. Monitor Battery Voltage – Most LiFePO4 batteries come with an onboard voltage monitor, making it easy to track how much charge is left in the battery. By regularly checking this monitor, you’ll be able to tell if your battery is getting close to being fully charged and thus needing to end its charging cycle – allowing you to prevent any potential damage caused by overcharging it.

3. Unplug When Not In Use – You should always unplug your charger from the wall socket and your LiFePO4 battery when not in use; this prevents any chance of overcharging due to a faulty connection or circuit breaker issue.

4. Check Temperature Regularly–The temperature of the cells in your LiFePO4 battery will increase while they are being charged, which is normal; however, excessive heat can cause severe damage, so it’s essential to check temperatures regularly and reduce or stop charging if any cells become too hot (over 50°C).

5. Set Timer Reminders – Setting up timer reminders on your phone or computer can help remind you when it’s time to check on your charging status and cut off power if necessary; this way, even if you forget about monitoring your battery’s charge levels, there will still be some protection against unwanted overcharging.

Discharging LiFePO4 batteries properly

How to properly discharge LiFePO4 batteries?

Discharging LiFePO4 batteries properly is essential for their health and longevity. Here are some tips to help you get the most out of your LiFePO4 battery:

1. Always charge the battery to its total capacity before discharging it. This will ensure that it has enough energy to power whatever device you use.

2. Monitor the battery’s voltage while discharging it, and make sure not to exceed its maximum discharge rate. If you do, you risk damaging the battery and reducing its lifespan.

3. When finished with your device, always recharge your LiFePO4 battery as soon as possible – this will help prevent over-discharge, which can lead to irreversible damage. Following these steps will help ensure that your LiFePO4 battery continues to work well for a long time!

How to avoid deep discharging LiFePO4 batteries?

To avoid deep discharging LiFePO4 batteries, the most important thing is to keep an eye on their voltage. LiFePO4 batteries should never be discharged below 2.5V/cell. If you find that the voltage of your battery is getting close to this level, it’s time to recharge it.

Another way to avoid deep discharging your LiFePO4 battery is to use a Battery Management System (BMS). A BMS monitors the voltage of your battery and will cut off power when it gets too low, preventing any further discharge. This can help extend the life of your battery and ensure that it isn’t damaged by deep discharge.

Finally, avoid leaving your LiFePO4 battery in a discharged state for too long. If you know you won’t use your battery for an extended period, charge it before storing it away.

Maintenance

How to check the state of charge of LiFePO4 batteries?

The first step is to measure the voltage of the battery. This can be done with a multimeter, which should read between 3.2 and 3.6 volts per cell when fully charged. If the voltage is lower than this, it indicates that the battery has been discharged and needs to be recharged.

Another way to check the state of charge is to measure the current going in and out of the battery using an ammeter. If there is more current going into the battery than coming out, it means it’s being charged, and its state of charge is increasing. Conversely, if there is more current coming out than going in, it’s being discharged, and its state of charge is decreasing.

How to balance the cells of LiFePO4 batteries?

The most common way to balance LiFePO4 batteries is using a battery balancer. This device monitors the voltage of each cell within the battery. It will automatically discharge any cell with a higher voltage than the others to bring them back into balance. It’s important to note that these devices must be used cautiously as they can cause damage if misused.

Another way to balance LiFePO4 batteries is through manual balancing. This method manually monitors each cell’s voltage and then discharges any cells with higher voltages until they match the others. While this method takes more time, it does not require specialized equipment and can be done without risking damage to the battery.

How to clean and maintain LiFePO4 batteries?

It is essential to take proper care of LiFePO4 batteries to ensure their longevity and performance. Before cleaning any LiFePO4 battery, disconnect the main positive and negative wires. Wear insulating gloves while cleaning, and never overcharge or discharge the cell. To store the battery, keep it at a state of charge between 40-60% and store it indoors during the off-season.

To clean the battery terminals, use a damp cloth or soft brush to remove any dirt and debris. Avoid charging the battery at currents higher than 0.5C, as this can cause overheating and negatively affect the battery’s performance. Lastly, unlike lead acid batteries, lithium batteries do not need a float charge while in storage, so keep the battery at no more than 100% charge.

In conclusion

Taking care of your LiFePO4 battery is essential for preserving its performance and lifespan. Following the tips outlined in this guide, you can keep your lithium batteries running smoothly and reliably. Regular maintenance and inspections are essential, as is avoiding extreme temperatures, overcharging, or discharging them too low. With regular care, your lithium batteries can provide years of reliable power. So take the time to look after them properly – it’s worth it!