Let me guess:
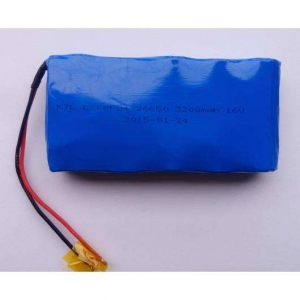
You’ve decided to build your own battery pack using 18650 cells, and now you’re staring at a pile of batteries wondering, “How the heck do I connect these things?”
I’ve been there.
Spot welding 18650 batteries is hands down the most reliable method for creating custom battery packs. Unlike soldering (which can damage cells from excessive heat), spot welding creates strong connections without overheating your batteries.
But here’s the thing: while spot welding isn’t rocket science, there’s a right way and a wrong way to do it.
In this comprehensive guide, as a professional 18650 battery packs manufacturer, I’m going to walk you through everything you need to know about spot welding 18650 batteries like a pro. By the end, you’ll have the confidence to create professional-grade battery packs for your DIY projects.
Let’s dive in.
What You’ll Need for Spot Welding 18650 Batteries
Before we get into the actual welding process, let’s make sure you have all the necessary equipment:
- A Spot Welder: There are several options on the market, from budget-friendly kwelder units to more professional setups. For most DIYers, a mid-range spot welder with adjustable power settings will do the trick.
- Nickel Strip: Usually 0.15mm or 0.2mm thick. Pure nickel is preferred over nickel-plated steel for better conductivity.
- 18650 Battery Cells: Make sure they’re from reputable manufacturers.
- Battery Holder/Jig: This keeps the cells perfectly aligned during welding.
- Safety Equipment:
- Safety glasses
- Heat-resistant gloves
- Fire extinguisher (just in case)
- Non-conductive work surface
- Measurement Tools:
- Digital multimeter
- 800-grit sandpaper
- 91% isopropyl alcohol
- Microfiber cloth
Got everything? Great! Now let’s talk about why proper preparation is crucial for successful battery welding.
Preparation: The Make-or-Break Step
I can’t stress this enough:
Good preparation is 80% of successful spot welding.
Here’s what to do before you even turn on your welder:
1. Clean the Battery Terminals
Battery terminals often have a thin layer of oxidation that can interfere with welding quality.
To clean them:
- Lightly sand both the positive and negative terminals with 800-grit sandpaper
- Wipe them with 91% isopropyl alcohol using a microfiber cloth
- Allow them to dry completely
This creates a pristine surface for optimal electrical contact.
2. Check Battery Voltages
This step is crucial for building balanced battery packs:
- Measure each cell’s voltage with your multimeter
- Group cells with voltages within 0.1V of each other
- Ensure all cells are between 2.5V and 4.2V
Using cells with mismatched voltages is asking for trouble down the line.
3. Set Up Your Workspace
Your welding station should be:
- Well-ventilated
- Dry and clean
- Free of flammable materials
- Equipped with a non-conductive work surface
- Organized with tools within easy reach
Remember: you’re working with energy storage devices. Safety first!
Battery Configuration Basics
Before welding, you need to decide how to arrange your cells. There are two basic configurations:
Series Connection
- Connects positive terminal to negative terminal
- Adds voltage (4 cells in series = 14.4V-16.8V)
- Capacity stays the same as a single cell
Parallel Connection
- Connects positive terminals together and negative terminals together
- Voltage stays the same as a single cell
- Adds capacity (4 cells in parallel = 4x the capacity)
Most practical battery packs use a combination of series and parallel connections (like 4S2P = 4 series × 2 parallel).
Now that you’ve chosen your configuration, let’s get to the actual welding!
The Step-by-Step Spot Welding Process
Here’s where the rubber meets the road. Follow these steps carefully for perfect welds every time:
1. Configure Your Spot Welder
Different welders have different settings, but generally:
- For 0.15mm nickel strips, start with medium power
- For thicker strips (0.2mm+), use higher power settings
- Start with a conservative setting and make test welds first
Pro tip: Always test your settings on scrap nickel strips placed on an old battery to dial in the perfect power level.
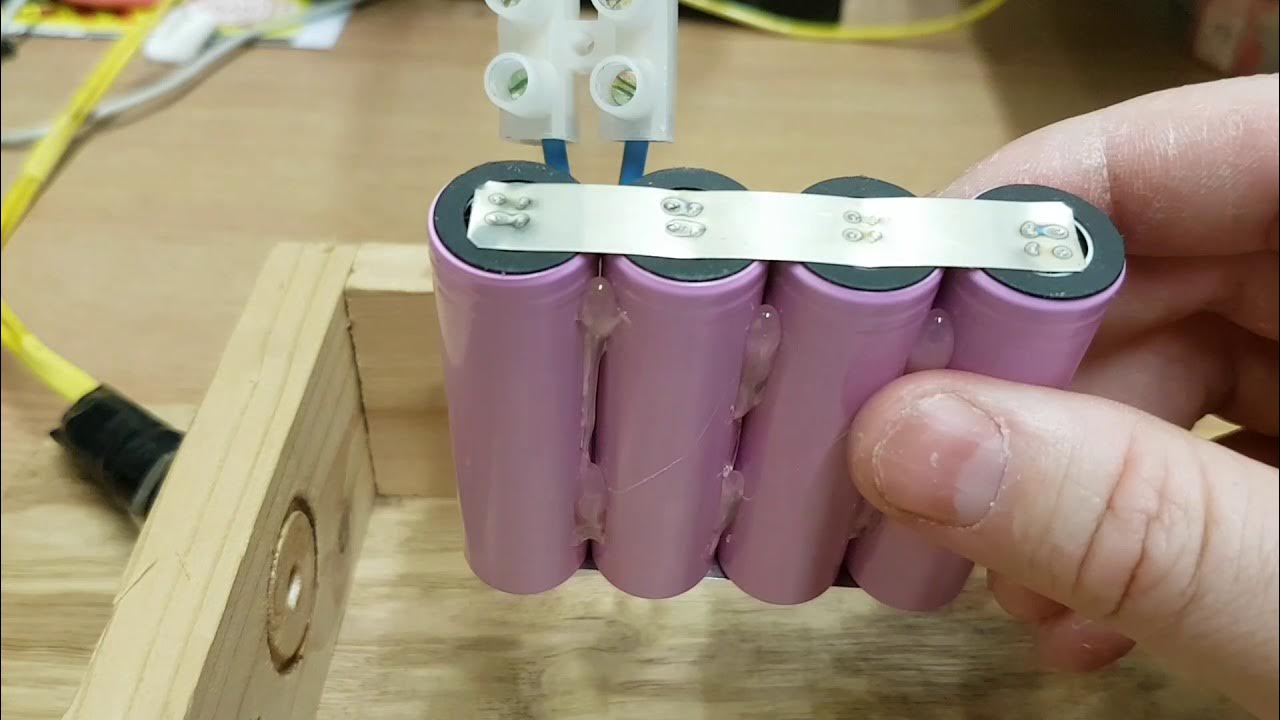
2. Position Your Components
Proper positioning is critical:
- Secure your 18650 cells in the battery holder
- Lay nickel strips across the terminals, ensuring full contact
- For parallel connections, make sure strips make solid contact with each terminal
3. Execute the Weld
Here’s the actual welding technique:
- Position the welder’s electrodes directly over where the strip meets the battery terminal
- Apply firm but gentle pressure (too much can damage the cell)
- Trigger the pulse
- Make 2-4 welds per connection for redundancy and strength
4. Inspect Each Weld
A good weld will:
- Show a uniform dimple pattern
- Have no burning or discoloration
- Hold firm when gently tugged
- Show low resistance when tested with a multimeter (under 1 mΩ)
If any weld looks suspicious, remove it carefully and redo it.
Common Battery Welding Patterns and Best Practices
The way you arrange your nickel strips can affect the performance and reliability of your battery pack. Here are some common patterns and why they matter:
The Grid Pattern
This uses intersecting strips to create a robust network that can handle higher current. Great for high-drain applications.
The Fish Scale Pattern
Overlapping strips like fish scales provides excellent current distribution while saving on nickel.
The Reinforced Edge Pattern
Adding extra strips around the perimeter creates stronger mechanical connections.
No matter which pattern you choose, remember these crucial battery welding best practices:
- Keep strips short: Long strips create unnecessary resistance.
- Double up when necessary: For high-current applications, use two layers of nickel strip.
- Mind the balance leads: If you’re adding a BMS (Battery Management System), plan your balance lead connections carefully.
- Avoid crossing positive and negative: This seems obvious, but it’s a common mistake that can lead to catastrophic shorts.
Troubleshooting Common Spot Welding Issues
Even experienced battery builders run into problems sometimes. Here’s how to handle the most common issues:
Weak or Failed Welds
- Cause: Power setting too low, dirty terminals, poor contact
- Solution: Increase power, clean terminals thoroughly, ensure firm contact
Burning Through Nickel Strips
- Cause: Power setting too high, electrodes worn out
- Solution: Decrease power, replace or clean electrodes
Battery Gets Hot During Welding
- Cause: Too many welds in quick succession, power too high
- Solution: Let battery cool between welds, reduce power, increase electrode size
Spot Welder Not Firing Consistently
- Cause: Insufficient power supply, worn contacts
- Solution: Use a more powerful battery/power supply for your welder, clean contacts
Beyond Basic Spot Welding: Advanced Techniques
Once you’ve mastered the basics, consider these advanced techniques for your battery building projects:
Cell Fusing
Adding fusible links between cells can prevent catastrophic failures if one cell shorts.
Pre-tinned Nickel
Some builders pre-tin their nickel strips with solder for added strength (though this is controversial).
Custom Bus Bars
For very high current applications, custom copper bus bars can replace nickel strips.
Specialized Configurations
Z-configurations and other advanced layouts can optimize for specific use cases like electric vehicles or high-discharge applications.
Safety Considerations for DIY Battery Building
I can’t emphasize this enough: building battery packs involves real safety risks. Always follow these precautions:
- Never short battery terminals, even briefly
- Use insulating materials between cell groups
- Apply fish paper or kapton tape to prevent shorts
- Test your pack with a current-limited power supply before full use
- Install appropriate BMS systems for protection
- Never leave charging batteries unattended
- Keep a class D fire extinguisher nearby
Real-World Applications for Your DIY Battery Packs
Now that you’ve mastered spot welding 18650 batteries, what can you do with your new skills? Here are some popular projects:
- E-bike battery packs: Custom sizes to fit unique frames
- Powerwall systems: Home energy storage solutions
- Portable power stations: Custom capacity for your specific needs
- Electric skateboard/scooter power: High-discharge packs for personal mobility
- Emergency backup power: Tailored to your essential devices
Final Thoughts on Spot Welding 18650 Batteries
Spot welding 18650 batteries is both an art and a science. It takes practice to get it right, but the results are worth it.
Remember:
- Start with quality cells
- Prepare meticulously
- Test your welds
- Build in redundancy
- Never compromise on safety
With the techniques I’ve shared in this guide, you’re now equipped to create professional-quality battery packs for virtually any application.
The best part? You’ll save money and have the satisfaction of building something custom-tailored to your exact specifications.
If you’re ready to take your DIY projects to the next level, spot welding 18650 batteries is a skill that will open up a whole new world of possibilities.
Have you tried building your own battery packs? Let me know in the comments!